
How Should a Backpack Fit When the Load Rides on Your Hips?
Move the load onto your hips where your legs can carry it.
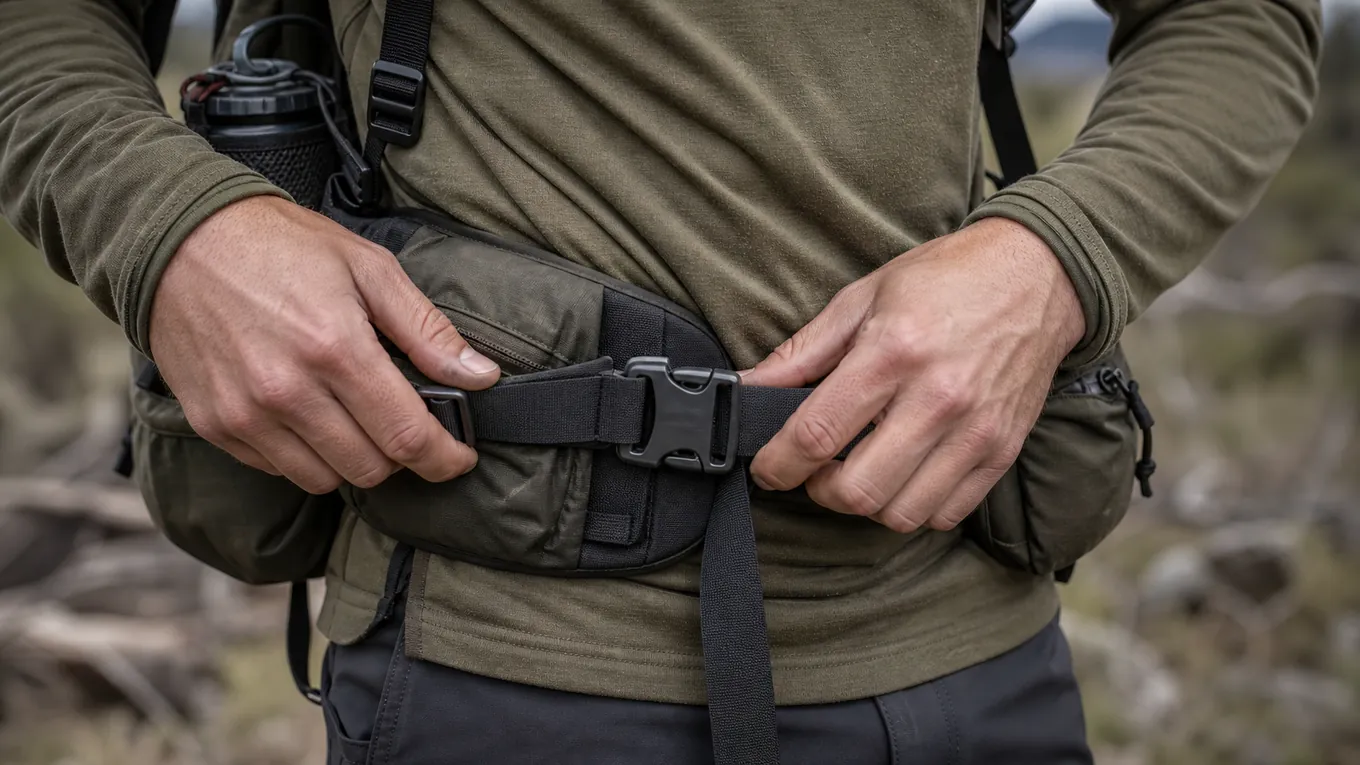
A backpack fits when the frame length, hip belt, shoulder wrap, and load placement work together. The goal is simple: put most weight on your hips and use the shoulder straps to stabilize, not to carry.
Torso length comes before every other adjustment
Fit the torso length first, then the hip belt. Height does not size a backpack well because two people the same height can have different spine lengths.
A pack fits your back and hips, not your total height.
A mirror shows strap position, but only movement reveals belt slip, backward pull, and pressure that builds over time. Use the same test load for every pack you compare so one harness does not get an easier trial.
- First fit check
- Torso length before strap tension
- Main load carrier
- Hip belt over the top of the hip bones
- Shoulder strap job
- Stabilize the pack without carrying most weight
- Loaded test
- 20 to 30 minutes with real trip weight
- Wrong-pack signal
- Pain or numbness after one careful adjustment cycle
Use the pack maker's torso range as a starting point, then test the actual harness. A size chart can get you close, but belt shape, shoulder width, frame curve, and the clothing you wear under the straps decide whether the pack works while walking.
| Torso length | Common pack size | Fit note |
|---|---|---|
| 15 to 17 in | Extra small | Often needs shorter shoulder yoke |
| 17 to 19 in | Small | Common for shorter torsos |
| 19 to 21 in | Medium | Common middle range |
| 21 in and up | Large | Needs enough frame height |
If you are only carrying a light day kit, the fit tolerance is wider. Overnight backpacking loads punish poor fit much faster.
How does pack type change the fit target?
A light daypack can fit well with a simple waist belt and soft back panel because the load is small. A backpacking pack needs a real frame, shaped hip belt, and enough torso adjustment to keep heavier weight off your shoulders.
Do not judge both packs by the same standard.
A 20-liter daypack should feel quiet and easy. A 60-liter pack should still transfer weight after food, water, shelter, and layers are inside.
The heavier the load, the less you can ignore frame length and hip-belt shape.
Capacity also changes how strict the test should be. A small pack may feel fine if it stops bounce and does not rub through a shirt.
A bigger pack has to keep the load close, stay upright on descents, and let you breathe after the hip belt is tight.
| Pack use | Fit priority | What matters most |
|---|---|---|
| Short day hike | Stable carry and no rub | Pocket access, shoulder comfort, light waist belt |
| Long day hike | Better load control | Hip support, water weight close to back |
| Overnight backpacking | Load transfer | Frame length, hip belt wrap, shoulder yoke |
| Multi-day trekking | Repeatable comfort | Adjustability, ventilation, and no pressure points |
How should the hip belt carry the load?
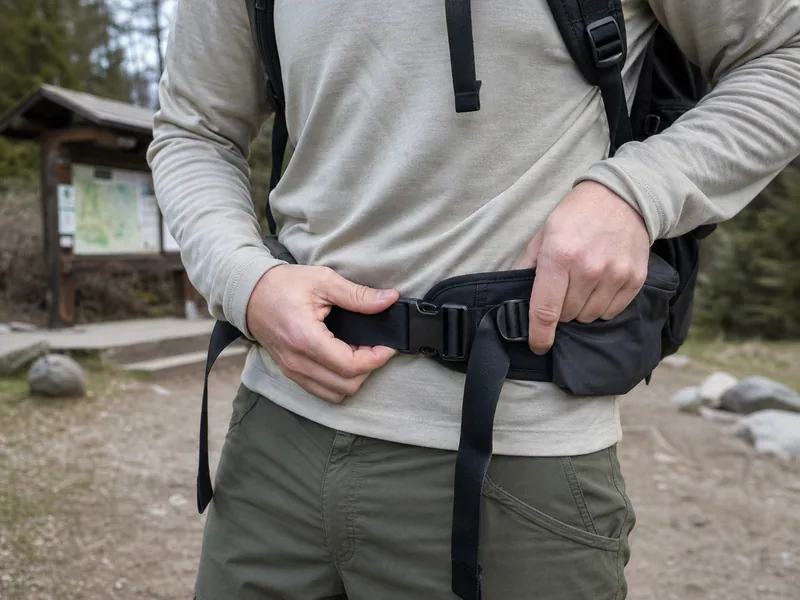
Load the pack with real weight before judging fit. Place the hip belt over the top of your hip bones, tighten it first, and let your legs take the load.
The hip belt should carry the weight before the shoulder straps touch the job.
The belt should feel firm around bone, not squeezed around the soft waist. If it slides down after a few minutes, loosen the shoulder straps, reset the belt slightly higher, and check whether the belt angle matches your hip shape.
Water is often the densest thing in a daypack. A realistic water carry plan helps you test the pack with the weight you will actually bring.
What should shoulder straps and load lifters change?
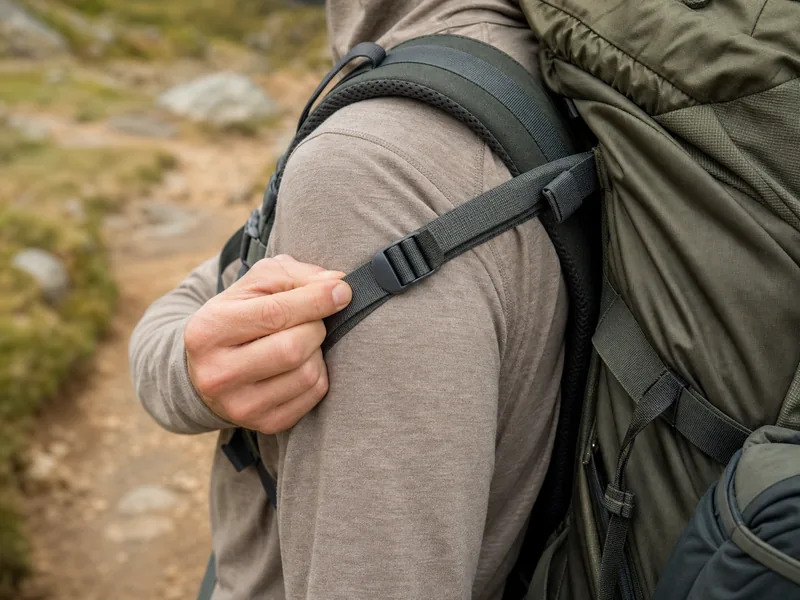
Shoulder straps should wrap close without carrying most of the load. If they dig down, the hip belt is loose, the torso length is wrong, or the load is packed too far back.
Load lifters should angle from the shoulder area back toward the pack. A rough 45-degree angle is a useful starting point, but comfort matters more than a perfect number.
Shoulders stabilize the pack, and hips carry it.
- Hip belt centered on the hip bones, not the soft waist.
- Shoulder straps wrap with no hard gap and no pinch.
- Load lifters pull the pack closer without lifting the hip belt.
- Sternum strap sits a few fingers below the collarbone.
- No strap makes fingers tingle or skin burn after a short walk.
Bad strap setup gets worse when you are tired. Day hike training can test pack comfort before a longer route.
How does load placement affect fit?
Put dense items close to your back and near the middle of the pack. Water, food, stove fuel, and compact gear should not swing low or far behind you.
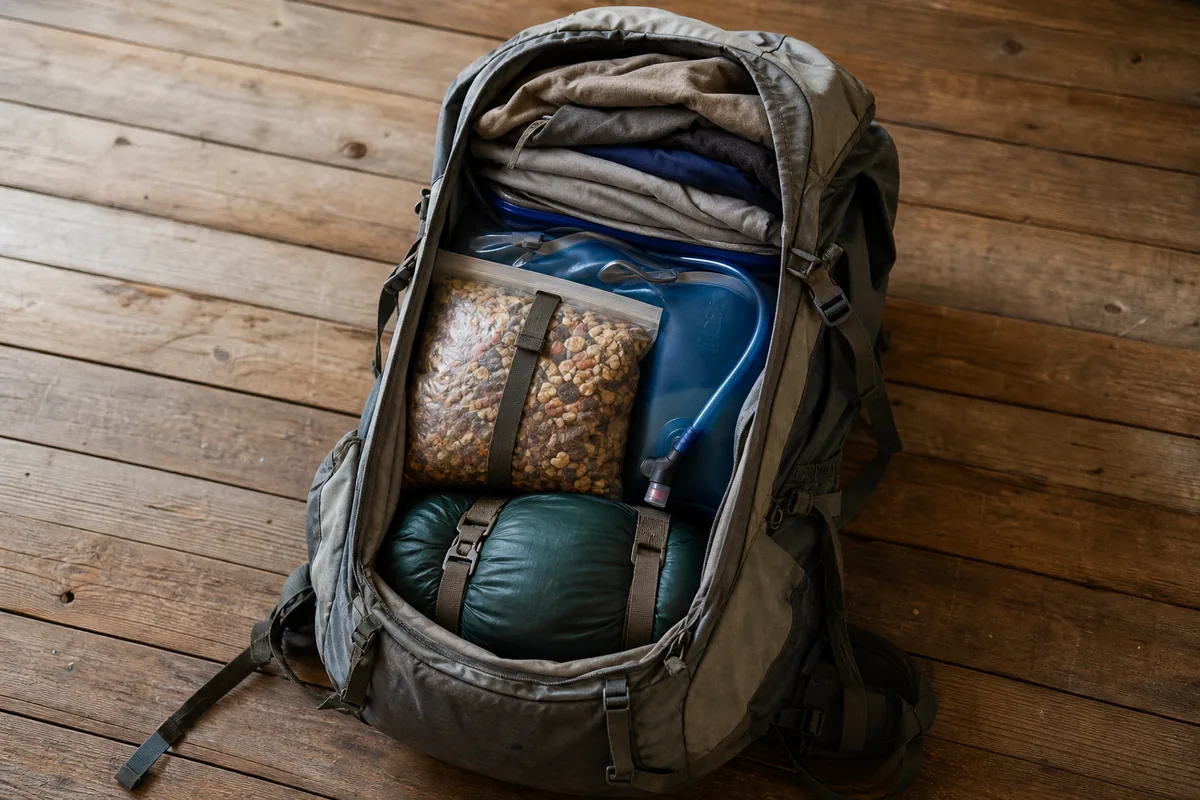
A good fit can still feel bad when the weight is packed in the wrong place.
Close to spine
Dense items ride near the back panel.
Middle zone
Heavy items sit around shoulder-blade to hip height.
Soft outer layer
Puffy clothing fills gaps and stops movement.
Quick access
Rain shell, snacks, and map stay reachable.
No hard corners
Cookware and bottles do not press into your back.
Bottom zone
Bulky light gear fills space without pulling dense weight away from your spine.
A simple hiking daypack may only need water, snacks, layers, first aid, and a headlamp. A multi-day trekking or backpacking load needs more structure.
Some fit problems are straps, others are the wrong pack
Some problems are strap mistakes. Others mean the frame, belt, or shoulder shape does not match your body.
Do not buy a pack that needs pain to prove it fits.
| Problem | Likely cause | Better move |
|---|---|---|
| Shoulders carry the load | Hip belt loose or torso too long | Reset belt, then shorten torso setting |
| Hip belt slides down | Belt shape or size is wrong | Try a different belt or pack |
| Neck rubs | Shoulder yoke too narrow or high | Change size or harness shape |
| Pack pulls backward | Load too far out or lifters loose | Repack dense items close |
| Lower back pressure | Frame curve or load placement mismatch | Try another frame shape |
| Arm numbness or tingling | Shoulder compression or poor torso fit | Loosen, reset the load, and stop if sensation does not return |
A pack marked unisex often means one hip-belt shape. If that belt digs into your hips, try a different belt angle or a women's-specific fit.
The broader gear decision separates fit, capacity, and use case instead of treating every pack problem as a strap problem.
Use pressure location to decide whether to keep adjusting or change packs.
Pain on the top of both shoulders usually means the hips are not carrying enough. A sharp spot on one collarbone often means the shoulder yoke is too narrow, the strap curve is wrong, or the load is pulling to one side.
Numb fingers, burning skin, and a belt that must be painfully tight are stop signs. Those are not normal break-in problems.
They mean the harness is pressing a nerve, blocking circulation, or asking your body to fit the pack instead of the other way around.
How do you fix fit problems in the right order?
Adjust from the bottom up.
Set the hip belt first, snug the shoulder straps second, tune load lifters third, and use the sternum strap last. Changing everything at once hides the real cause.
Walk for a few minutes after each change. A good adjustment should make the pack quieter, reduce pressure, or bring the load closer without cutting circulation.
One strap change should solve one problem. If every strap has to be painful, the pack is wrong.
Keep the test order boring on purpose. If you tighten shoulder straps first, the belt cannot prove whether it can carry weight.
If you crank load lifters before the belt is stable, they may pull the top of the pack close while the bottom still slides.
- Reset the beltCenter it over the hip bones and tighten before touching shoulders.
- Set shoulder wrapRemove gaps without lifting weight off the hips.
- Tune load liftersPull the upper pack closer without raising the belt.
- Set sternum strapStabilize shoulder straps without squeezing the chest.
- Walk and reassessCheck bounce, rub, tingling, and backward pull.
- Repack the loadMove dense items close to the spine before tightening straps harder.
- Test real movementClimb, descend, and reach for gear before accepting the final fit.
A loaded fit test needs more than a lap of the shop
Walk with the loaded pack for at least 20 to 30 minutes before trusting the fit. Stairs, a hill, or uneven ground will reveal bounce and rub faster than a mirror.
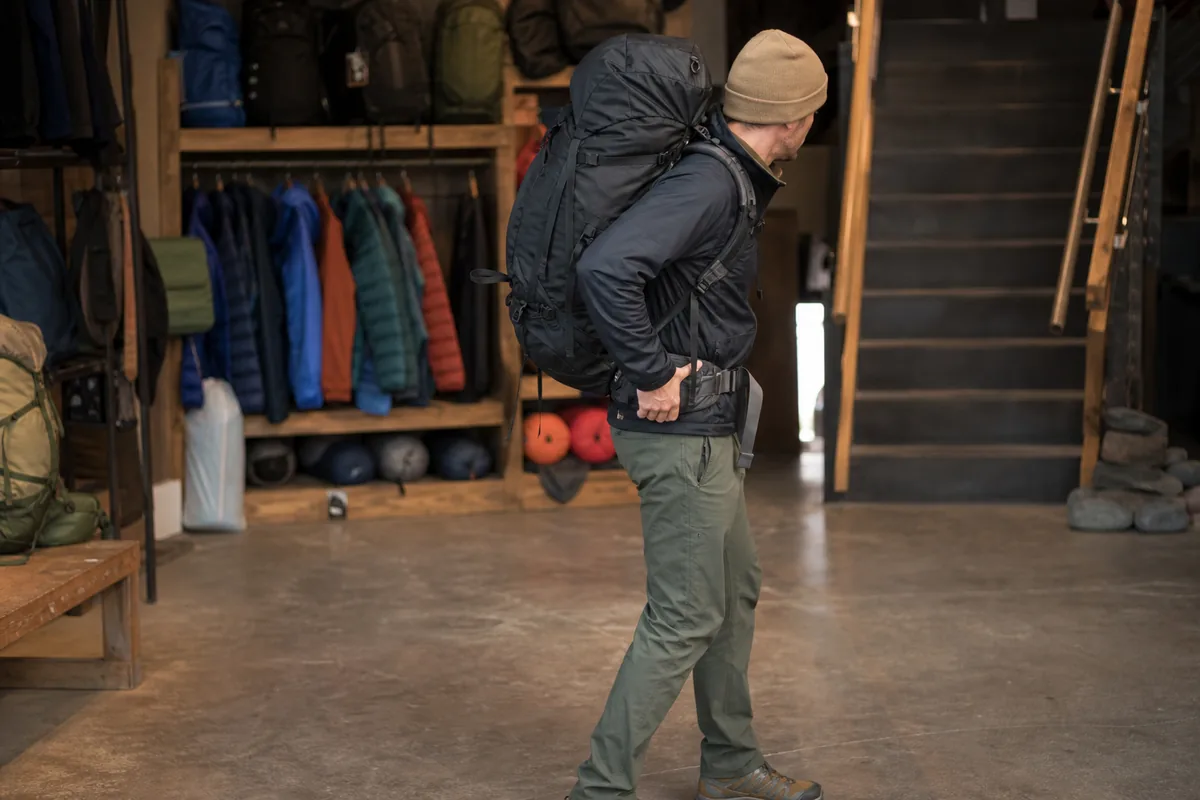
The right pack is the one you stop thinking about while walking.
Test while wearing the shirt, jacket, or layers you normally hike in. A strap that feels fine over a thick fleece can rub through a thin sun shirt.
If possible, have another person look from the side and behind while you walk. They can see belt slip, pack sway, or shoulder gaps that are hard to feel in the first minute.
Comfort after half an hour matters more than comfort in the first thirty seconds.
Field fitting notes
If the pack pinches after a short test, do not assume the trail will fix it. Shorten the load, adjust once, then try a different pack if the same pain returns.
Beginner hiking trips are useful pack tests because the route stays short enough to turn fit notes into fixes before bigger days.
Test uphill and downhill if you can.
Uphill walking shows whether the pack lets you breathe and step high without the belt digging into your stomach. Downhill walking shows whether the load pulls backward, slides on your hips, or drives your toes forward because you are leaning against the pack.
After the test walk, write down exactly where the pack bothered you. A note like left shoulder strap rubbed near the collarbone after 25 minutes is more useful than shoulders hurt.
Those notes tell you what to change next. A belt slip points toward belt size or angle, tingling fingers point toward shoulder or sternum pressure, and backward pull points toward load placement or lifter tension.
Specific fit notes save you from buying another pack with the same problem.
- Note where pressure started.
- Note how long it took to appear.
- Note whether tightening or loosening helped.
- Note whether the problem changed uphill or downhill.
- Note whether repacking dense items changed the feel.
How do you measure torso length without guessing?
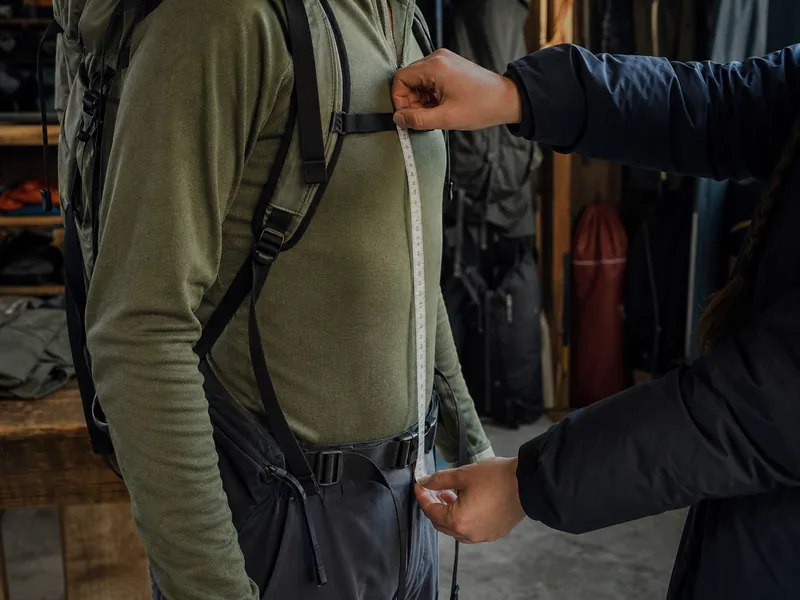
Find the bony bump at the base of your neck, then find the height of the top of your hip bones. The torso measurement runs along the spine between those two levels.
It does not run to the waistline or the bottom of the pelvis.
Ask another person to measure while you stand naturally.
Tilt your head forward to locate the neck point, return to a neutral stance, then place your hands on the top of the hip bones with thumbs pointing toward the spine. Measure down to the level between the thumbs.
Measure the frame path. Total height, shirt size, and pant waist do not identify the distance that the shoulder harness must cover.
Repeat the measurement once. If the two results differ by more than about half an inch, reset the landmarks instead of averaging a poor first attempt.
Then compare the result with the exact size chart for that pack because small, medium, and large ranges differ by maker and model.
An adjustable harness still needs the correct base size. The adjustment rail can fine-tune shoulder position, but it cannot make a hip belt wrap correctly or give a short frame enough clearance behind the head.
After setting the measured length, load the pack and check shoulder contact.
A large gap behind the shoulders can mean the harness is too long or the yoke shape is wrong. Heavy pressure on top of the shoulders can mean the load is not reaching the hip belt, the torso setting is too long, or dense gear placement sits too far back.
How should fit change when the load gets heavier?
Fit the pack with the heaviest load you expect at the start of the trip. Food and water may shrink later, but a harness that works only after two days does not fit the heaviest first-day load.
Add weight in stages. Start near a light day load, walk, then add the food, water, and shared gear that create the full carry.
This shows when the hip belt stops transferring weight or the frame begins to fold away from your back.
Load exposes the limit. Tightening straps cannot turn a soft daypack into a stable heavy-load pack.
Watch what changes as kilograms are added.
The belt should remain on the hip bones. Shoulder pressure should not rise sharply.
The top of the pack should stay close when you lean slightly forward, turn, and step down.
Recheck the fit after drinking a large amount of water or removing food. A partly empty pack can develop voids that let dense items settle low or to one side, so compression and load placement may need a small reset even when the harness size is correct.
When should you stop adjusting and try another pack?
Stop adjusting when the same pain, slip, or numbness returns after one orderly reset. A pack is the wrong shape when correct torso length and load placement still require extreme strap tension to keep it controlled.
Compare symptoms under the same load.
A belt that slides on every descent points toward the wrong belt size or hip shape. A shoulder strap that cuts across the neck on both sides points toward the wrong yoke width or curve.
One hard lumbar spot that survives repacking points toward a frame shape mismatch.
Repeated pain is evidence. Do not treat numbness, burning, skin abrasion, or a belt that restricts breathing as a break-in period.
Change only one variable before the next walk.
Try the next torso setting, belt size, or pack model, then repeat the same route and load. This makes the comparison useful instead of replacing one unknown setup with another.
Sources
REI explains torso measurement, hip-belt placement, shoulder-strap tension, load-lifter adjustment, and loaded fit checks: How to Size and Fit a Backpack.
Its loading instructions also place dense gear near the back and recommend testing the finished load before a trip: How to Pack and Hoist a Backpack.
Test the complete system. The pack maker's sizing instructions control the hardware details, and a loaded walk decides whether that size works on your body.
Step by stepPractical steps
- Measure torso length, not height.
- Load the pack with real weight.
- Set the hip belt over your hip bones and tighten first.
- Snug shoulder straps without shifting the load off your hips.
- Angle load lifters so the pack rides close without pulling the belt up.
- Walk 20 to 30 minutes before trusting the fit.
AnswersQuestions readers ask
Should the weight sit on my shoulders?
No.
Most of the load should rest on your hips. Shoulders only stabilize the pack.
How do I know my backpack torso size?
Measure from the bony bump at the base of your neck to the point level with the top of your hip bones. Match that torso length to the pack size chart.
Where should the hip belt sit?
The hip belt should wrap over the top of your hip bones, not around the soft waist. Tighten it before the shoulder straps.
What do load lifters do?
Load lifters pull the upper pack closer to your body. They should reduce backward pull without lifting the hip belt off your hips.
Can a daypack fit differently than a backpacking pack?
Yes.
Light daypacks are more forgiving. Heavy backpacking loads need a better frame, hip belt, and torso match.