
How to Pack a Backpack So the Load Stays Stable
Protect the dry core, place dense weight near the spine, keep trail needs reachable, contain awkward items, and diagnose the result on a loaded walk.
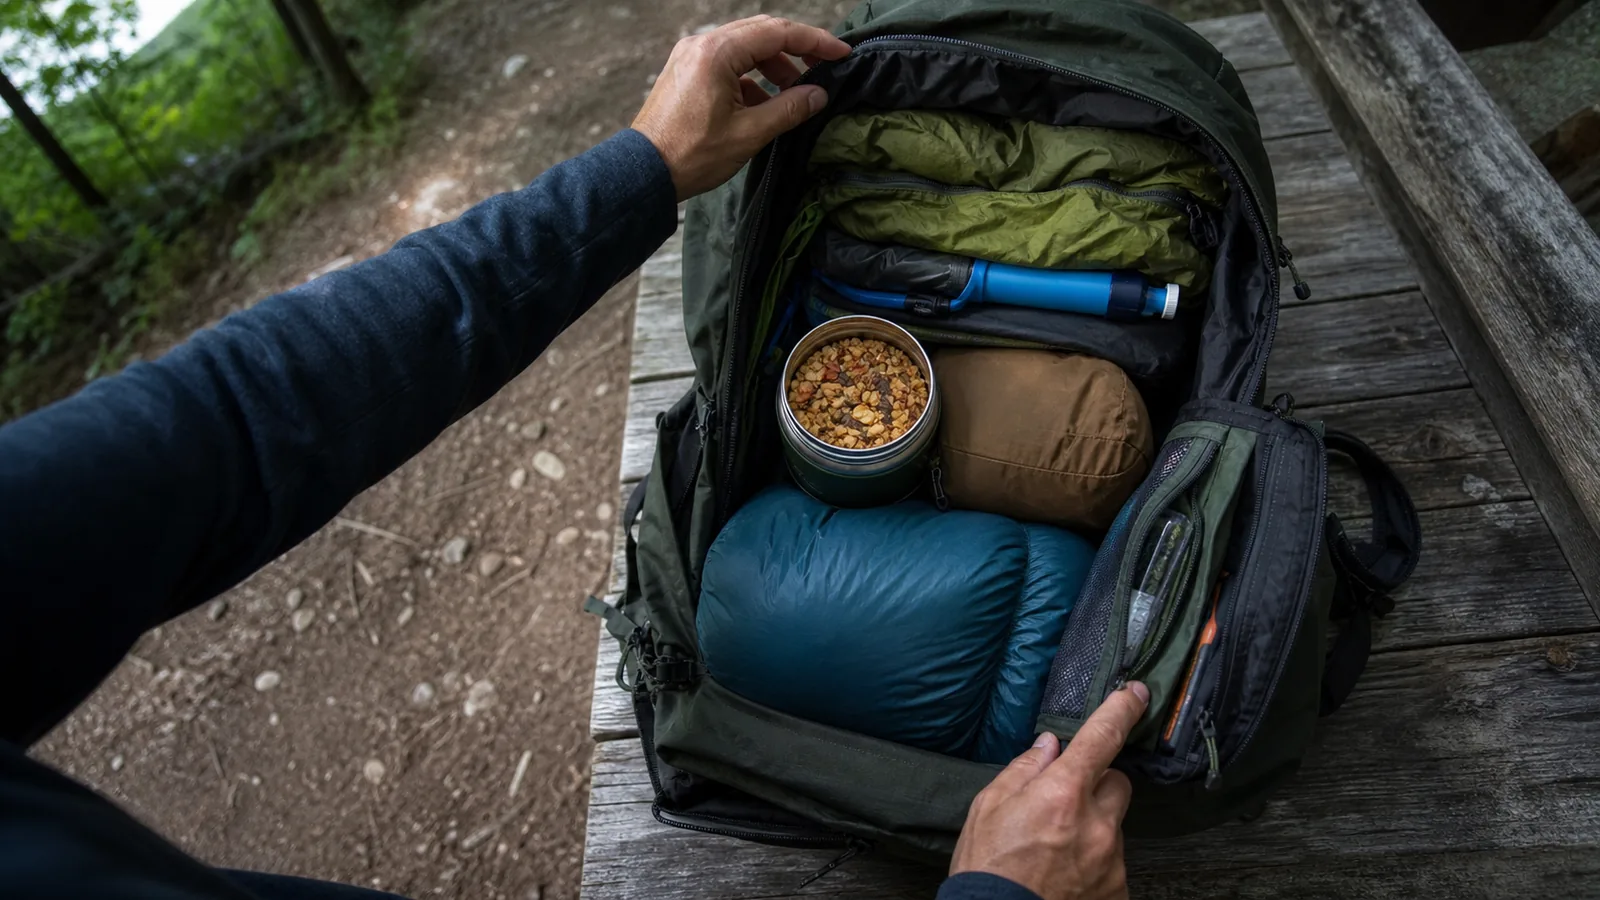
Pack a backpack by putting soft camp gear low, dense items in the middle close to your spine, and rain layers, water treatment, first aid, light, food, and navigation where you can reach them. Balance both sides, contain leaks, tighten compression straps, then walk with the finished load before the trip.
Packing order stops mattering only when you stop walking
A backpack can hold every required item and still carry badly.
Dense weight far from the spine pulls backward. A heavy bottle on one side twists the torso.
Rain gear under the sleep system turns one weather stop into a full unpack.
Give every item a place based on what must stay dry, how dense it is, when you need it, and what can leak or snag.
Packing rule
A useful load passes four tests. It stays close to the body, remains balanced through turns, protects overnight warmth, and gives access to time-sensitive items without dismantling camp gear.
The first overnight backpacking setup should be assembled early enough that a borrowed pack, unfamiliar shelter, or oversized food load can still change.
There is no single diagram that fits every pack and trip.
A bear canister can control the center. A long dry carry shifts several kilograms during the day.
Cold rain moves insulation and shelter higher than they sit on a mild forecast.
Packing order only helps once the full gear inventory is settled, including real food, water, fuel, weather protection, and required storage. Packing an incomplete floor layout only makes the missing item harder to see.
Pack for movement and access, not for the smallest-looking pile.
How do you build a dry core inside the pack?
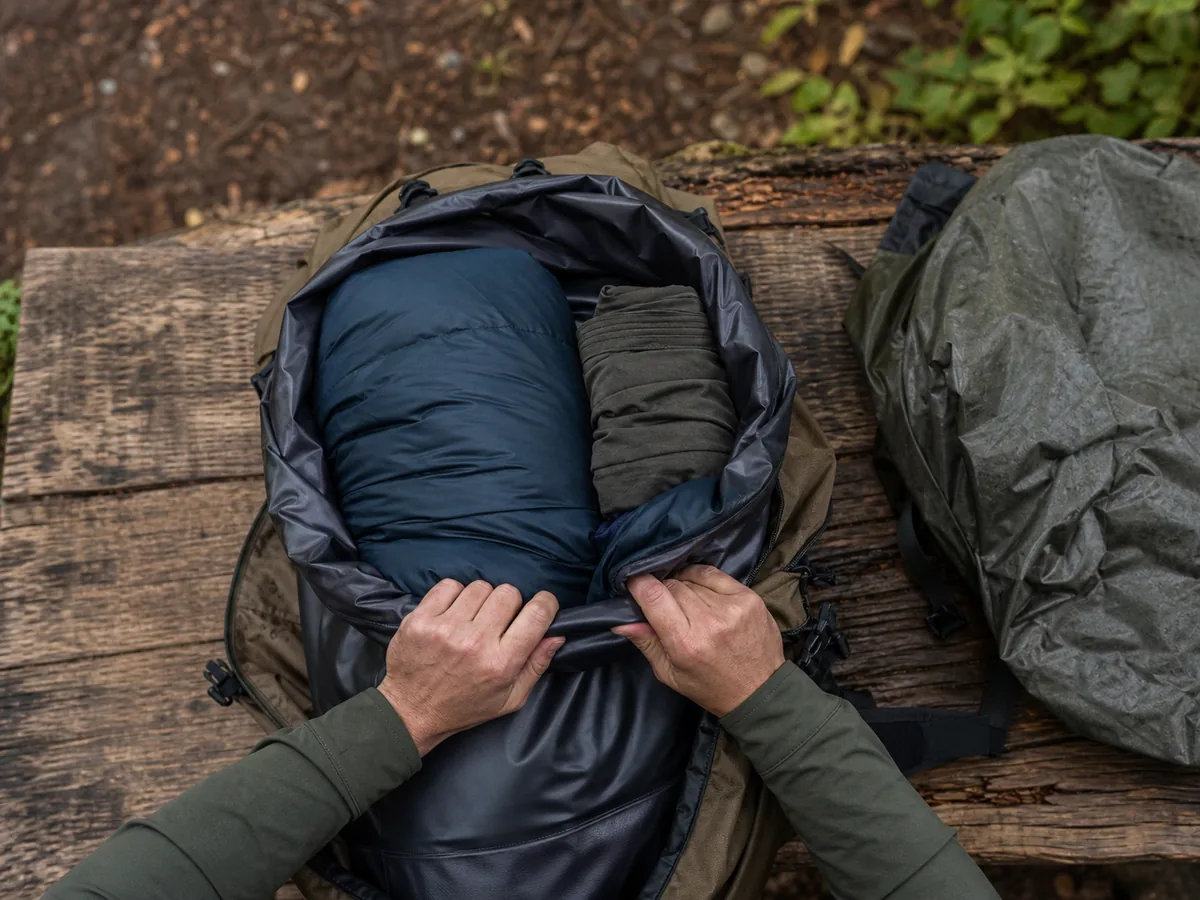
The sleep system and dry camp clothing protect overnight recovery. Put them inside a waterproof pack liner or other reliable internal barrier before dense gear enters the bag.
A pack cover can reduce rain on the exterior, but water still reaches the back panel, seams, pockets, and openings. Internal protection keeps critical insulation separate even when the pack fabric becomes wet.
- Line the main compartment with an intact waterproof barrier.
- Compress or shape the sleeping bag without stressing its insulation or closure.
- Seal dry sleep clothing with the sleeping bag or in a separate protected bag.
- Keep vulnerable electronics and paper records in their own sealed protection.
- Close the liner above the critical dry items before loading the core.
- Store a wet shelter or rainfly away from dry insulation after use.
- Check the barrier for holes during the final pack-out.
Do not seal wet fuel, food, or contaminated waste inside the dry core.
The barrier has one job. It protects warmth and vulnerable essentials from water.
The rain backpacking routine needs a place for wet layers that does not expose the sleeping bag each time the weather changes.
Dry function comes first. A beautifully balanced load is not ready if the night insulation can become wet.
How should you use the bottom, core, and top zones?
Lay out the equipment in groups before loading. Separate camp-only soft items, dense items, trail-access items, and pocket items.
This prevents a small object from disappearing into the wrong zone.
- Create the soft bottomPlace the protected sleeping bag, sleep clothing, and other light camp-only items low.
- Build the dense coreCenter food, cook kit, and other heavy compact items close to the spine.
- Fill voidsUse soft shelter fabric or clothing around hard objects so the load cannot shift.
- Add the working topPlace insulation, rain protection, water treatment, first aid, and the next camp need above the core.
- Load pocketsAssign navigation, water, snacks, sun care, toilet kit, and small urgent items to consistent locations.
- Compress the loadTighten side and front compression enough to stop movement without crushing vulnerable gear.
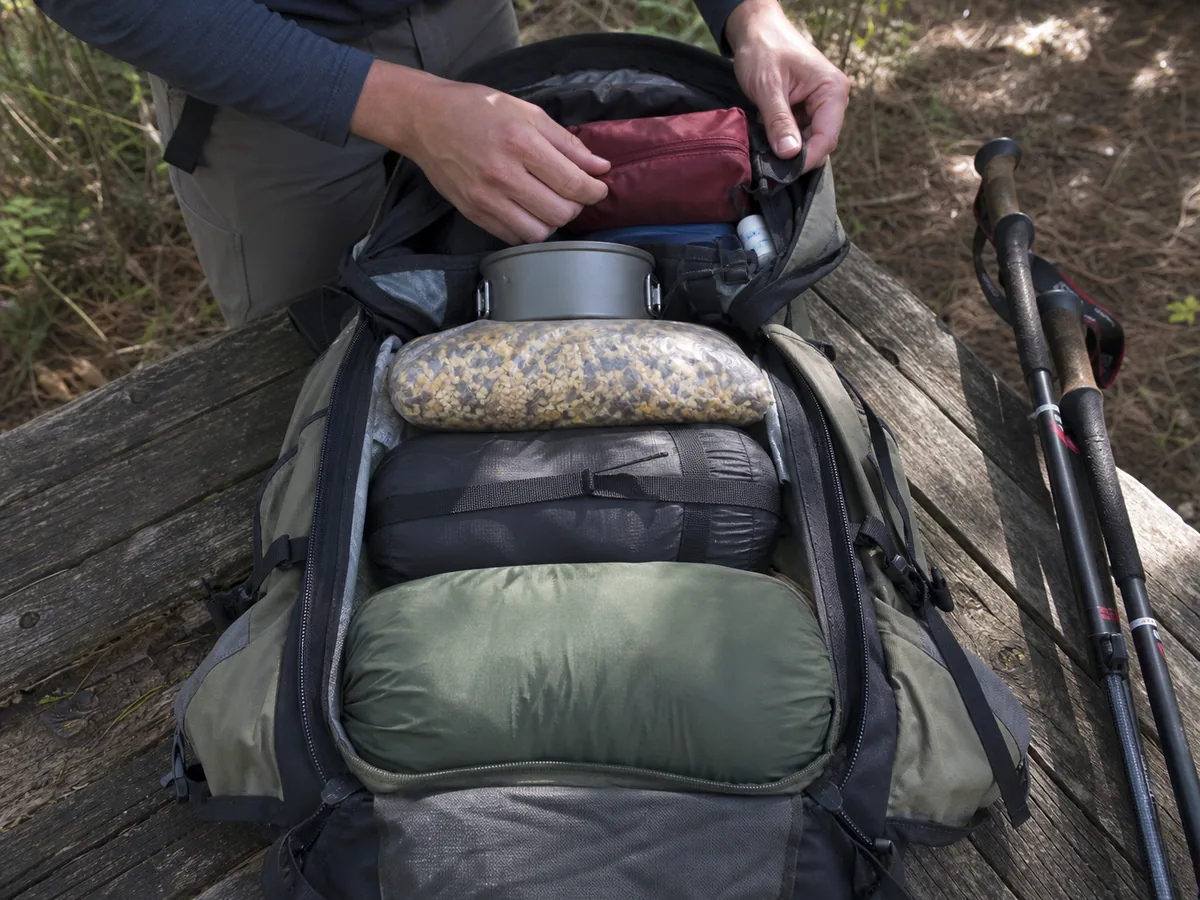
Keep dense weight near the vertical center of the back rather than at the far outer face.
Too low can make the pack sag. Too high can make it tippy.
The best exact position depends on the pack frame, body, terrain, and shape of the load.
Load in horizontal layers and fill gaps. Two vertical towers can pull differently as food or water is used.
Soft material around the dense core reduces movement and hard pressure against the back panel.
The complete overnight packing system explains why shelter, sleep, food, water, clothing, navigation, repair, and first aid must all remain functional together.
Dense weight stays close. The farther it sits behind you, the more leverage it creates.
Where should bear canisters, water, and fuel go?
Pack the required food-storage container early because it may decide the remaining geometry. Use only a method approved for the exact land unit, and make sure all food, trash, toiletries, and other attractants fit when camp is set.
Center a hard canister close to the spine and pad its edges with soft gear.
Horizontal placement can work in a wide pack. A narrow pack may require vertical placement.
Choose the orientation that remains centered, does not create a hard pressure point, and allows the pack to close correctly.
| Awkward item | Main risk | Placement test | Correction |
|---|---|---|---|
| Bear canister | Hard edge and concentrated mass | Centered close to back without a pressure point | Change orientation and pad gaps |
| Water reservoir | Dense load that is hard to insert later | Filled and installed before the pack is full | Load first and protect the hose connection |
| Water bottles | Side imbalance as one empties first | Equal starting volume or deliberate switching | Alternate drinking sides or rebalance at stops |
| Liquid fuel | Leak into food or dry gear | Cap secure upright and isolated below food | Use a protected external pocket when the pack design allows |
| Cook pot or stove | Hard shape presses into the back | No edge is felt through normal movement | Nest or wrap with soft items |
| Tent poles | Long item catches branches or falls | Fully secured with two attachment points | Move inside or tighten dedicated straps |
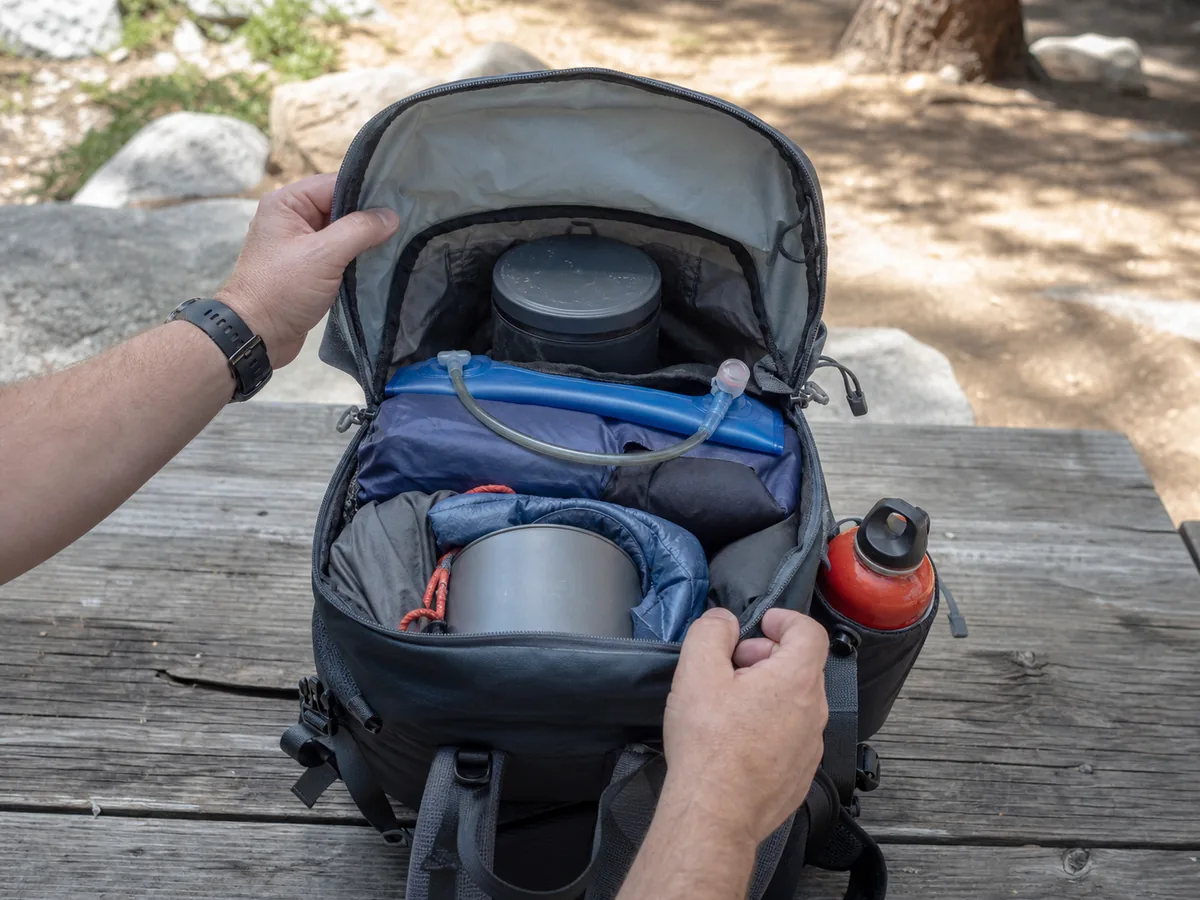
Water changes the balance while you drink. Recheck the pack after a large refill or after one side bottle empties.
A water carry calculation should set the capacity from verified source gaps before you try to solve the weight with straps.
Food also shrinks across the trip. Keep the daily units organized so a partly empty canister does not become a hard object rolling inside a large void.
Contain the dominant item. Let the canister, water, or fuel shape the packing plan before small items hide the problem.
Pockets are for what you need without stopping
Follow a normal trail hour.
You may drink, eat, check the map, apply sun protection, adjust gloves, use the toilet kit, or add a shell. Those actions identify the useful pocket items.
Hipbelt and shoulder pockets suit small frequent items such as the current food portion, lip protection, or a compact camera. Side pockets often carry bottles, poles, or tent components.
A front pocket can isolate a damp layer, toilet kit, or water equipment when the pack design supports it.
Navigation
Map compass and offline phone stay together in a secure reachable place.
Water
Bottles or hose remain usable without removing the pack when safe.
Moving food
Carry only the current portion outside the protected main food storage.
Weather
Shell gloves or warm layer sit near the top or in a pocket that closes.
Toilet kit
Keep the complete local waste method together and away from food handling.
Security
Clip keys permit wallet and identification where a fall or open zipper cannot lose them.
Do not fill every pocket because it exists. A packed side pocket can block arm movement or keep the compression strap from controlling the main load.
Use the same location every time. The common backpacking mistakes become harder to correct when batteries, treatment tablets, or first-aid supplies migrate between pockets.
Keep shared water and trail space orderly under the backpacking etiquette practices so pocket access does not scatter food, straps, or equipment across a stop.
Access needs a routine. Reachable equipment is useful only when everyone knows where it returns.
How should you secure gear outside a backpack?
Exterior attachment is useful for long or wet equipment that the pack is designed to secure. It becomes a problem when overflow dangles from one strap, catches branches, shifts on a scramble, or falls unnoticed.
Secure trekking poles, tent poles, foam pads, or an ice tool with the dedicated loops and straps.
Specialized equipment requires its own safe carry method. Do not improvise a sharp tool position from a general backpacking diagram.
Shake the loaded pack, set it down, lift it, and brush past a doorway or safe branch at home. A bottle that falls or strap that catches during the test will not improve on the trail.
Nothing should swing. The pack should move as one controlled load.
How do you hoist a loaded backpack safely?
Loosen the shoulder straps enough to enter them while keeping the pack upright. Stand beside the back panel with a stable stance and bent knees.
- Use the haul loopGrip the reinforced top loop rather than lifting the whole load by one shoulder strap.
- Raise to the thighLift with both legs and rest the pack on a bent thigh while keeping control.
- Enter the first strapSlide the nearest arm and shoulder into the harness.
- Roll the pack onto the backLean slightly forward and guide the load rather than swinging it blindly.
- Enter the second strapKeep the first side controlled while placing the other arm.
- Set the hipbeltCenter and tighten it on the intended hip position before final shoulder adjustments.
- Finish the fitAdjust shoulder straps load lifters and sternum strap according to the pack maker's instructions.
The REI loading instructions recommend the thigh transfer because lifting by a shoulder strap can damage the harness and makes the pack harder to control.
Practice removing the load too. A pack that can be set down without dropping, twisting, or trapping a pole is easier to manage during a foot stop or emergency.
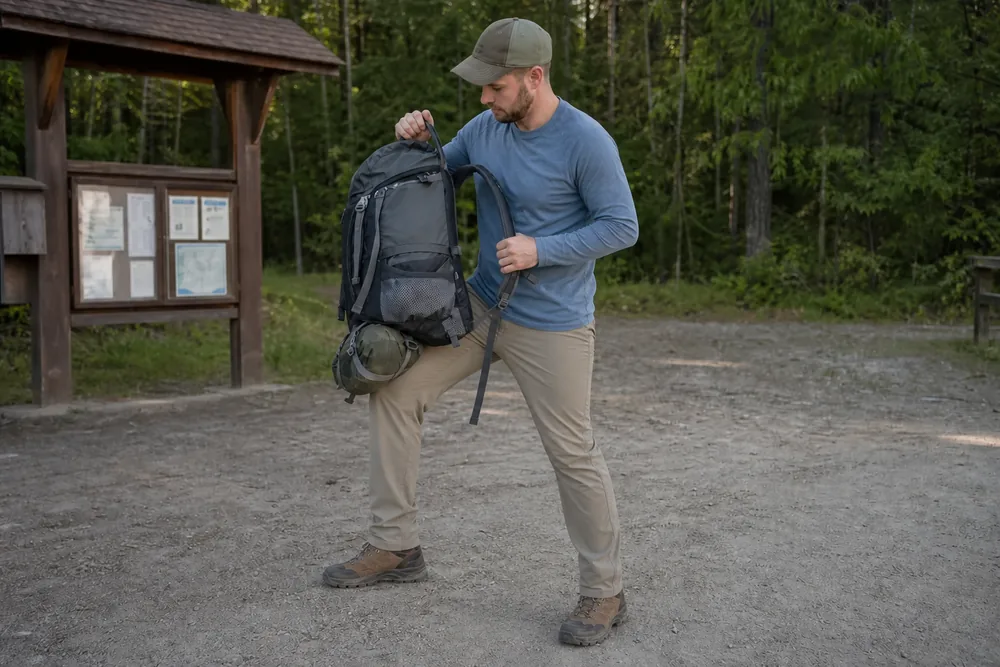
The backpacking exercise load rises with carried mass. Good placement improves control, but it does not make excess weight disappear.
Guide the load onto you. Do not ask one shoulder strap and a twisting back to catch it.
Some route conditions force a different pack order
Fair weather permits a deeper shell or shelter than a storm day. Change access before the conditions arrive, not after the group is cold or the pack is open in rain.
The backpacking safety thresholds determine which items must move upward before exposure, darkness, or a difficult water segment.
| Condition | Item that moves | Better position | Reason |
|---|---|---|---|
| Rain approaching | Shell pack cover or wet shelter | Top or secure front pocket | Keeps the dry core closed |
| Cold wind | Gloves hat and insulation | Immediate top access | Protects hand function before a long stop |
| Long dry carry | Water containers | Centered and balanced near the back | Controls the heaviest changing load |
| Frequent crossings | Camp shoes or crossing equipment when appropriate | Contained reachable pocket | Avoids opening the dry core near water |
| Bear canister required | Food and scented items | Main dense core | Keeps required storage controlled |
| Late camp risk | Shelter headlamp and water treatment | Working top | Starts essential camp tasks first |
Do not move a light jacket to the bottom simply because the morning is warm. The forecast, exposure, and turnaround time decide whether it remains a trail-access item.
The winter backpacking setup may need bulky insulation, liquid-water protection, traction, and more fuel. The lighter backpacking process can reduce proven excess, but it should not delete the route-specific function that made the item accessible.
Repack before the change. Access is a weather and timing decision.
Compression has a point where it starts costing you
Close the pack with the equipment in its real containers. If the lid, zipper, roll top, frame, or compression straps must be forced beyond their normal range, the load is not ready even when every item technically sits inside.
Compression removes unused air and stops movement. It should not crush a water filter, bend a stove control, deform a hard canister, damage insulation, or push a sharp cookware edge into the back panel.
Closed is not the test. The pack must also keep its shape, protect vulnerable gear, and open without an uncontrolled spill.
Leave enough room to repack damp or less-neatly folded equipment. A shelter packed perfectly dry at home may take more space after rain.
Food bags also change shape as meals are removed, so a layout with no flexible space becomes harder to stabilize later.
Use the pack's frame and compression system as designed.
Side compression can pull a soft load inward. A frame sheet or stays transfer dense weight toward the hip belt.
Neither feature can control one hard object sitting far from the spine.
If the required load exceeds the pack's volume or rated carry guidance, remove genuine duplicates, redistribute shared gear, or choose a suitable pack. Do not hang a second loose pack on the outside or delete insulation, water, required storage, and other route needs to preserve the original bag.
How does frame design change the loading zones?
The bottom, core, and top model is a starting point. A framed backpack can control a denser core near the spine, while a frameless pack depends more on a compact light load and careful use of a folded pad or other designed structure.
Follow the pack maker's instructions for removable stays, frame sheets, load lifters, roll-top limits, and external attachment points. A load lifter attached low on a small pack will not behave like one anchored above the shoulder on a tall frame.
Work with the harness. Dense weight belongs where the frame can transfer it, not simply at the geometric center of the bag.
Check head clearance on steep climbs and while looking upward. A tall load or hard canister placed too high can strike the back of the head or make the pack tippy.
Lower it slightly while keeping it close to the spine.
On steep or uneven ground, keep the load compact and centered. A high center of mass may feel efficient on smooth walking but become harder to control during a side step, duck, or careful descent.
Test the frame after the shelter and food are repacked imperfectly.
A system that works only with factory-tight folds will be difficult to rebuild in rain, wind, or darkness. Leave a repeatable place for damp fabric and confirm that the dry core still closes without forcing the frame away from your back.
If the frame bows, the hip belt lifts, or the roll top cannot reach its normal closure, reduce or redistribute the load before adding strap tension. Those symptoms show a capacity or placement problem, not a need to pull harder.
When should you rebalance food and water weight?
The pack that leaves the trailhead will not have the same shape on day three. Food shrinks, fuel changes, water containers empty and refill, and wet shelter fabric may need a different place than it had at home.
Rebuild the dense core each morning instead of tightening compression around a new void. Keep the remaining food and water close to the spine, then use soft clothing or shelter fabric to stop hard items from rolling.
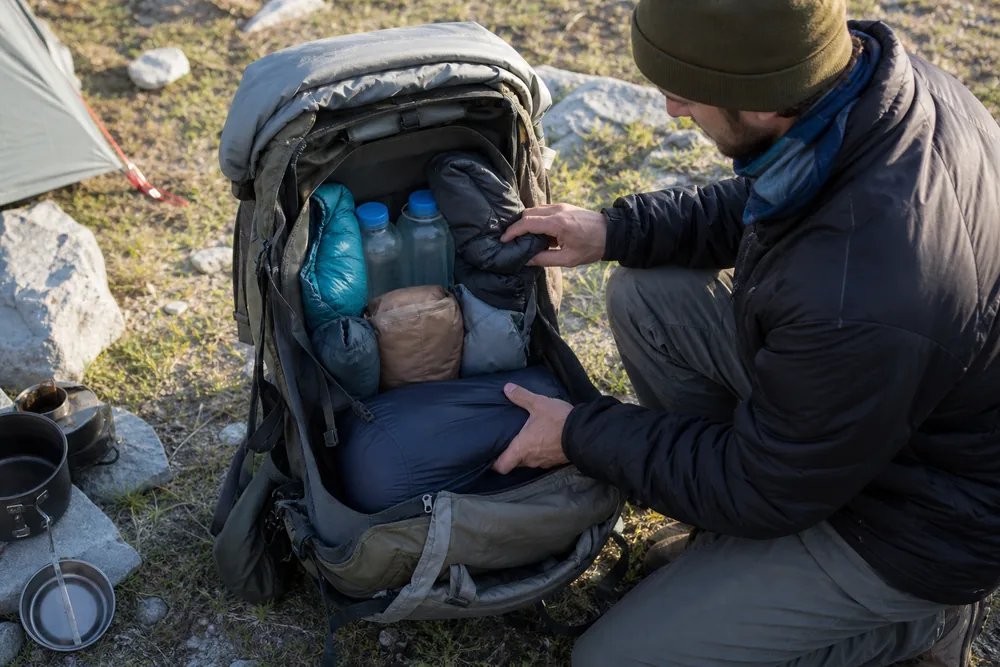
Changing weight needs a reset. A stable first-day layout can become a low, one-sided load after several meals and one empty bottle.
- Center the remaining food before small items fill the gap.
- Balance bottles by actual volume, not container size.
- Keep the day's food separate from protected camp storage.
- Move wet shelter fabric away from the dry core.
- Restore rain layers, insulation, navigation, light, and first aid to known locations.
- Tighten compression only after the new core is stable.
- Check exterior attachments before leaving camp.
Recheck balance after every large water refill. A two-liter change moves about two kilograms, or 4.4 pounds, into or out of the pack.
Place that mass deliberately instead of letting the first available pocket decide.
Keep one small daily food bag reachable while the main supply remains controlled. This avoids opening and rearranging the full food-storage system at every snack stop.
When equipment is shared, confirm any carrier change aloud. Moving the shelter, treatment method, first aid, or stove between packs without telling the group makes the item harder to find when it matters.
Before walking, lift the pack by its haul loop and feel whether it rolls to one side.
Then put it on, tighten from the hips upward, and take several turns and step-downs. A two-minute camp check can prevent an hour of fighting a shifted load.
What does a ten-minute loaded walk reveal?
Use the actual first-day food and water. Walk level ground, climb stairs or a gentle grade, make controlled turns, step down, reach for water, add a shell, and remove the pack.
| Symptom | Likely cause | First correction |
|---|---|---|
| Pack pulls backward | Dense mass too far from spine | Move the core inward before tightening straps |
| One shoulder works harder | Side-to-side imbalance | Reweigh bottles and dense items |
| Hard point presses the back | Cookware canister or fuel edge | Rotate pad or move the object |
| Load sways during turns | Voids or loose compression | Fill gaps and tighten compression straps |
| Hands cannot reach water | Pocket or hose position is wrong | Reposition and retest while wearing the pack |
| Rain gear requires unpacking | Working top is buried | Move weather protection above camp gear |
| Exterior gear clicks or swings | Attachment uses one loose point | Secure twice or move inside |
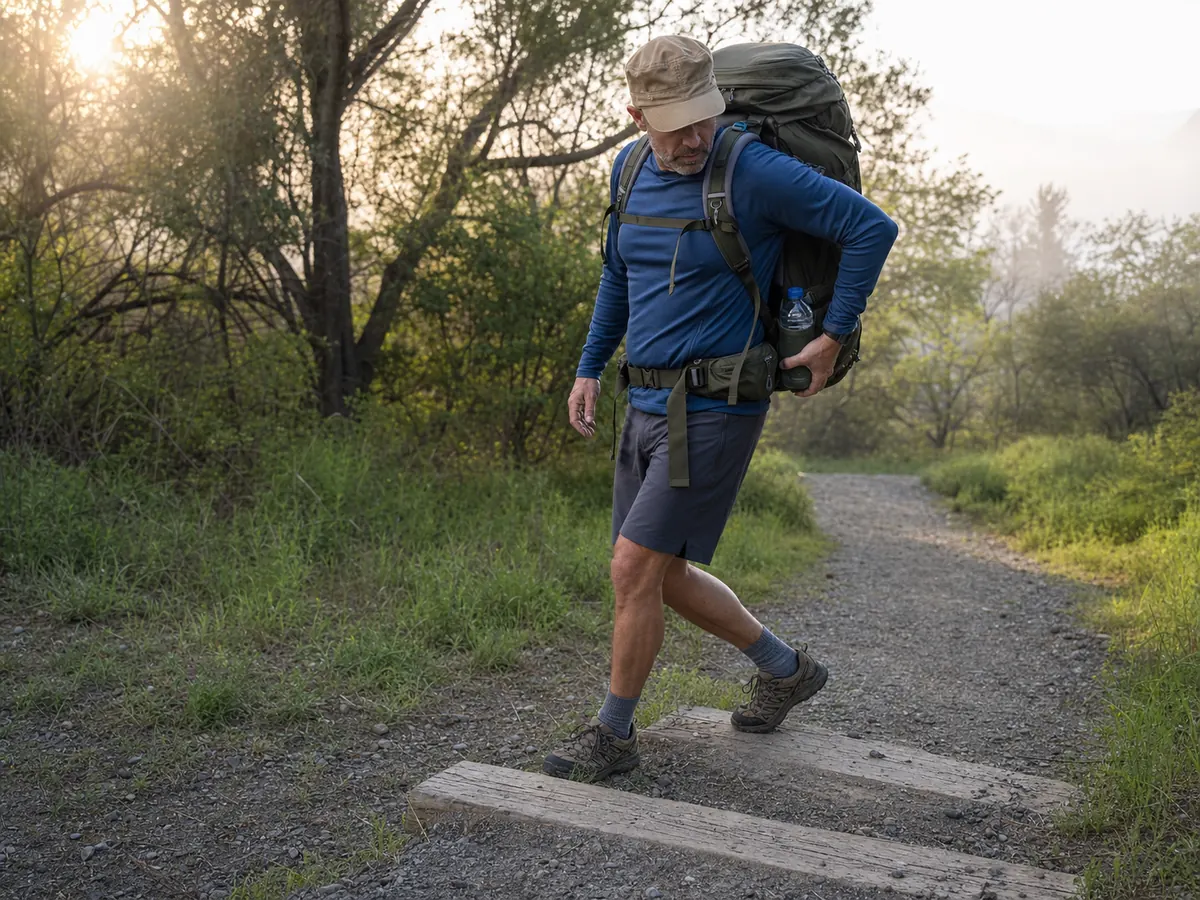
Correct placement before chasing every symptom with tighter straps. Then repeat the walk.
If the load still causes numbness, sharp pain, progressive pressure, or altered gait, stop and reassess pack fit, total load, and the planned trip.
Run the test several days before departure. The loaded-pack training plan needs time to expose foot, shoulder, hip, and balance problems while a repack or route change remains easy.
At the end, photograph or write the final pocket map. That record makes morning repacking faster and helps another group member find first aid, water treatment, or light.
Walk the finished load. The floor cannot tell you whether the backpack moves as one stable system.
Sources
REI describes soft bottom items, dense core items close to the back, accessible top items, pocket use, compression, and a controlled thigh-assisted hoist: How to Pack and Hoist a Backpack.
The National Park Service lists navigation, sun protection, insulation, illumination, first aid, fire, repair, food, water, and emergency shelter as functional essentials that must remain usable: Ten Essentials.
Local rules still control the load. Verify food storage, fuel, fire, waste, water, permits, and specialized equipment with the responsible land manager and equipment maker.
Step by stepPractical steps
- Protect sleep insulation and dry camp clothing inside an internal waterproof barrier.
- Place soft camp-only gear low and dense items close to the spine in the middle.
- Keep weather layers, water treatment, first aid, light, food, and navigation accessible.
- Center and contain bear canisters, water, fuel, cookware, and exterior equipment.
- Compress the load, hoist it under control, and diagnose it on a loaded walk.
AnswersQuestions readers ask
Where should the heaviest items go in a backpack?
Place dense items in the middle of the pack close to your spine, then pad gaps so they cannot shift. Keep both sides balanced and adjust the exact height to the pack design, terrain, and item shape.
What should go at the bottom of a backpack?
Use the bottom for protected soft items that are not needed until camp, such as the sleeping bag and dry sleep clothing. Keep urgent weather, water, navigation, light, and first-aid items higher or in secure pockets.
Should a tent go inside or outside a backpack?
Inside is usually more secure when it fits.
A wet shelter or long poles may use a designed exterior pocket or two-point attachment. Keep every exterior item narrow, contained, and unable to snag or fall.
How do I pack a bear canister?
Use an approved canister for the exact place, center it close to your back, pad hard edges, and choose a horizontal or vertical orientation that stays balanced and allows the pack to close correctly.
How do I know if my backpack is packed correctly?
Walk with the real first-day load. The pack should stay close and balanced through turns and steps, reveal no hard pressure points, keep exterior gear still, and let you reach water, rain protection, navigation, light, and first aid.