
What Makes Backpacking in Winter Work the Next Morning?
Lower the route ceiling until snow travel, navigation, dry insulation, liquid water, camp work, and the cold morning restart all pass together.
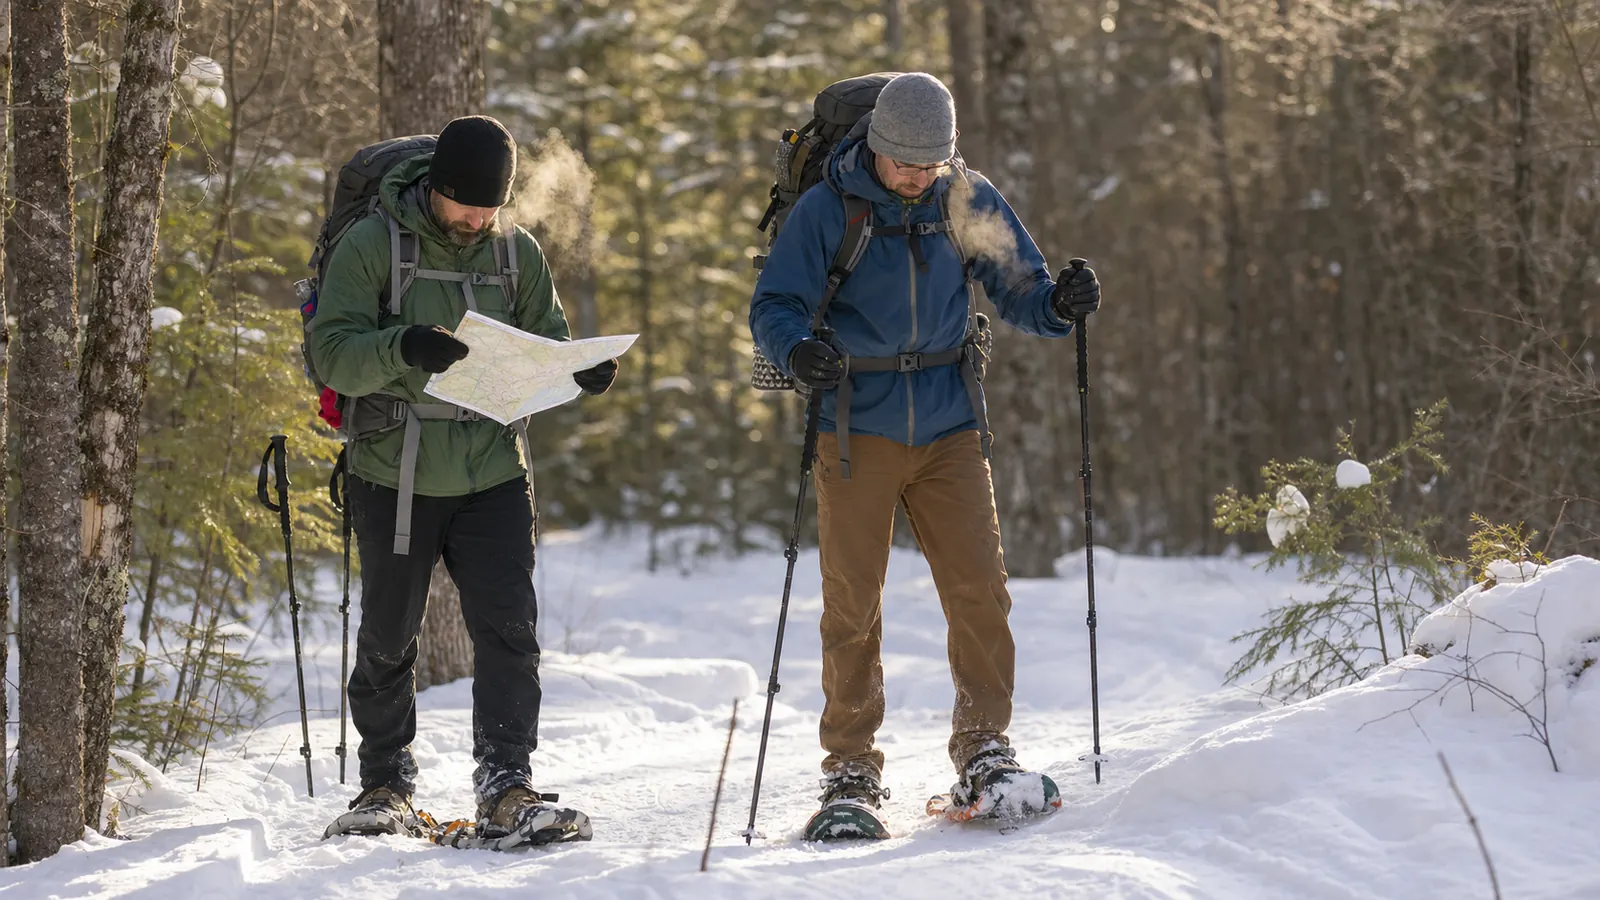
Winter backpacking requires a shorter route, a larger time and heat margin, dependable navigation when tread disappears, surface-specific traction or flotation, protected dry insulation, a water and fuel system that remains usable below freezing, and clear cold-stress exit rules. Prove one night near an easy exit before adding remoteness, deeper snow, stronger wind, or another day.
- Daily ceiling
- Set by snow depth, surface, wind, daylight, navigation, and camp labor
- Dry reserve
- Sleep insulation, sleep clothing, and critical hand warmth stay protected
- Movement system
- Traction or flotation matches the actual snow and ice surface
- Water system
- Containers, treatment, stove, and fuel remain usable below freezing
- Camp gate
- Shelter and warmth can be established with gloves and limited light
- Exit gate
- Cold signs, lost route, unusable water, wet insulation, or worsening weather end the plan
Winter changes every part of an overnight. Snow slows movement, covers the route, complicates camp, freezes water systems, lengthens simple tasks, and leaves fewer daylight hours to correct a mistake.
Lower the winter ceiling. Start with less distance and consequence than your three-season ability suggests, then increase only after the complete cold system works.
Why does winter shorten a backpacking route?
One mile of firm dry trail and one mile of unconsolidated snow are different work. Trail breaking, postholing, careful ice travel, and frequent surface changes can reduce distance while increasing heat and sweat.
Daylight is shorter, yet camp often takes longer. A platform may need preparation, stakes may not work normally, frozen fittings need attention, and making liquid water can add a major evening task.
Wind increases heat loss and can make a moderate air temperature much more demanding for exposed skin and inactive bodies. Apply the same conservative checks used for winter hiking conditions, then lower exposure and route ambition for the overnight load and camp work.
Stops change character. A long summer break can become a rapid cooling period, especially when base layers are damp from climbing or snow work.
Navigation takes more time when snow hides tread, signs, small landmarks, and junctions. Tracks made by another party can lead away from your intended route or disappear under new snow.
Water is no longer a simple refill. Bottles can freeze, filters can be damaged by freezing, and melting snow requires a stable stove, fuel, time, and some starter water.
Camp labor continues after walking.
Shelter, dry layers, hand protection, water, food, ventilation, and sleep setup all need attention while the body is producing less heat. Establish a controlled beginner backpacking baseline before adding these cold-dependent tasks.
| Three-season assumption | Winter change | Conservative correction |
|---|---|---|
| Map distance predicts time | Snow and ice alter speed dramatically | Use a much shorter route with early exits |
| Known trail stays visible | Tread and markers may disappear | Navigate independently of tracks |
| Water remains liquid | Bottles, hoses, and filters may freeze | Protect containers and test a freeze-safe system |
| Camp setup is routine | Snow, wind, gloves, and darkness slow every task | Rehearse the exact sequence near an exit |
| Breaks restore energy | Damp clothing and wind cool the body | Keep stops brief and add insulation early |
| Morning is simple | Boots, water, stove, and batteries may be cold | Test the complete restart before going remote |
Do not recover lost winter time by rushing. Faster movement can increase sweat, reduce observation, separate the group, and leave less control on ice or uneven snow.
Your turnaround should be earlier than it would be on the summer version of the route. The return and camp work still need heat, light, navigation attention, and a working group.
If the route enters avalanche terrain, requires technical climbing, or exceeds the group's snow-travel education, this general article is not enough. Obtain qualified instruction and current local hazard information or choose terrain outside that problem.
Winter distance is earned slowly. The safe ceiling comes from the slowest cold-dependent system, not from summer mileage.
How do you navigate when snow hides the trail?
Familiar summer terrain can look unrelated under snow. Practiced compass navigation matters when junctions, blazes, and tread disappear.
You need a map and compass, plus the skill to use them. Store an offline map and route information as support, but do not depend on one phone, battery, or screen.
Cold reduces battery performance. Keep critical electronics protected and warm enough to function, carry an appropriate power reserve, and avoid using the navigation device as entertainment throughout camp.
Buried tread
Follow position and terrain, not the path shape expected from summer.
False tracks
Another person's route may lead to a campsite, hazard, or different objective.
Hidden junction
Confirm direction before tracks divide or the corridor becomes unclear.
Whiteout or snowfall
Landmarks and contrast can disappear faster than the group can relocate them.
Cold battery
A charged device may deliver less usable time in low temperatures.
Covered water
Streams, lake edges, and thin ice can create hazards not shown by the summer line.
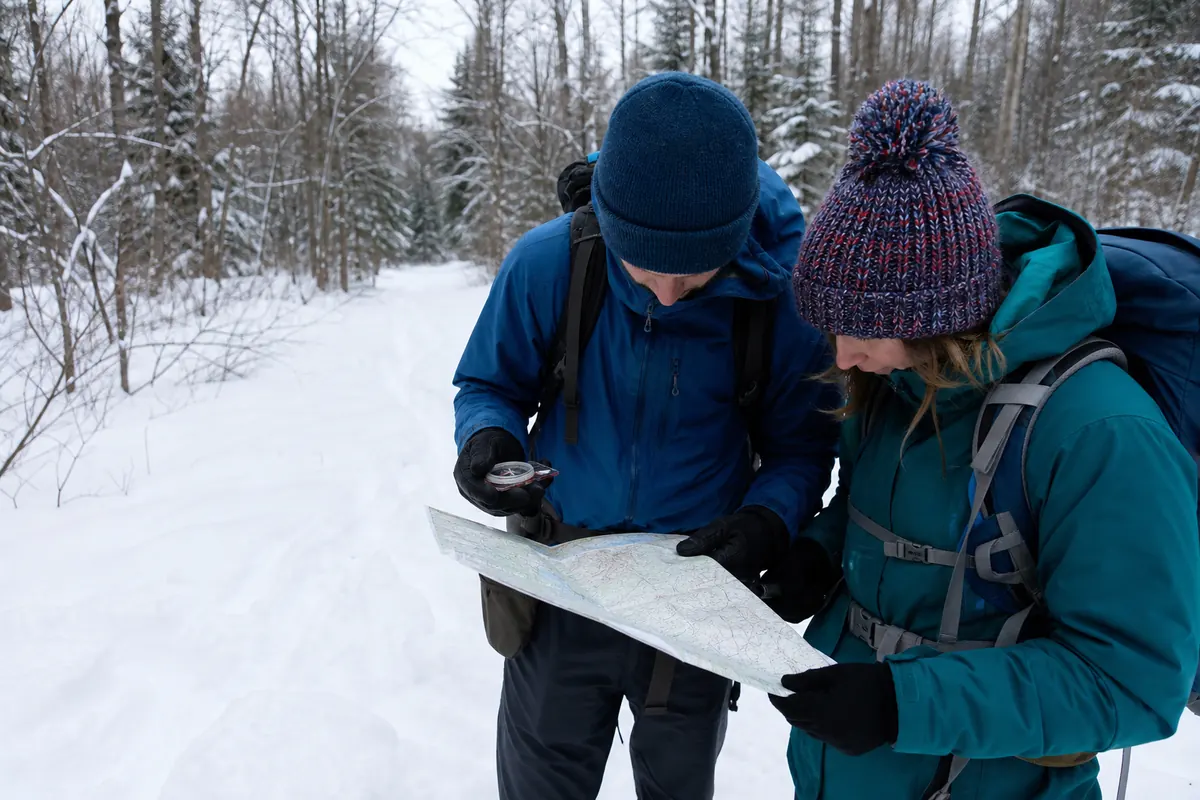
Mark simple checkpoints before departure. Major terrain boundaries, safe turnaround points, and the known exit are more useful than a dense collection of waypoints nobody practiced.
You should confirm your position more often than in summer. Correcting a small drift near the last known point is easier than reconstructing an hour of travel after tracks disappear.
Do not step onto snow-covered water because another track crosses it. Ice thickness and current can vary over short distances, and surface appearance does not prove support.
You should turn around when the group cannot confidently match position, terrain, and the remaining time. A plausible direction is not a winter route plan.
You should treat the return route as a separate navigation problem. The wider backpacking route system should never depend on tracks remaining visible after snowfall or wind.
At each major checkpoint, confirm how long the group can continue and still establish shelter before cold and darkness. Winter navigation decisions need a camp-work clock, not only a distance-to-destination number.
Your paper route notes should record that clock.
Navigate the covered landscape. Memory of summer tread helps with context but cannot replace present position and conservative terrain choices.
When Do You Need Traction, Flotation, or Both?
Deep soft snow needs flotation to reduce sinking. Packed snow or ice may need traction, while mixed routes can require deliberate transitions between devices.
Snowshoes, skis, and traction devices change gait and balance. Add them to a loaded backpacking progression before using them on an overnight.
Postholing is more than inconvenience. Repeated deep sinking consumes time and energy, can injure the legs, and shows that the surface or chosen equipment is outside the efficient plan.
- Current local reports describe snow depth, packing, ice, and recent weather.
- Flotation matches deep or unconsolidated snow.
- Traction matches firm snow or ice and fits the actual footwear.
- Bindings can be operated with gloves and cleared of snow.
- The group has practiced transitions without blocking a narrow trail.
- Poles are adjusted and used without catching between rocks or roots.
- Gaiters and footwear limit snow entry while allowing foot checks.
- The route avoids avalanche or technical terrain beyond the group's education.
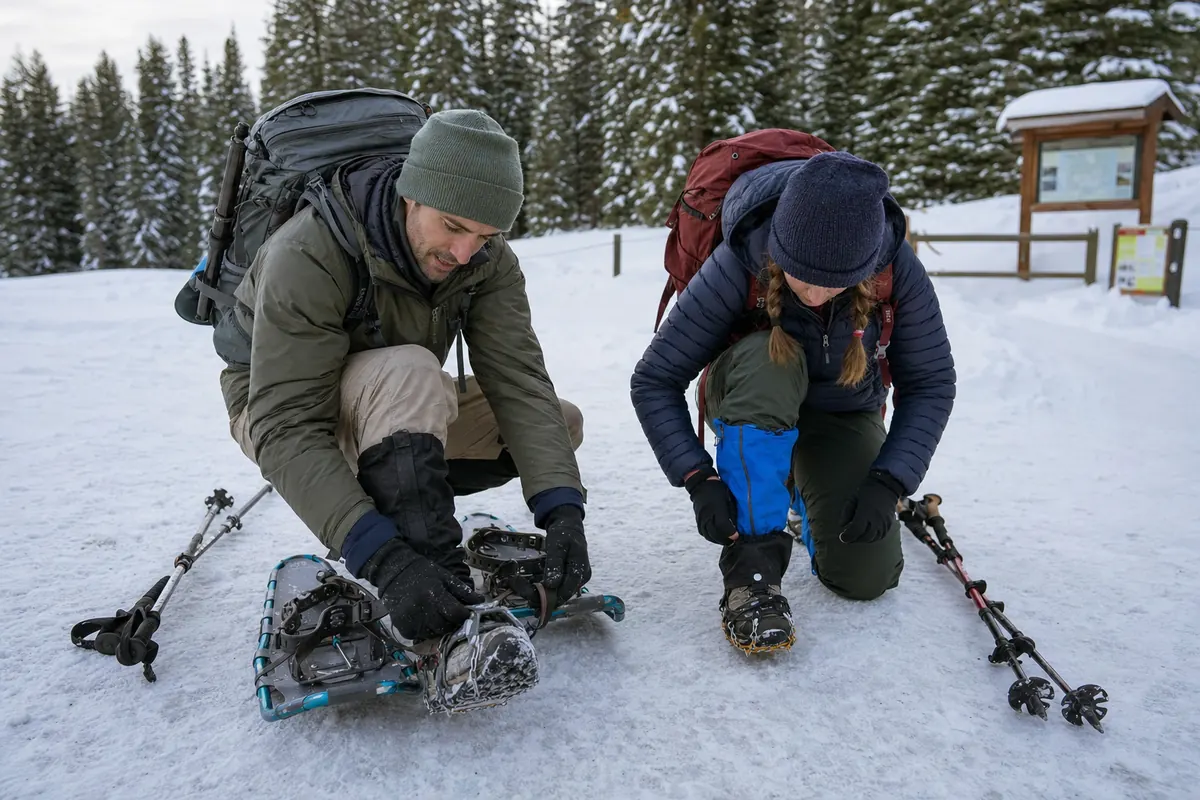
Traction does not make every slope safe. It can improve grip while exposure, falling ice, unstable snow, or a steep uncontrolled slide remains outside ordinary backpacking.
Footwear must remain warm and usable after movement stops. Snow entering around the ankle, compressed socks, tight lacing, or damp insulation can become a cold and skin problem at camp.
Reject the route when the required device is unfamiliar, current surface information is missing, or progress during the first section is far slower than the turnaround plan allows.
Match the surface, then practice. Winter equipment has value only when it fits, operates with gloves, and supports controlled movement under the real pack.
How do you protect dry insulation in winter?
Sweat can wet clothing from the inside before snow or wind touches it. The same wet-dry boundary requires early venting before the base layer is soaked.
Put on warmth before a stop becomes cold. The correct moment is often while hands still work easily and the group feels comfortable, not after persistent shivering begins.
Seal sleeping insulation and dry sleep clothing inside a dependable waterproof liner. A backpacking packing system keeps wet shelter, snow-covered equipment, and damp active layers outside that reserve.
Hand systems deserve redundancy because gloves become wet, lost, or difficult to use during camp work. Protect at least one warm pair for inactivity and the morning restart.
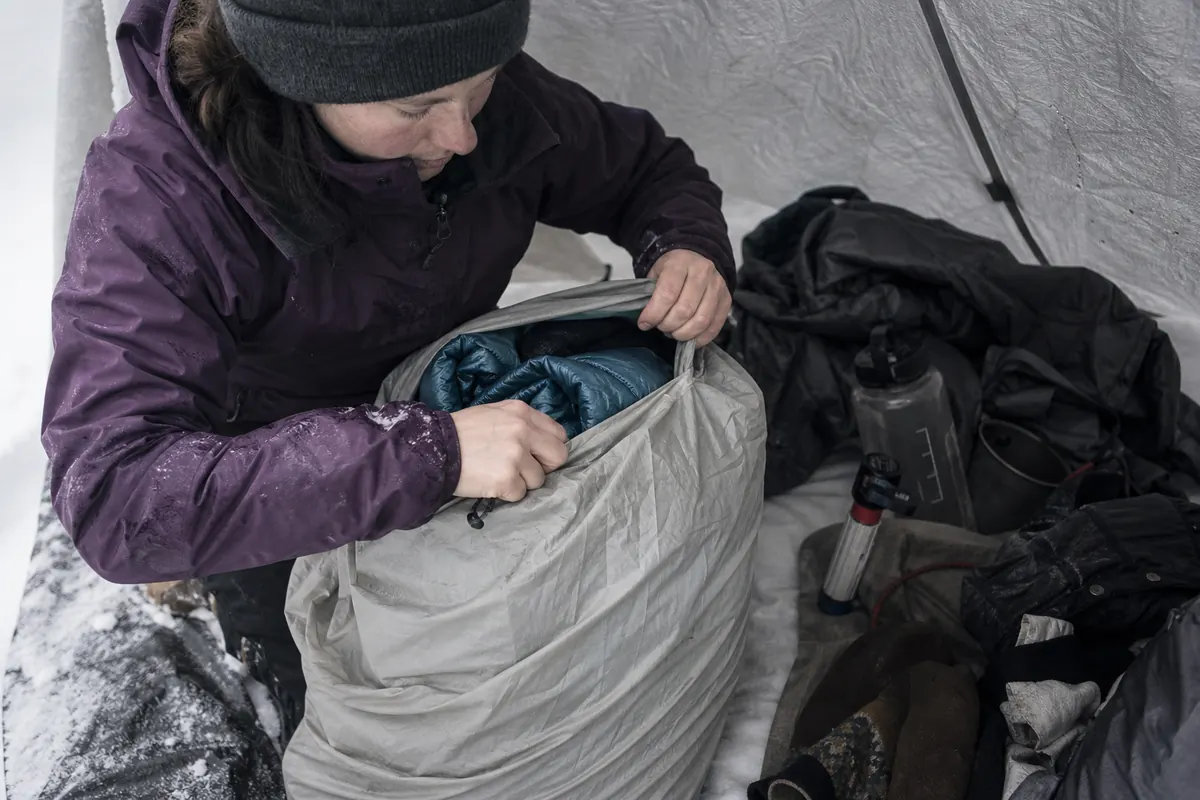
Brush snow from clothing and equipment before it enters the shelter. Snow that melts inside adds moisture exactly where drying is slowest.
Manage condensation through shelter ventilation appropriate to the design and conditions. Blocking every opening can trap moisture that later wets insulation or freezes on interior surfaces.
A backpacking mistake review should trace that moisture to venting, wet gear, cooking vapor, site choice, or sleep position.
At night, keep damp items only where the shelter, sleeping system, and manufacturer guidance can handle them safely. Do not pack wet clothing inside insulation in a way that compromises warmth.
If the group cannot restore warmth, protect dry sleep equipment, or keep hands functional enough for essential tasks, use the planned exit and seek appropriate help.
Dryness is finite reserve. Winter warmth depends on what remains dry after movement, camp work, and a full inactive night.
Camp gets built with cold hands and a headlamp
The moment walking stops, heat production drops while the hardest camp tasks begin. A first overnight plan must leave time for that longer camp order.
You should choose a legal site away from obvious avalanche paths, falling branches, wind loading, drainage, and unsupported snow over water or voids. This article cannot assess a specific site, so use current local guidance and conservative terrain.
Prepare only the platform the shelter needs. Excess digging consumes time, increases sweat, and leaves the group colder before shelter exists.
- Add warmth earlyVent damp layers as needed, then protect head, hands, and torso before cooling.
- Confirm the siteCheck legal location, terrain, wind, overhead hazards, and snow support.
- Build shelterUse the practiced snow or frozen-ground anchor method for the exact shelter.
- Protect the dry coreMove sleep insulation inside only after the shelter and wet zone are controlled.
- Create liquid waterUse the tested bottle, treatment, stove, and fuel sequence.
- Eat before appetite fadesPrepare the familiar meal and keep a no-cook reserve available.
- Secure scented itemsFollow current local food and wildlife rules.
- Stage the restartPut boots, gloves, light, map, water, and first food where morning cold cannot hide them.
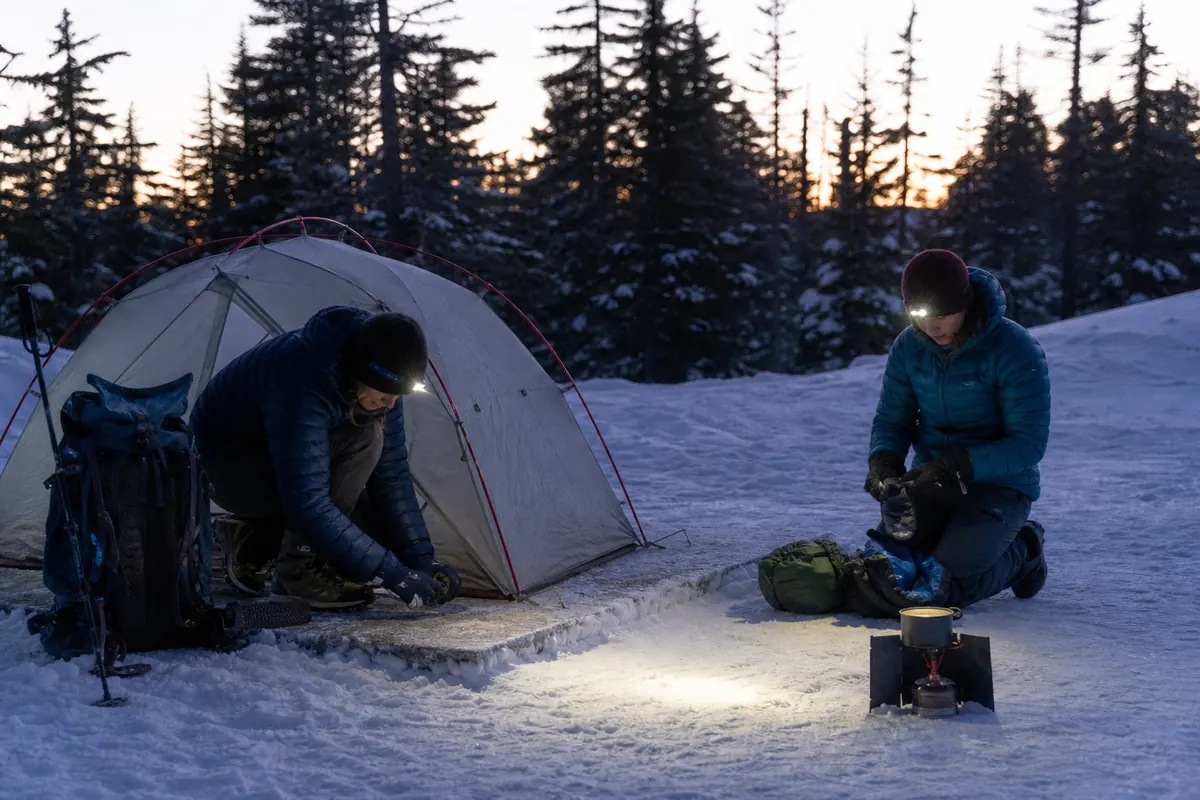
Practice every buckle, knot, anchor, stove control, bottle lid, and repair with gloves. If a task requires bare hands for more than a quick adjustment, change the system before the remote trip.
Small parts need capture. Use pockets, trays, or a closed bag so a valve cap, stake, lighter, or repair piece cannot disappear into snow during the few minutes it is exposed.
Divide work without separating the group. One person can secure shelter while another protects dry gear or prepares water, but everyone should remain close enough to notice cold behavior and changing weather.
You should keep the stove stable, ventilated, and use it only as the manufacturer directs. Never use a combustion stove to heat a closed tent because fire and carbon monoxide can be fatal.
You should eat and drink while your hands still work well. Cold can reduce thirst and appetite even as the body needs energy and liquid for the night.
Stage headlamp, backup light, warm gloves, map, and exit equipment before sleep. Searching for a small item in snow or darkness can expose the whole dry system.
Warmth before comfort. Winter camp succeeds when the group establishes shelter, dry insulation, liquid water, food, and a morning plan before arranging optional details.
How do water, food, and fuel stay usable below freezing?
Start with liquid water. Melting snow requires heat and works better when a small amount of water is already in the pot, so arriving with every container frozen creates a difficult first step.
Protect bottles from freezing through insulation, placement, and frequent use. Wide openings can be easier to manage, and storing bottles upside down can keep ice from sealing the mouth first when the lid is secure.
Hydration hoses can freeze where exposed. A simple bottle system may be easier to inspect and restore in sustained cold.
Many water filters can be damaged if water freezes inside them. Follow the manufacturer's cold-weather directions and use a treatment method that remains reliable for the expected temperature.
| Freeze failure | Early signal | System response |
|---|---|---|
| Bottle mouth freezes | Ice forms near cap while water remains below | Insulate, invert securely, and drink often |
| Hose freezes | Flow slows or stops | Drain after use or use an inspectable bottle |
| Filter may have frozen | Wet filter was exposed below freezing | Follow manufacturer guidance and switch to safe backup |
| Snow will not melt efficiently | Empty pot scorches or yields little water | Begin with starter water and add clean snow gradually |
| Fuel use rises | Boil and melt times exceed the test | Carry measured reserve from cold-condition practice |
| Meal requires too much water | Camp supply falls before morning | Use a tested lower-water meal or change the carry |
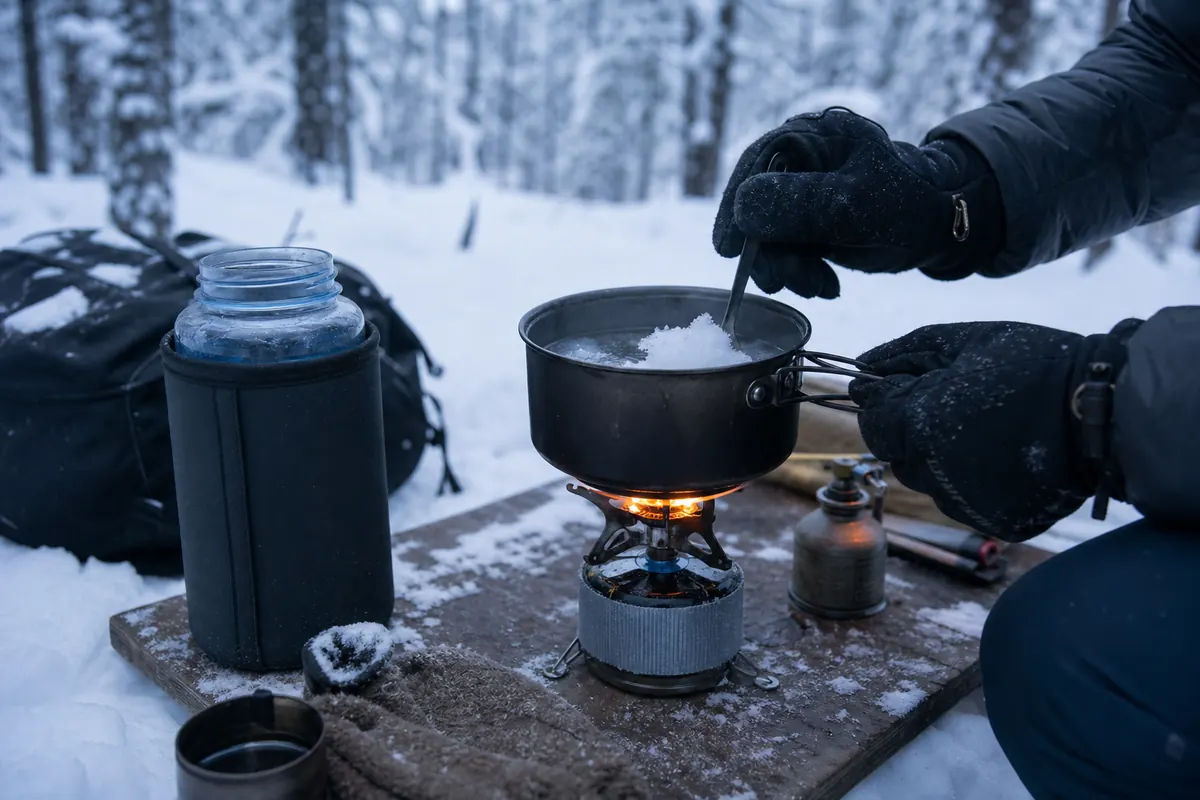
Collect clean snow away from contaminated camp areas and follow local guidance. Snow melting does not automatically make water safe when the source may contain contamination.
Measure fuel during a safe cold rehearsal with the same stove, pot, wind protection, group size, and meals. The water carry calculation must include liquid needed before snow melting begins.
Choose familiar food that remains edible in cold conditions. Some bars become very hard, fatty foods may feel unappealing, and packages can be difficult to open with gloves.
A longer winter trekking itinerary multiplies this water, fuel, packaging, and morning-work burden across several days.
Keep one no-cook option that can be eaten when the stove fails or camp arrives late. It must remain physically edible at the expected temperature and should not depend on large amounts of liquid water.
Plan the morning water before sleep. If every bottle is nearly empty, the group may need to operate the stove and melt snow before it can drink, eat, take medication, or leave.
Preserve enough liquid to start that process safely.
Check bottle lids, threads, and gloves during the rehearsal. Spilled water can wet insulation or footwear and create a more serious winter failure than the lost volume alone.
Protect the liquid chain. Bottles, treatment, stove, fuel, meal water, and morning use must all work through the coldest hours.
How do you test a winter sleep system near its cold limit?
Ground insulation is the foundation. Snow and frozen soil can draw heat from below even when the top insulation feels substantial.
Combine pads only when their use and compatibility are understood. Prevent sliding, protect inflatable components from sharp surfaces, and carry a repair that works in cold conditions.
Use a sleeping bag or quilt, dry sleep clothing, headwear, and shelter ventilation as one tested system. Product labels cannot account for personal metabolism, fatigue, food, moisture, wind, or the actual pad.
Eat and drink before sleep while keeping the water plan intact. Avoid improvised heating methods that can burn skin, damage equipment, start a fire, or create carbon monoxide.
Test one night near a heated building or easy vehicle exit under controlled conditions. The purpose is to observe ground cold, condensation, water freezing, hand function, and morning restart without remote consequence.
Record the coldest conditions actually experienced rather than assuming the product rating was proven. A warmer future route or a more exposed campsite can change the result.
Notice where moisture collected during the test. Frost on the shelter, damp insulation near the face, wet socks, or condensation under a pad points to a specific ventilation, clothing, site, or packing change before the next cold night.
The morning result matters as much as sleep comfort. If hands cannot operate buckles, feet cannot warm in boots, or the group needs far longer than planned to make water, the sleep system did not preserve a functional travel day.
Prove the whole night. Warmth is successful only when the sleeper can think, move, use hands, and restart the route normally in the morning.
What cold signs should end the trip?
Cold stress can begin with persistent shivering, exhaustion, fumbling hands, unusual quietness, poor coordination, or difficulty completing familiar tasks. These hypothermia warning signs require immediate action.
Confusion, memory loss, slurred speech, and drowsiness are serious hypothermia warning signs. The affected person may not recognize the problem or make safe decisions.
Check each other because self-assessment becomes less reliable as cold affects the brain. Use simple questions and observe speech, hands, gait, and behavior.
- Stop and add shelter, dry layers, insulation, food, and appropriate warmth at early cold signs.
- Exit when shivering persists or hand function prevents essential camp tasks.
- Exit when wet insulation, failed shelter, or unusable water removes the overnight reserve.
- Turn around when navigation is uncertain or weather is worsening faster than the exit margin.
- Treat confusion, slurred speech, severe drowsiness, or worsening coordination as an emergency.
- Seek immediate medical help for suspected hypothermia or severe frostbite.
- Do not rub, walk on, or expose suspected frostbite to refreezing risk.
- Keep the rest of the group protected while the response is organized.
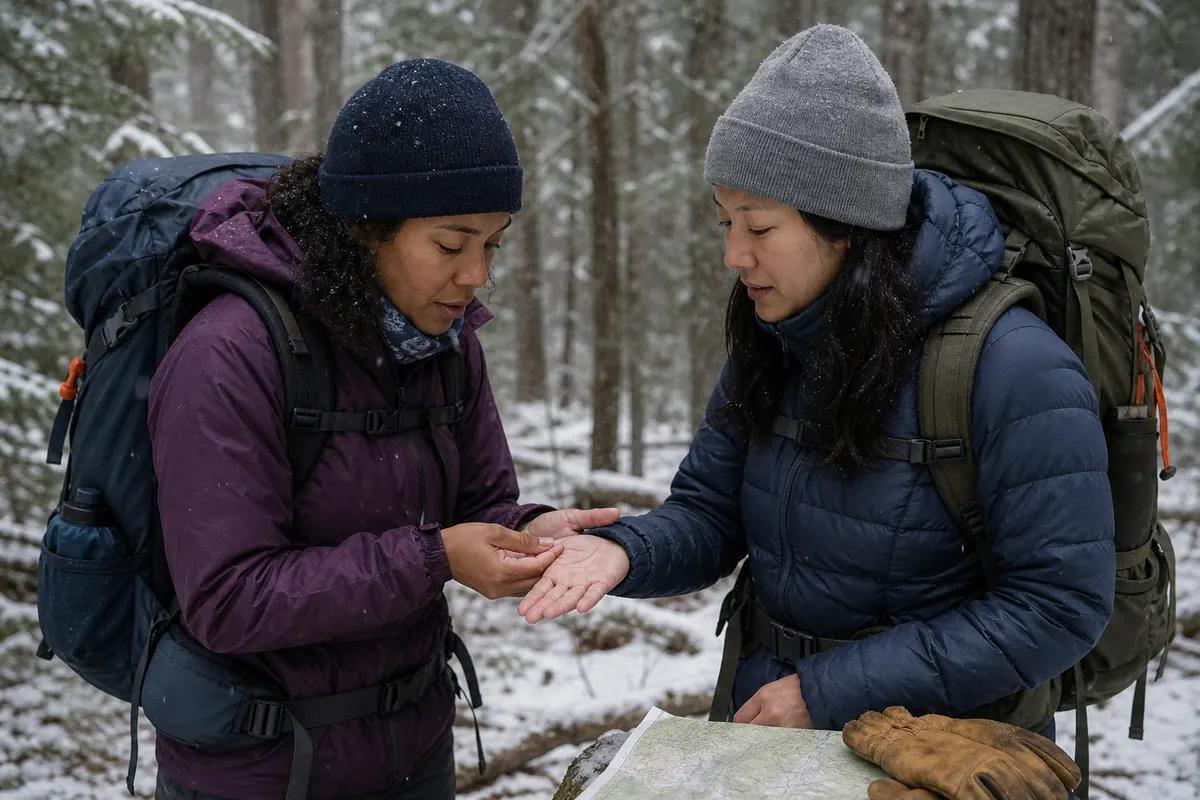
Move to shelter and replace wet clothing with dry insulation when it can be done safely. Use the group's practiced emergency plan and current official first-aid guidance.
Frostbite concern includes numb, pale, waxy, or hard skin, especially on fingers, toes, nose, and ears. Protect the area, prevent refreezing, and obtain medical help.
Do not continue merely because camp is closer than the trailhead. A failed shelter or water system can make camp less protective than the known exit.
Cold changes the decision maker. Act on early signs while the group still has the coordination and judgment to use its exit plan.
A first winter overnight is judged the next morning
Choose one night close to a simple exit and outside avalanche or technical terrain. Prove the three-season overnight system before cold is added.
The test continues through morning. Check whether boots can be worn, water remains liquid or can be made, stove and ignition work, batteries function, shelter packs, and hands can complete every task.
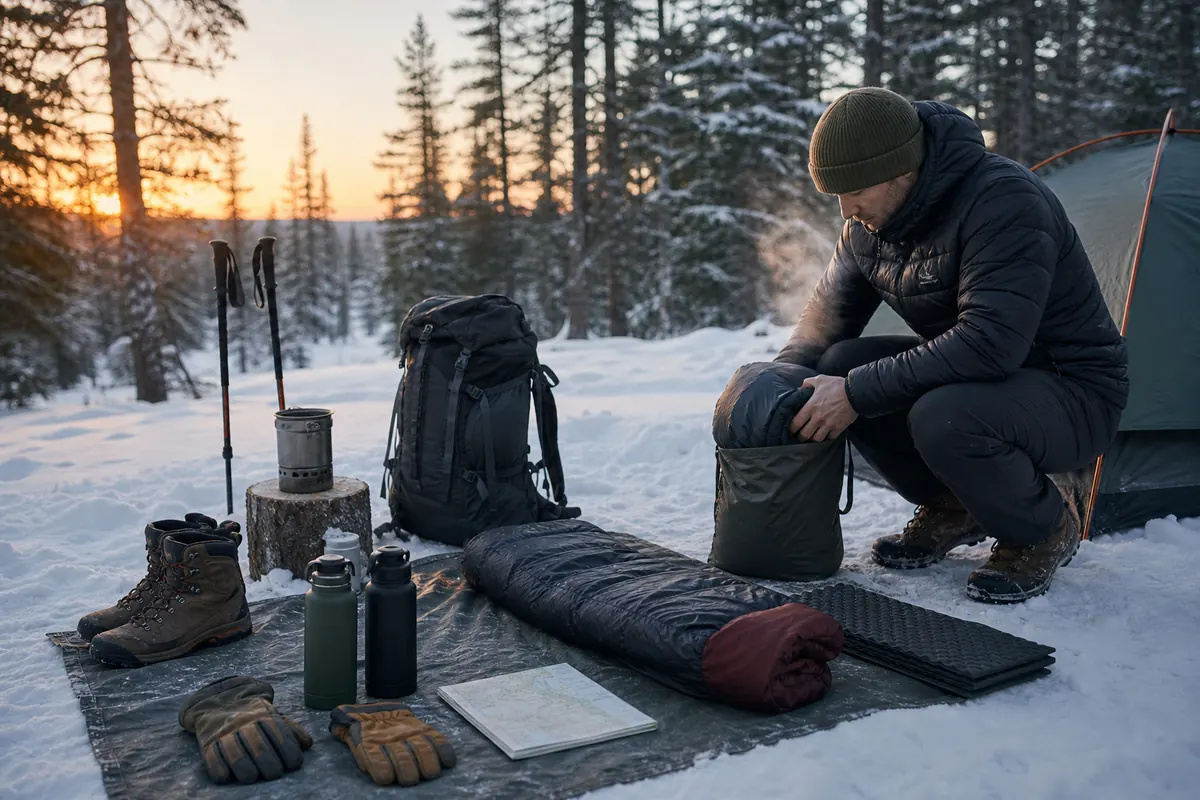
Walk a short controlled section before deciding to add distance. Normal gait, warm feet and hands, clear thinking, working navigation, and enough daylight must return together.
Review snow travel speed, camp time, fuel, water, condensation, food, sleep warmth, battery use, and cold signs. Trace each weak result to its first decision.
Add only one major demand next time. Do not add deeper snow, stronger wind, exposure, and another night together.
Compare the actual lowest temperature and wind with the forecast source used during planning. This creates a record of what the system experienced instead of treating “winter” as one repeatable condition.
Repeat the near-exit test after a major shelter, stove, sleep, footwear, or water-system change. New equipment can alter setup time and hand work even when it promises more warmth.
Restart before expanding. Winter readiness is shown by a controlled morning, not by enduring one difficult night.
Sources
The National Park Service advises checking current weather, trail conditions, avalanche information, route visibility, traction needs, maps, and turnaround options for winter hiking: Winter Hiking Tips.
The NPS winter backpacking checklist includes cold sleep systems, maps, traction or flotation, warm and waterproof layers, stove and extra fuel, freeze protection, treatment, light, first aid, food, and waste supplies: Winter Backpacking Gear Checklist.
The CDC explains that hypothermia can occur even above 40°F when rain, sweat, or cold water chills a person and lists shivering, exhaustion, confusion, fumbling hands, memory loss, slurred speech, and drowsiness as warning signs: Preventing Hypothermia.
The National Weather Service explains wind chill, frostbite, hypothermia, and current cold-weather warnings: Cold Weather Safety. Current local conditions decide snow, ice, avalanche exposure, access, water, weather, fire, permits, and whether the route is appropriate.
Step by stepPractical steps
- Lower the route ceiling from current snow, ice, wind, daylight, navigation, and camp-work demands.
- Match traction or flotation to the surface and navigate independently of visible tread or other tracks.
- Protect a sealed dry core and practice shelter, water, food, and fuel tasks with gloves in cold conditions.
- Set cold, weather, route, water, and equipment exit triggers before departure.
- Prove one controlled night and the complete cold-morning restart near an easy exit before adding difficulty.
AnswersQuestions readers ask
Is winter backpacking safe for beginners?
A first winter overnight should use a very short route, easy exit, non-avalanche terrain, current conditions, practiced snow travel and navigation, and a cold system already tested near help.
Do I need snowshoes or traction for winter backpacking?
It depends on the current surface. Deep soft snow may need flotation, while packed snow or ice may need traction.
Verify conditions and practice the exact device with your footwear and pack.
How do I keep water from freezing while backpacking?
Use inspectable containers, insulation and placement, drink often, protect treatment equipment according to its manufacturer, and test the stove, fuel, snow-melting, and morning-water sequence in cold conditions.
How do I keep a sleeping bag dry in winter?
Seal sleeping insulation and dry sleep clothing inside a dependable waterproof liner, keep snow-covered or damp gear outside that core, and manage shelter condensation through appropriate ventilation.
When should I leave a winter backpacking trip?
Leave for uncertain navigation, worsening conditions, persistent shivering, lost hand function, wet insulation, failed shelter or water, or any condition that removes a safe morning. Suspected hypothermia is an emergency.