
How to Tie a Bowline and Inspect Every Strand
Form the fixed loop, dress the collar and tail, add the required backup, and trace the knot before loading.
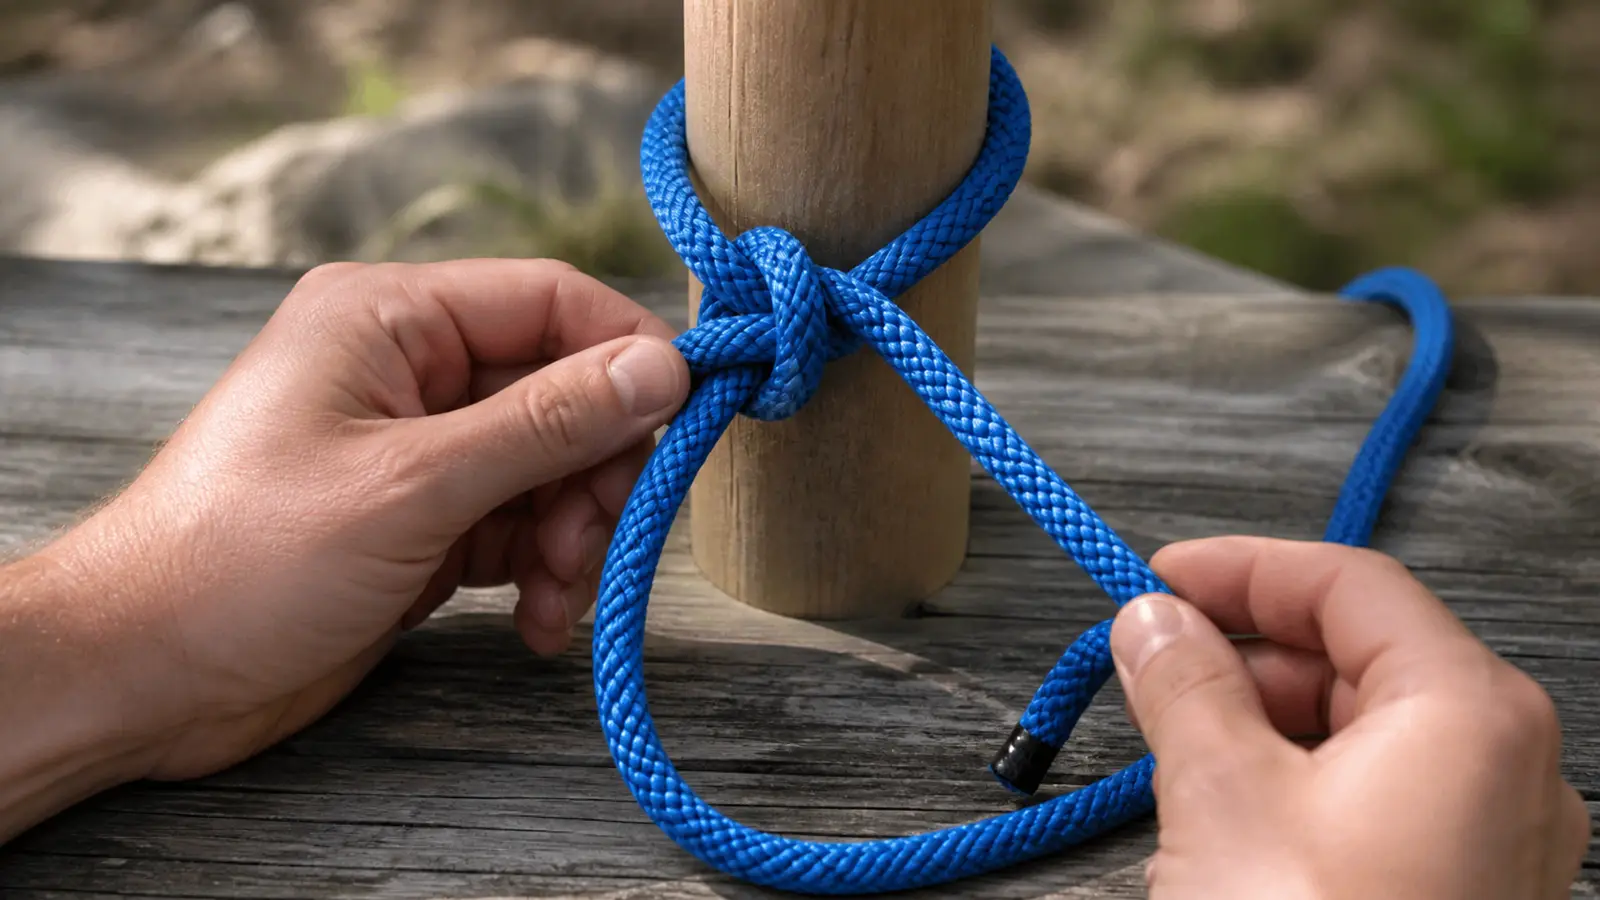
Tie a bowline by forming a small loop, passing the working end through and around the standing part, returning it, then dressing, backing up, and inspecting the knot.
A bowline forms a fixed loop at the end of a rope. You make a small loop in the standing part, pass the working end through it, lead that end around the standing part, return it through the small loop, then dress and inspect the knot.
The finished loop does not tighten like a noose under ordinary lengthwise load. A bowline can still be mis-tied, shake loose while unloaded, capsize under unsuitable loading, or be inappropriate for life-safety use without trained system guidance.
Tie, dress, inspect, then load. A familiar motion is not evidence that the knot is correct.
Why use a bowline, and when should you choose another knot?
The bowline is useful when you need a fixed end loop that remains comparatively easy to untie after loading. Common non-life-safety uses include attaching a guyline to a loop, securing a line around a suitable anchor, or creating a handle in the rope end.
You should choose another knot when the loop must hold ring loading, repeated cyclic slack, a critical side load, or an application whose standard forbids a basic bowline. The bowline also cannot be tied or released normally while the standing part remains loaded.
A bowline often fits an ordinary fixed end loop when it is correctly dressed, backed up as required, and loaded in the intended direction. It is the wrong tool for a sliding loop or constant adjustment under load.
A mid-rope loop usually needs another knot or a trained bowline-on-a-bight procedure.
Human suspension and fall arrest belong to a complete certified system. Do not rely on a bowline when the rope material, diameter, stiffness, condition, or expected force remains unknown.
Name the job before selecting the knot. If you cannot describe the expected direction, slack cycles, consequence, and inspection method, you do not yet know whether a bowline belongs there.
Which rope parts must you identify first?
Place the rope so you can see the working end, standing part, desired large loop, and small tying loop. You should leave enough tail to complete the path, dress the knot, and add the required backup.
- Working end
- Free rope end that travels through the knot
- Standing part
- Long section that carries away from the knot and normally receives the main load
- Large loop
- Fixed useful loop created by the finished bowline
- Small loop
- Temporary crossing in the standing part that controls the knot structure
- Collar
- Curved rope section that wraps around the standing part
- Tail
- Working-end length remaining after the knot is dressed
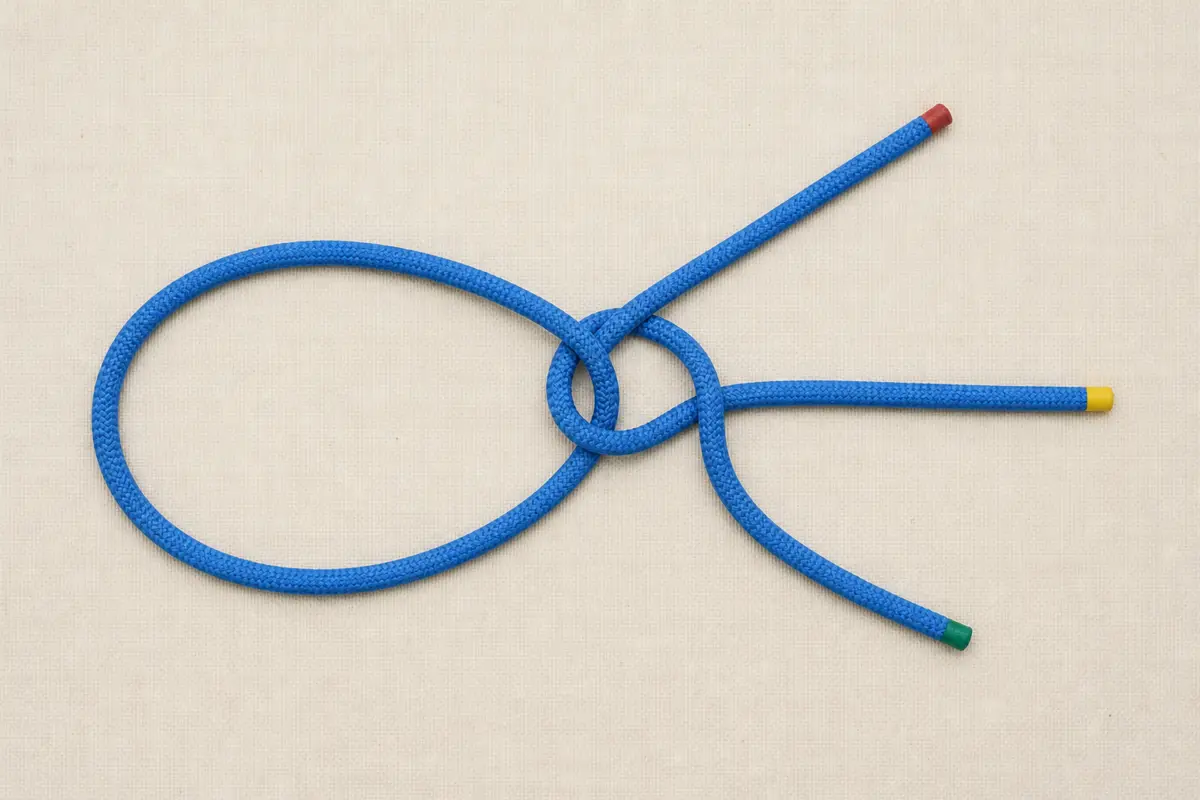
Practice with a supple rope of visible diameter before using small cord or a stiff utility line. Thin or slippery material can hide crossings and behave differently under load.
Add the backup required by the application or training system.
How do you tie the standard bowline step by step?
Begin slowly with the rope lying flat. You should stop whenever a strand twists over another in a way you cannot explain.
- Size the final loopLay out enough rope for the useful loop and the required tail
- Form the small loopCross the standing part over itself in the orientation shown by your trusted method
- Bring the working end throughPass it up through the small loop from the correct side
- Circle the standing partLead the working end behind and completely around the standing part
- Return through the small loopFollow the exit path beside the strand that first entered
- Dress the collar and setSettle every strand visibly under controlled hand force, then add the required backup
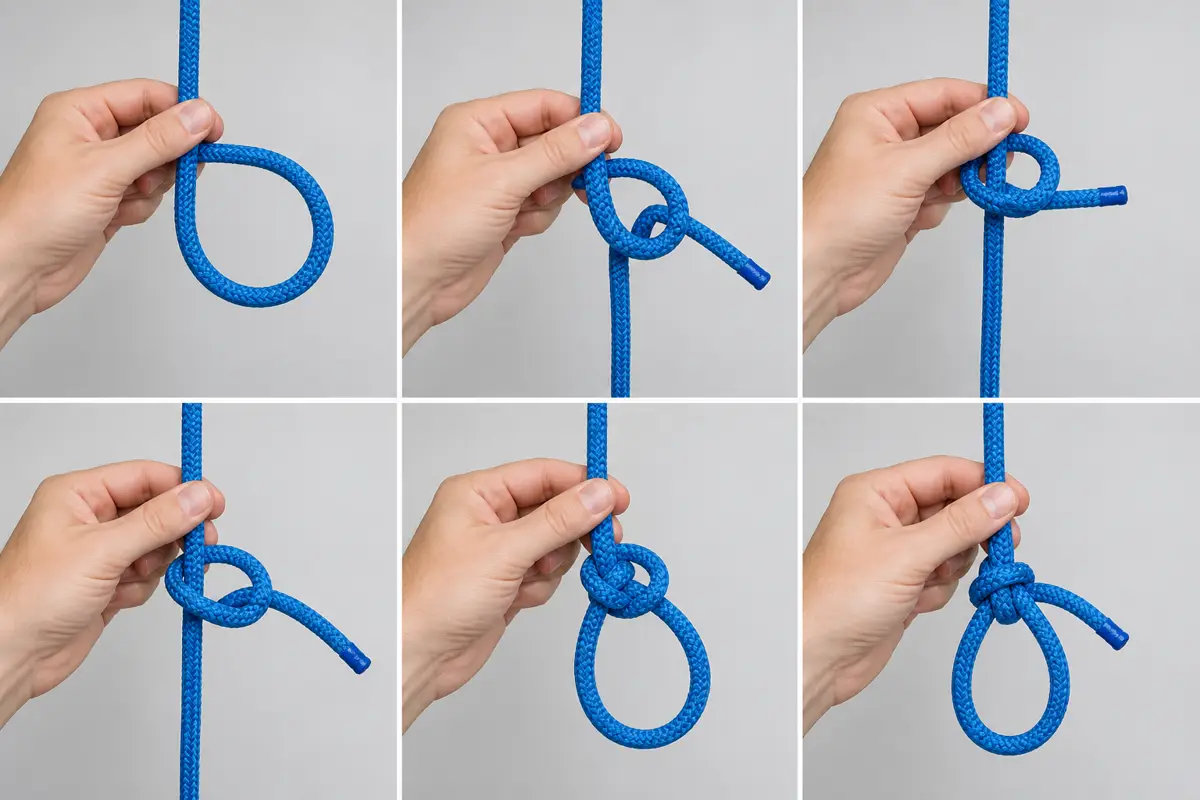
Do not use the rabbit-story mnemonic as your only inspection. It can help recall motion, but it does not prove the small loop orientation, collar, tail, or final loading path.
What should a correctly dressed bowline look like?
The knot should lie compactly without hidden crossings. Its collar wraps the standing part, the two legs of the large loop leave together, and the working end follows the expected finished position for the version you were taught.
- Trace one rope :: Follow the working end through every turn without jumping across strands
- Confirm the collar :: Verify that it wraps the standing part and is not an accidental slip loop
- Inspect the large loop :: Both legs leave the knot cleanly without crossing or twisting
- Check the tail :: Ensure the required length and backup remain after dressing
- Test the intended job :: Confirm load direction and loop size against a trusted finished model
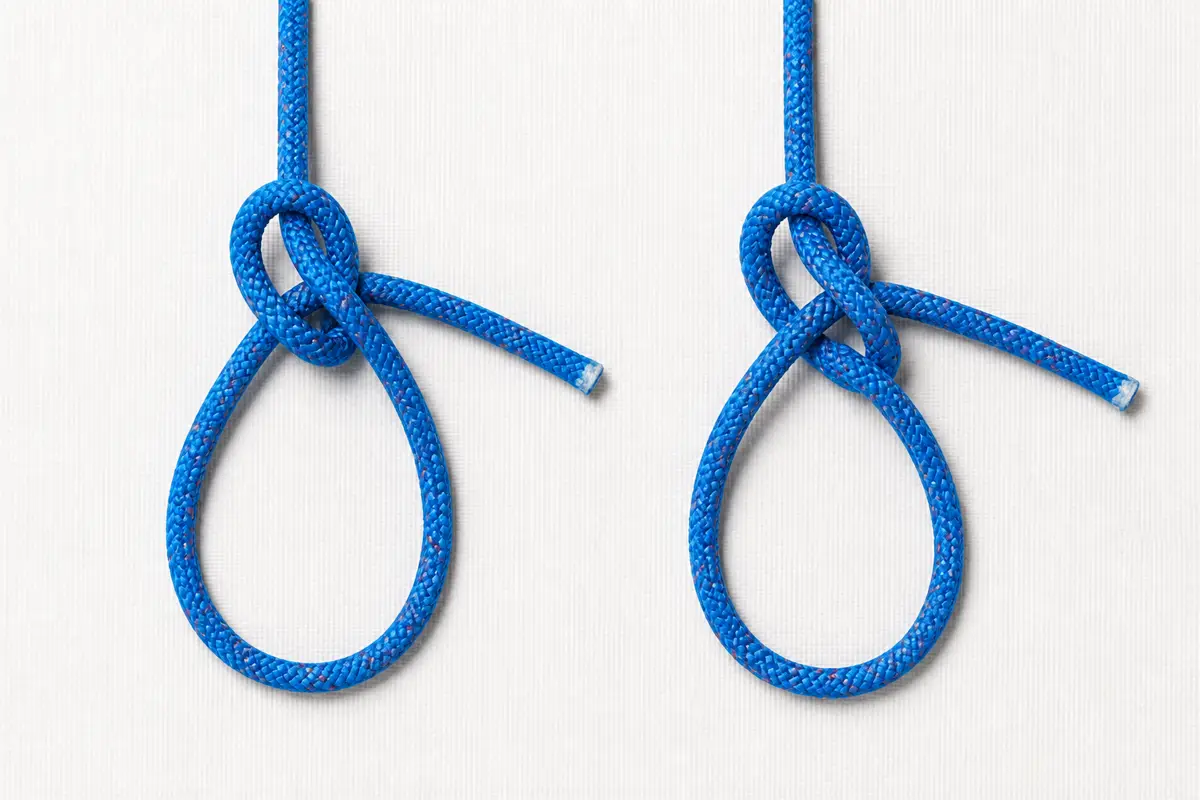
You should set the knot before applying a meaningful load. Pulling hard on a loose shape can lock a mis-tie into a convincing but unsafe form.
Why can a bowline shake loose?
An unloaded bowline can flex as the rope moves, especially in stiff, slick, or small-diameter material. Repeated transitions from slack to tension may walk the tail through the knot.
Follow the backup specified by the activity, rope system, and instructor. A double-overhand stopper around the appropriate adjacent strand is common in some systems, while other systems use a different knot or prohibit the basic bowline.
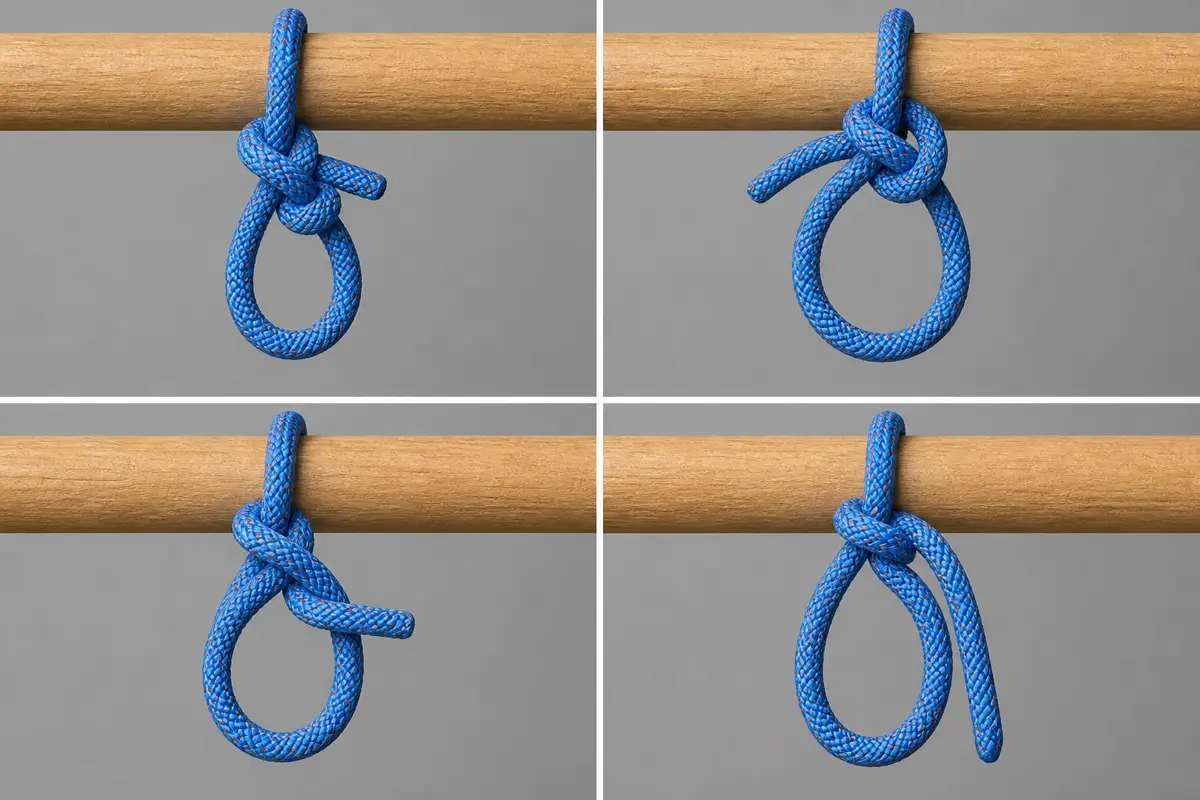
A short tail or loose dressing gives the knot room to change before the load stabilises it. Stiff or slippery rope can resist compact dressing, while repeated slack cycles may move the tail through the structure.
Ring loading pulls the loop in a different direction from the ordinary lengthwise use. The specified backup must restrain the right strand because an extra decorative knot does not correct an unsuitable loading pattern.
You should retire rope that is cut, glazed, chemically contaminated, severely abraded, or otherwise outside its inspection criteria. A correct knot cannot restore damaged rope strength.
How should you load and untie the bowline?
Apply force gradually along the standing part and the intended large-loop legs. Stop when the knot changes shape, the tail moves, the anchor shifts, or the load direction differs from the plan.
The bowline is valued partly because it can remain easier to untie after load than many simple knots. You still need the load fully removed and controlled before breaking the collar.
Trace the knot before loading, remove slack at hand tension, and watch the tail and anchor as force increases. After unloading, inspect for movement, glazing, compression, and anchor damage before you untie anything.
Confirm that the rope cannot move, drop, or release another object. Then bend the unloaded collar away from the standing part and work the knot loose.
Never place fingers inside a tightening loop or between loaded rope and an anchor. You should use body position that stays outside the line of pull.
Which mistakes create a bowline look-alike?
Reversing the small loop can produce a slip knot or a differently loaded structure. Passing the end around the wrong strand can leave a knot that resembles a bowline from one angle but fails the trace test.
| Observed result | Likely mistake | Correction |
|---|---|---|
| Large loop slides when standing part is pulled | Small loop or return path is wrong | Untie completely and rebuild from the first crossing |
| Tail exits from an unexpected side | Working end travelled around or through the wrong strand | Compare the full rope path with a trusted model |
| Collar does not wrap the standing part | The working end circled the wrong component | Remove the knot and repeat the circle step |
| Knot looks correct only under tension | Dressing, tail, or crossings remain unresolved | Rebuild and hand-test before loading |
Touch the working end and follow the same strand through the small loop, around the standing part, back through the loop, and out to the tail.
Restart when the path cannot be traced continuously.
Speed makes look-alikes harder to notice. You should practice identical deliberate movements until inspection remains clear without the mnemonic.
How do you practise until the knot is dependable?
Practice first with full light, a stable stance, and a trusted finished model beside you. Then vary loop size, rope orientation, and hand position without changing the knot structure.
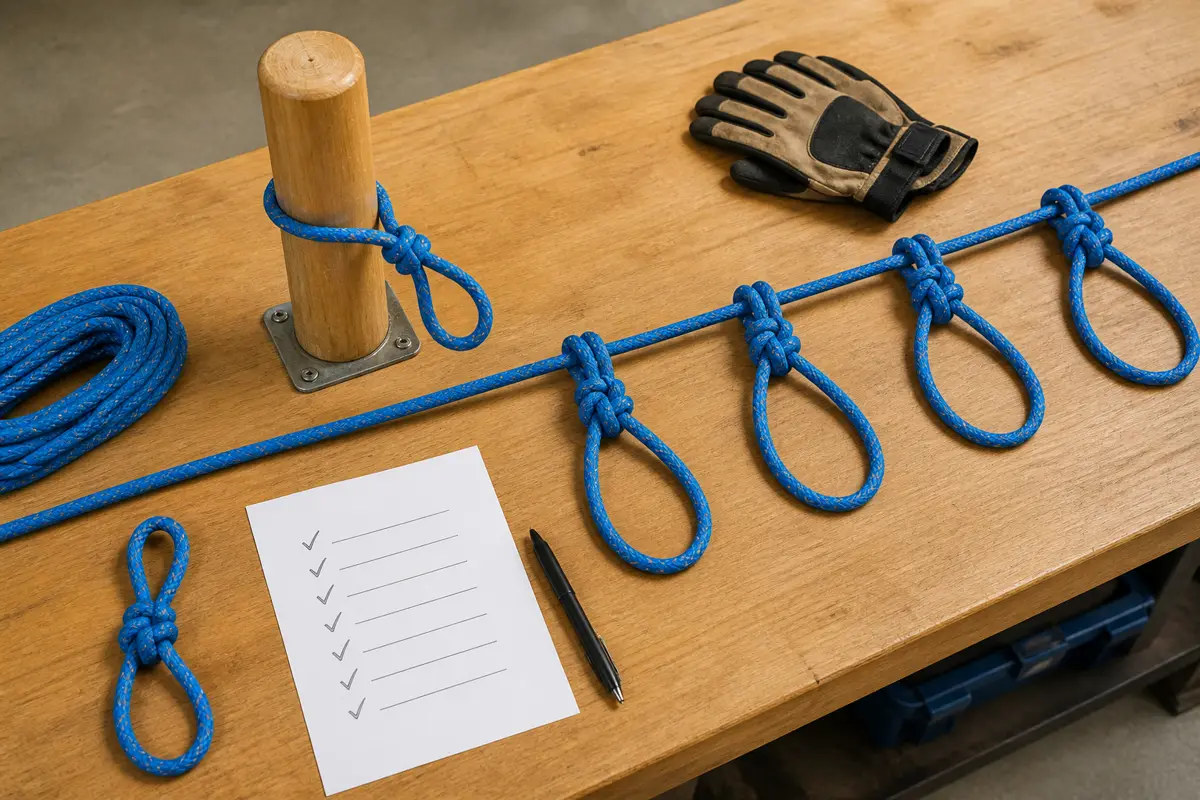
Tie slowly from several viewing angles and around a suitable object, then add the required backup before applying controlled utility force. Use gloves only after you can still trace every crossing by sight and touch.
Untie each example and inspect the rope for compression, heat, abrasion, or developing damage. Count a repetition only when you can explain every strand and the finished knot matches the trusted model.
You should seek qualified instruction for any system where failure can injure a person. This page supports recognition and ordinary utility practice, not certification for climbing or rescue.
Sources
The basic sequence and instructional practice follow Scouting America material on the bowline knot and its illustrated worksheet.
Use limits, unloading behaviour, inspection concerns, and backup cautions follow the Animated Knots bowline guide and REI's climbing knots guide.
Step by stepPractical steps
- Identify the working end, standing part, loop, and tail
- Size the final loop and reserve enough tail
- Form the small loop in the correct orientation
- Pass the working end through and around the standing part
- Return it through the small loop
- Dress the collar and loop legs under hand tension
- Add the required backup and inspect before loading