
How to Orient a Map and Verify It Against the Ground
Align north, rotate map and compass together, match several features, and keep orientation separate from position.
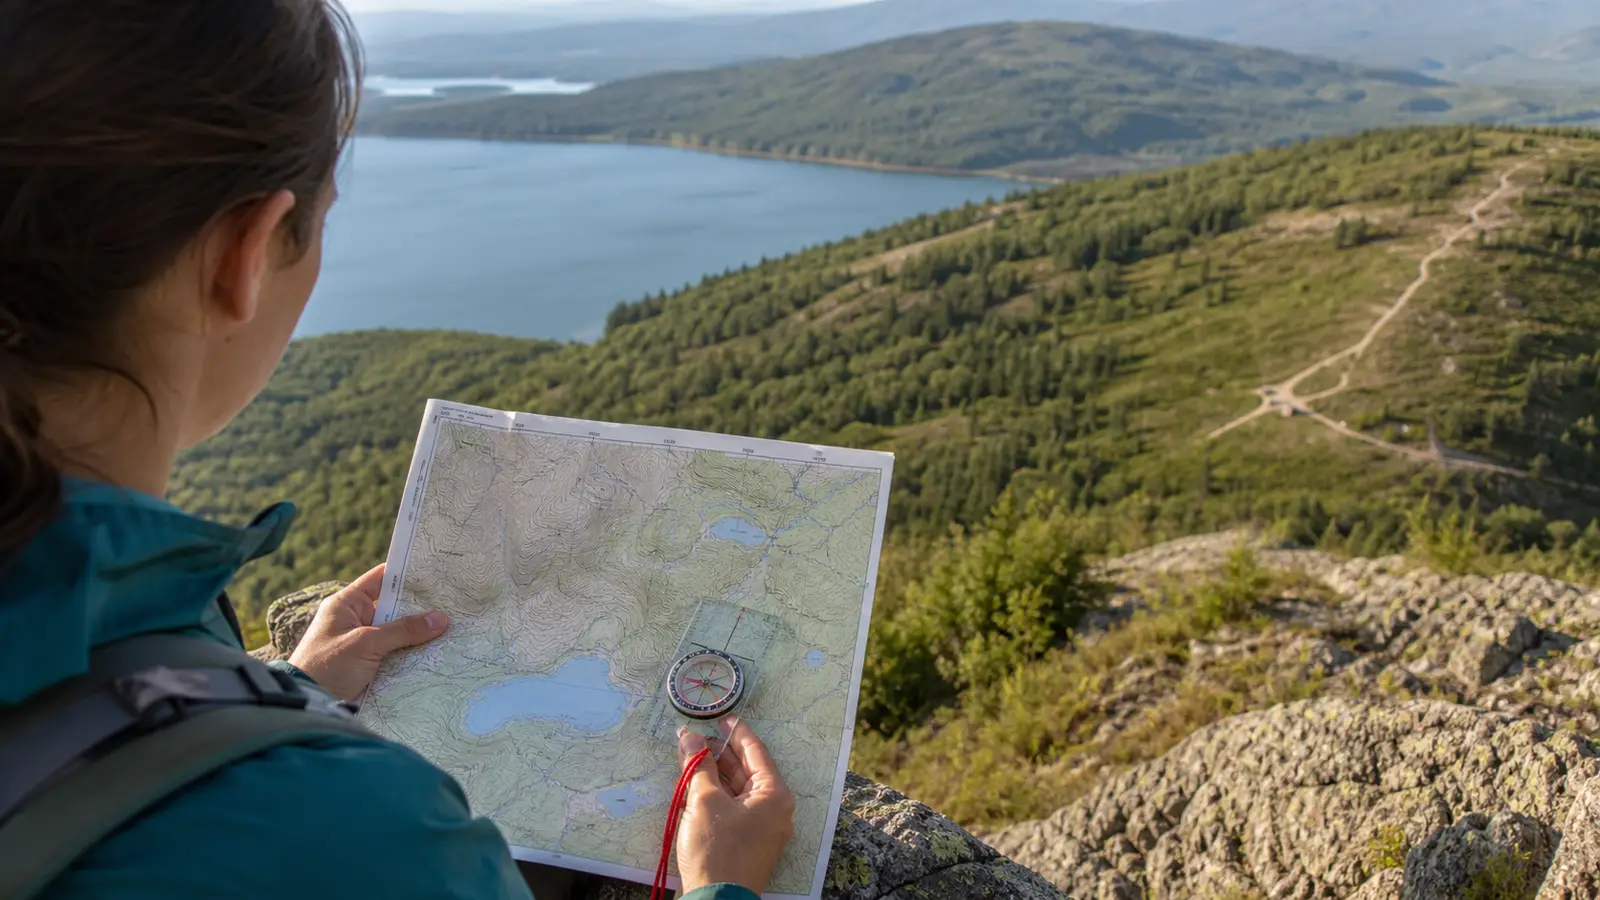
Orient a map by aligning its north reference with a correctly set compass or reliable terrain, then confirm the result with several independent features.
Orienting a map means rotating it until map north and the mapped features point in the same directions as the ground around you. You can do that with a baseplate compass or by matching reliable terrain, then confirm the result with more than one feature.
An oriented map makes left, right, ahead, and behind correspond to the page. It does not prove your position or replace a bearing, so keep those as separate navigation checks.
Rotate the map, then verify the match. The useful orientation is the one that explains several visible features at once.
What does an oriented map tell you?
An oriented map gives you a shared directional frame between symbols and terrain.
Once the topographic pattern is aligned, a ridge drawn to your right should also lie to your right on the ground.
- Map north
- The direction shown by the map's north reference and grid
- True north
- Direction toward the geographic North Pole
- Magnetic north
- Direction a magnetic compass points under current local conditions
- Declination
- The angle between true or grid north and magnetic north for the place and date
- Orientation versus position
- Rotating the directional frame does not establish your location or the bearing for the next leg
You should identify which north reference the map and compass procedure use before rotating anything. A correct-looking needle can still align the page to the wrong reference when declination is ignored or applied twice.
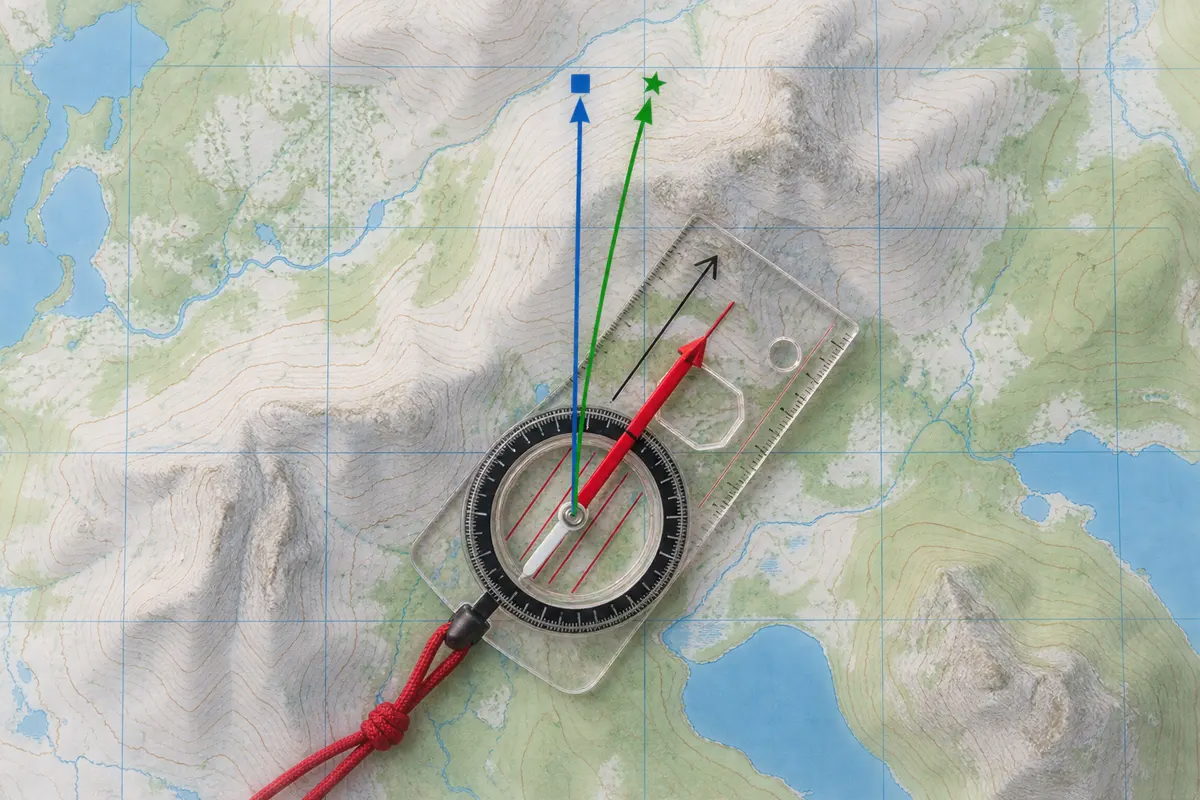
Orientation is most valuable before a junction decision or terrain comparison. It lets you point to the route on the page and then point toward the same route in the landscape.
How do you orient a map with a compass?
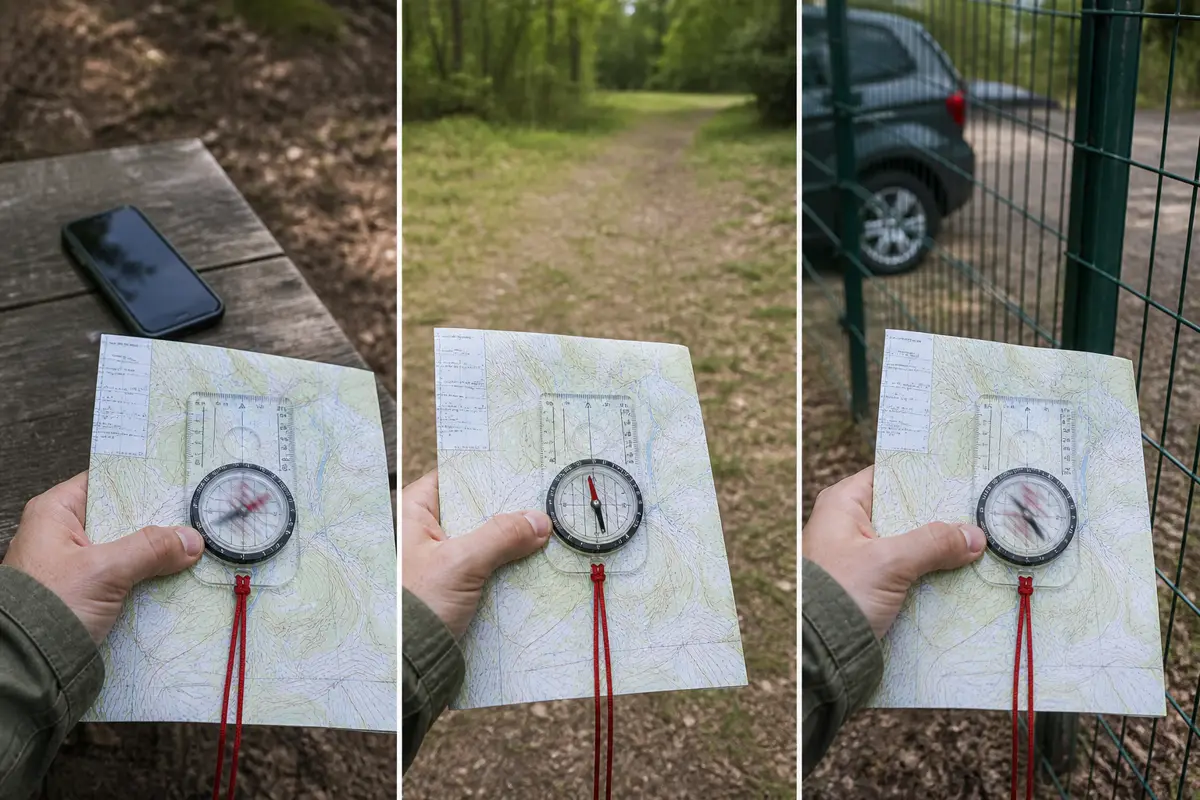
Move away from metal, electronics, vehicles, power lines, and other objects that can deflect the needle. You should hold or place the map level enough for the compass capsule to move freely.
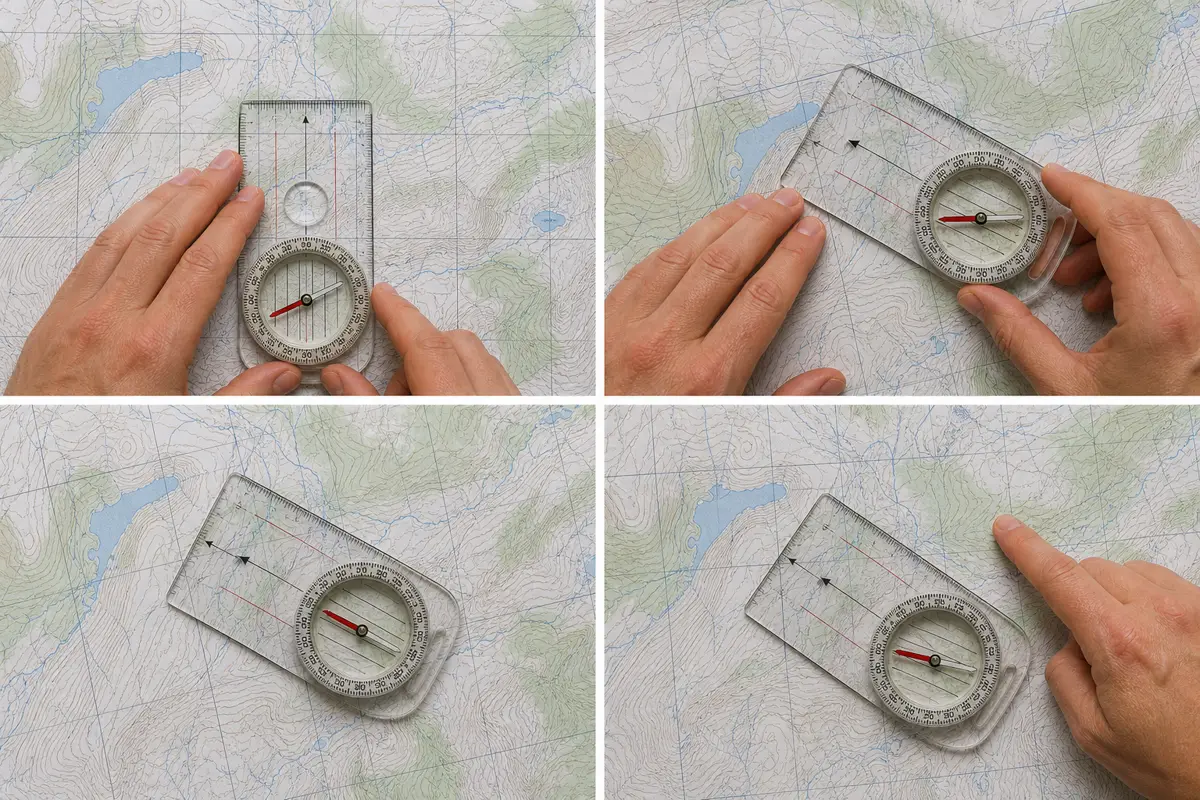
- Read and set the referenceFind the map's north system, then apply current declination by one method only
- Place the baseplateAlign its long edge or orienting lines with the map's north-south grid
- Rotate map and compass togetherKeep their relationship fixed while turning the whole page
- Settle the needleStop away from interference and wait until the magnetic needle becomes stable
- Match needle and housingPut the correct needle end inside the orienting arrow without changing the map-compass alignment
- Check the groundCompare at least two mapped features with the directions now shown on the page
Do not turn only the compass housing after the baseplate has been aligned. The page itself must rotate with the compass until the north references agree.
When the needle will not settle, move several steps and check again. A deflection that changes with position points to interference rather than a new north direction.
Which declination mistake rotates the map the wrong way?
Declination varies by location and changes over time. You need a current value from an appropriate mapping authority or land manager, not a number remembered from another trip.
Write the current value and its source on a removable trip note before departure. You can then repeat the same setup at every stop without reconstructing the sign convention under pressure.
With an adjustable compass, set current declination and align it to the printed grid without applying the angle again. With a fixed compass, use the documented manual offset once.
Confirm that dated magnetic lines remain current before following them.
Do not set declination on the compass and also rotate away from the map grid by the same amount.
When the reference or value is unknown, do not guess. Orient cautiously from distinctive terrain and obtain current information before using the result for a precise movement decision.
A phone compass can also be affected by calibration and nearby objects. Treat it as another instrument to verify, not as proof that the physical compass is wrong.
Can you orient a map from terrain alone?
You can rotate a map from terrain when the features are distinctive, visible, and correctly identified. Long ridges, valleys, shorelines, roads, power lines, and a clear junction usually work better than one rounded summit.
Linear feature
Align a road, river, shoreline, or ridge axis with the same line on the map
Paired landmarks
Rotate until two identified peaks or structures fall in their mapped relative directions
Valley junction
Match the joining angle and the direction each drainage continues
Slope shape
Compare spurs, re-entrants, cliffs, and changes in steepness rather than one contour
Start with the largest unmistakable pattern, then use a second independent feature. A single feature can produce a convincing 180-degree error when both ends look similar.

If the ground and page cannot be reconciled, stop naming features. Return to the last confirmed position or collect better evidence before making the map fit your expectation.
How do you verify that the map is not reversed?
Check both direction and sequence. A lake may sit west of you, but the near shoreline, inlet, ridge behind it, and trail approach must also occur in the mapped order.
- Use two independent features :: Avoid two points that belong to the same mistaken ridge or road
- Check near and far :: Combine a nearby junction or slope with a distant ridge, tower, or shoreline
- Compare left and right :: Confirm the landscape order rather than only the general compass direction
- Read contour shape :: Match valleys, spurs, saddles, and steepness to the visible ground
- Recheck and name uncertainty :: Move away from metal, confirm the needle independently, and mark anything still unconfirmed

You should repeat the check after a major turn, a long featureless segment, or a move into poor visibility. A map can remain physically aligned while your assumed position drifts.
When is orientation not enough to make the next move?
Orientation cannot identify your location when many places share the same shape. It also cannot tell you whether a visible trail is the intended trail without position, route, and feature evidence.
When visibility removes the planned features, preserve the last known position and shorten the distance between checks. You may need a bearing, pacing, GPS confirmation, or a retreat to a recognised feature before moving again.
Before departure, record current declination and identify the map's north system. At the trailhead, orient the page and prove the setup against obvious access features.
Refresh the frame at every major turn. When evidence conflicts or visibility is about to close in, stop movement and preserve the last confirmed position before selecting another navigation method.
Practice at a place with obvious roads, water, and relief before depending on the method in forest or fog. You should be able to explain why the orientation is correct without pointing only to the needle.
Sources
The north references and four map-orientation methods follow Natural Resources Canada guidance on orienting a topographic map.
Compass placement and map-reading context follow the U.S. Geological Survey resources on using a compass with a topographic map and finding your way with map and compass.
Step by stepPractical steps
- Read the map north reference and current declination
- Move away from magnetic interference
- Align the compass baseplate with map north lines
- Rotate the map and compass together
- Settle and align the needle
- Verify at least two independent terrain features