
Camping in the Rain Starts With a Protected Dry Zone
Keep one dry recovery area protected while runoff, shelter order, cooking limits, storm signals, and wet closeout shape the rest of camp.
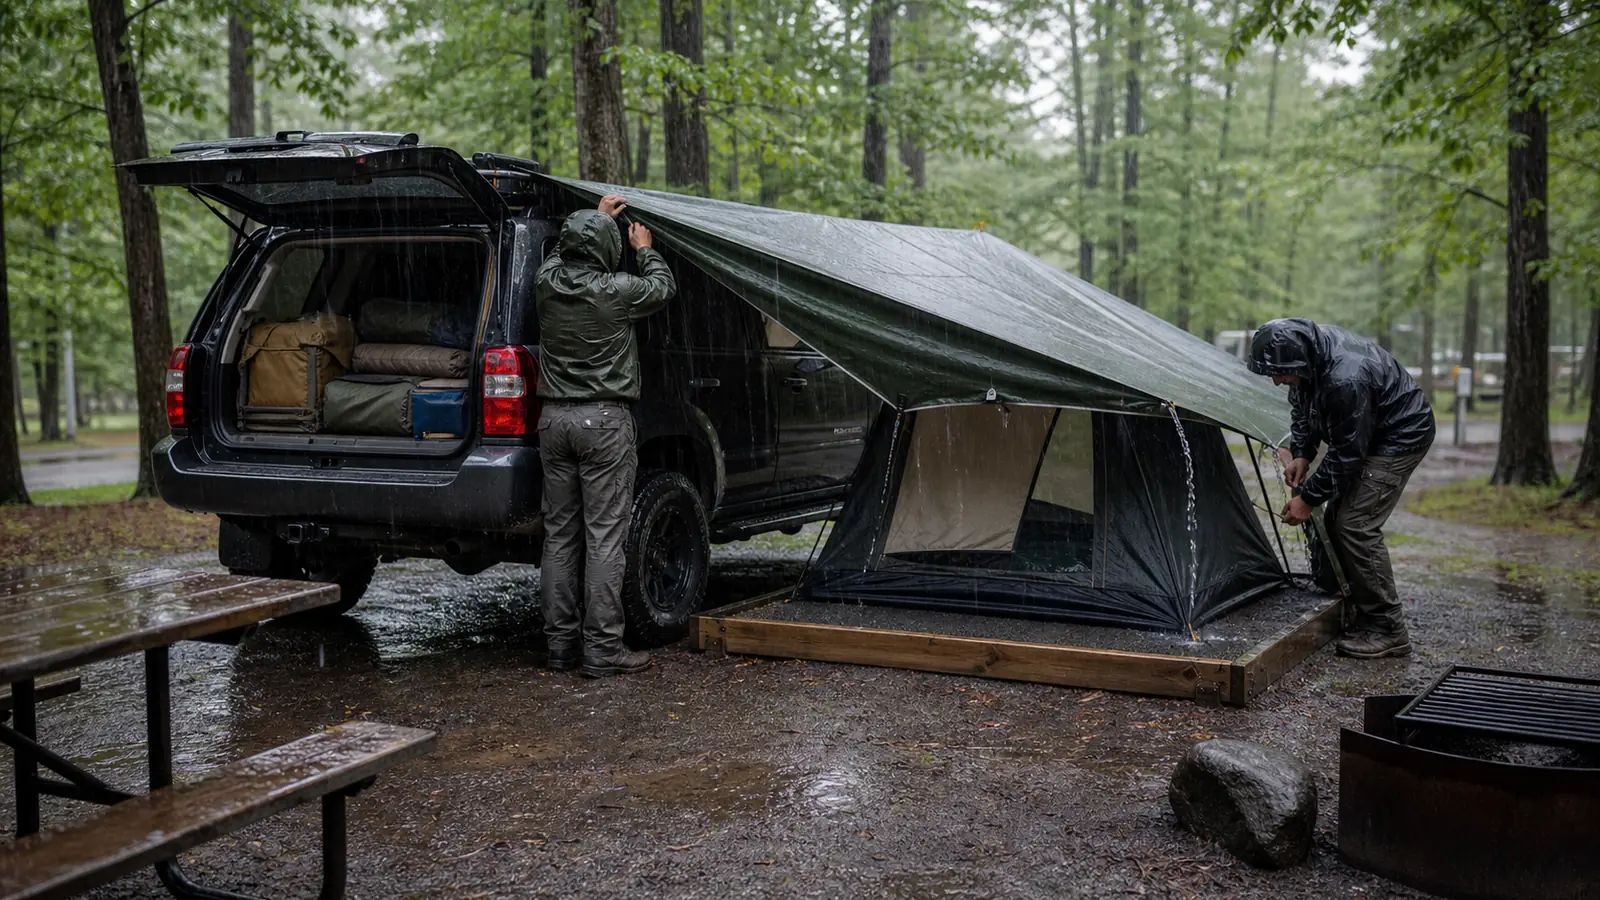
Camping in the rain can work when the site drains safely, the shelter goes up before bedding is exposed, and one dry clothing and sleep reserve never joins wet camp chores. Leave when lightning, rising water, dangerous wind, or cold behavior makes the campsite unreliable.
Rain does not enter camp through one obvious leak. Water can arrive under the tent, ride in on clothing, reach bedding during setup, condense inside the shelter, or spread from wet gear during packing.
The practical goal is simple. Protect one dry recovery area first, then let every wet task happen outside that boundary.
The rain system works only while sleep insulation and one change of clothing remain dry.
Wet-weather camp rule
Protect the dry zone before food, chairs, games, or a fire receive any time.
How does rain change the order of camp setup?
The camping basics still apply, but a fair-weather arrival often starts with unloading. In rain, unloading everything creates more exposed surfaces and makes it hard to tell which bag is still dry.
Keep shelter, rain protection, stakes, guylines, ground protection, and one light source reachable without emptying the vehicle or all the bins. The camping sleep kit stays sealed until the shelter has a roof, a floor that is not collecting water, and a controlled entrance.
Wet work and dry recovery need different hands, clothing, and storage.
The jacket used while pitching can drip beside the entrance. It should not lie on the sleeping pad or share a bag with the dry layer reserved for bed.
Use the vehicle as a controlled staging point, not a room with every door open. Remove only the shelter bundle, stakes, rain clothing, and first light.
Close doors between trips so wind-driven water does not soak seats, maps, electronics, or the dry clothing needed for departure.
Give every container a wet-side or dry-side destination before it leaves the vehicle.
A sealed sleep bag can move directly into the finished tent. Stakes, muddy footwear, jackets, and the shelter bag return to a washable wet area.
This prevents a small opening mistake from spreading water through the entire load.
Keep a dry cloth at the protected entrance for hands and small drips. It is not a towel for wiping the tent floor, cookware, or wet gear.
Once it becomes saturated, move it to the wet side instead of using it near insulation.
The first-trip camp plan must change when daylight is short. Shelter and the sleep system outrank cooking because a cold meal can be replaced with ready food, while soaked insulation may end the night.
Put the first-night clothing and sleep insulation in waterproof inner bags before leaving home. The shelter can then be assembled around sealed gear instead of relying on a car door, picnic table, or tent body to keep loose bedding dry.
If two people are present, name the dry-gear handler before unloading.
That person moves sealed bedding only after the fly is stable. Everyone else can work on stakes, drainage checks, and vehicle access without opening the protected bags.
Order controls exposure. Do the task that protects later tasks before opening gear that depends on it.
Rain moves across a campsite in predictable lines
Flat ground can still be the bottom of a shallow basin. Look beyond the space needed by the tent and ask where water from the surrounding ground will travel.
Debris lines, smooth channels, bare soil below a slope, matted vegetation, and puddles after a short shower show where runoff already moves. Avoid low depressions and the outlet of any natural drainage path.
Look up as well.
Rain and wind can release damaged branches, while saturated soil may weaken trees. A legal assigned pad does not cancel an overhead hazard, so speak with campground staff when the reserved space is unsafe.
| Visible clue | What it can mean | Better action |
|---|---|---|
| Debris line across the pad | Water has crossed the site before | Choose a legal pad outside the flow |
| Low bowl with damp soil | Water can collect under the floor | Move to higher durable ground |
| Bare channel from a slope | Runoff concentrates here | Stay out of the channel and outlet |
| Leaning or damaged branch | Wet wind may add load | Use another legal site or ask staff |
| Footpath beside the tent | People will track water and mud past the door | Keep the entrance away from traffic |
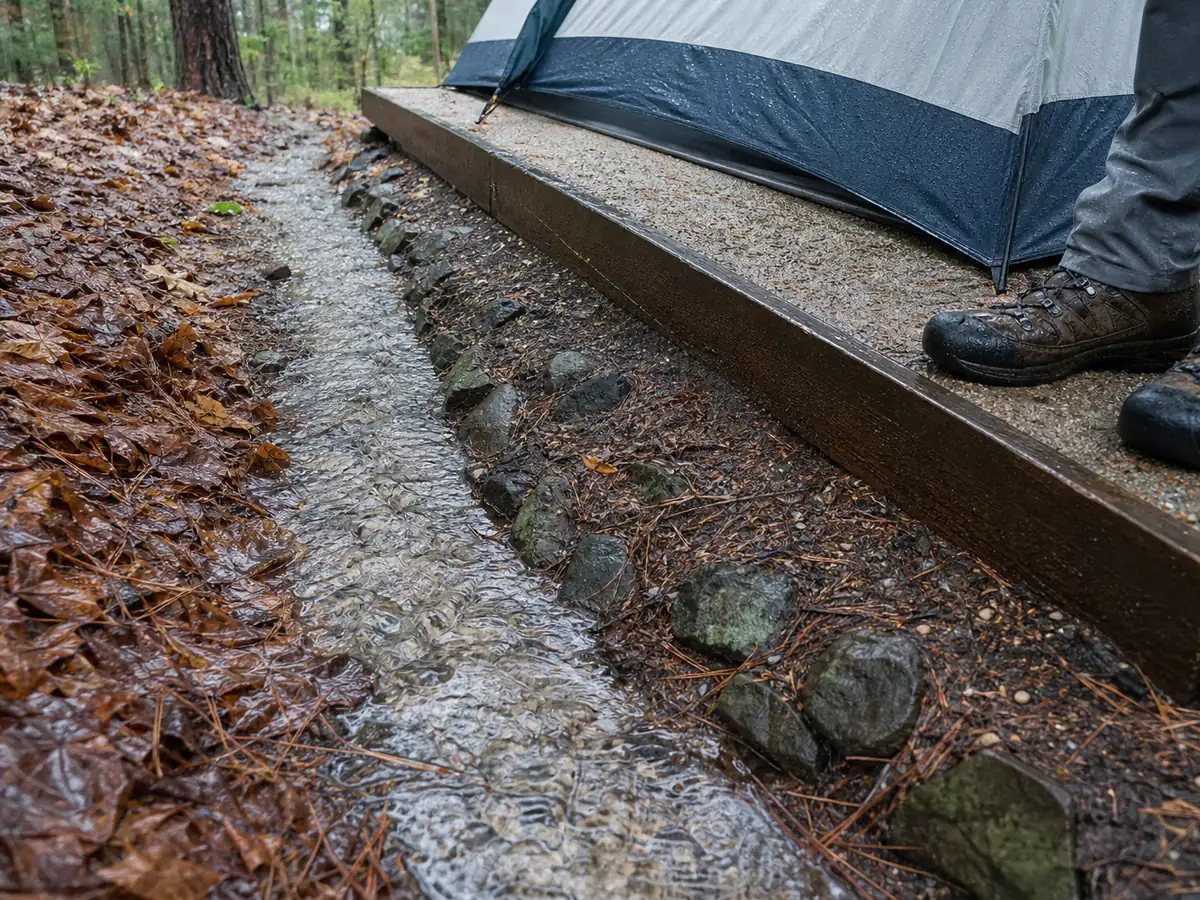
Never dig a trench around the tent. It damages the site and confirms that the chosen spot cannot handle the water naturally.
Use the full shelter footprint when judging the pad.
A dry corner does not rescue a door in a shallow channel. That placement belongs among the common camping mistakes because the shelter can flood from below even while the fly works.
Avoid digging trenches, moving large rocks, or cutting vegetation to repair a poor choice. Good camping etiquette keeps the assigned surface intact, and those changes still may not control runoff.
Move to a legal pad that already sheds water.
Follow the water path before deciding where the tent belongs.
How should you pitch a tent while protecting dry bedding?
Stage the shelter under the vehicle hatch, a permitted tarp, or the smallest protected area available. Count poles, stakes, guylines, and rainfly parts before carrying the bundle onto the pad.
Tent designs differ.
Follow the manufacturer order, especially when the fly cannot stand before the inner tent. The goal is to reduce exposure time, not invent a pitch that weakens the shelter.
- Stage the shelterKeep every required part together under cover.
- Prepare the padRemove movable sticks and confirm runoff will not cross the floor.
- Build the weather layerAttach or position the fly as early as the design allows.
- Tension the shelterStake and guy it for the expected wind without blocking paths.
- Control the entranceKeep wet footwear and jackets outside the sleeping area.
- Open the beddingBring pads and insulation inside only after the floor and roof are protected.
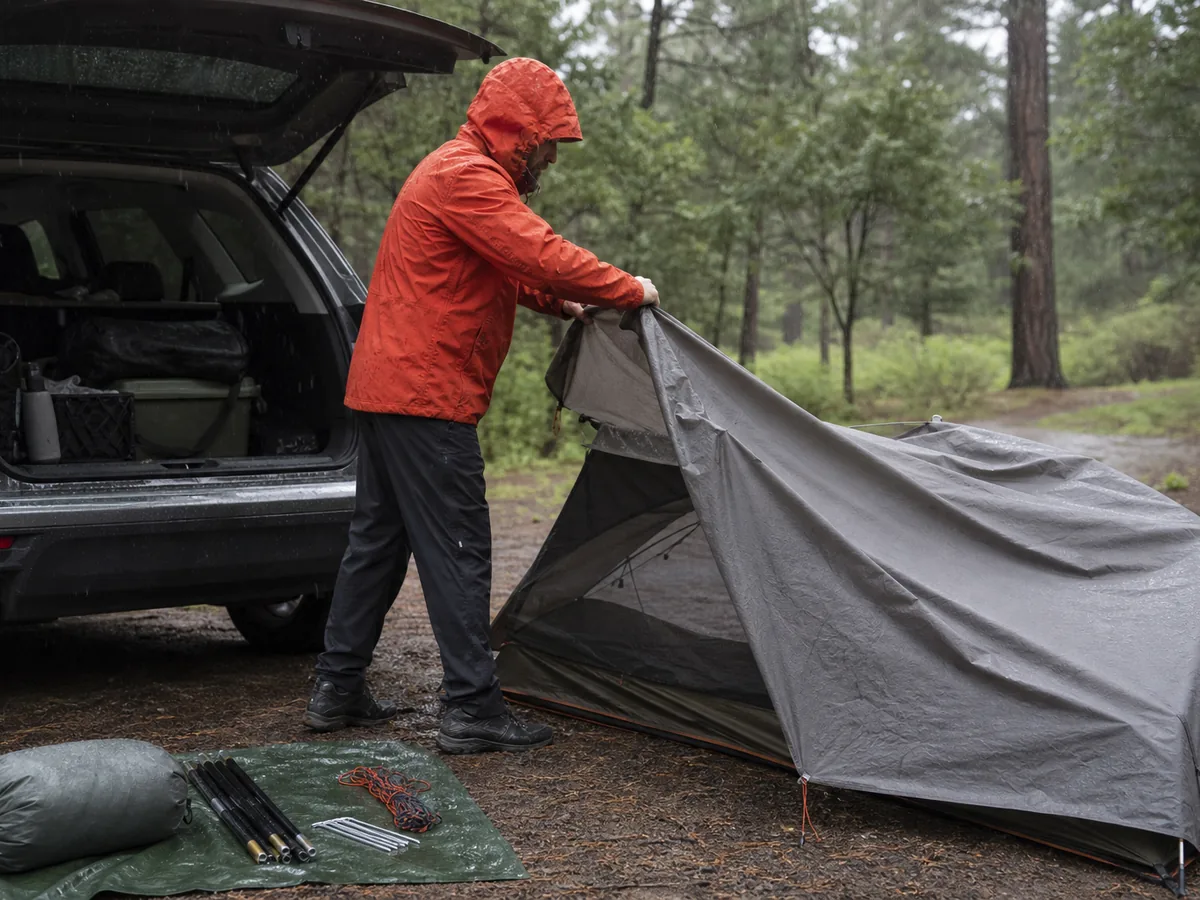
Keep the footprint fully beneath the tent floor. Exposed groundsheet material can catch rain and direct it under the shelter.
Ventilation still matters. Closing every opening can trap moisture from breathing and wet clothing, so use the vents and spacing built into the shelter while keeping direct rain out.
Find the water pattern before calling it a leak. Fine droplets spread across the inner roof usually point to condensation.
Water that starts at one seam, zipper, attachment point, or damaged coating points to a local entry that needs the repair method approved for that shelter.
A wet floor edge can come from outside the tent. Check whether the footprint extends beyond the floor, runoff reaches the pad, or a door drip lands inside.
Moving loose gear away from the wall will not solve water traveling underneath.
Contact can move water too. A sleeping bag pressed against a damp inner wall can wet one small area even while the fly keeps rain out.
Restore the designed gap between layers and keep bulky gear away from the fabric.
Use a dry cloth to collect small interior droplets, then return it to the wet zone. Do not wipe the whole shelter with the cloth reserved for hands or bedding.
Once a cloth is saturated, it can spread more water than it removes.
Watch the same spot through several minutes of rain after each correction. If water continues to enter, reaches insulation, or collects faster than it can be controlled, protect the dry reserve and use the planned exit.
The pattern tells you what to fix. Condensation needs ventilation and separation.
A local entry needs a suitable repair, while water moving under the floor means the site or footprint setup has failed.
Keep the tent door oriented away from the strongest expected wind when the assigned pad allows it. The exposure check used for winter camping helps here because wet fabric, wind, and lost insulation can combine even above freezing.
Before carrying bedding inside, press on the structure, inspect every connection, and watch one minute of runoff. This short pause catches a missing clip, loose stake, reversed fly, or door drip while the insulation remains sealed.
Expose bedding last. A quick setup is useful only if the shelter remains stable and ventilated.
Some dry layers never touch a camp chore
Choose one complete dry set for sleep. Seal the base layer, socks, hat, and any required insulation separately before departure.
Work clothing handles setup, cooking, toilet trips, and water collection. If it becomes wet, it stays in the wet zone rather than borrowing from the sleep reserve too early.
- Sleep clothing remains sealed until the bed is ready.
- Sleeping bag or quilt travels inside a waterproof liner or sealed container.
- Wet jackets have a defined hanging or storage place away from bedding.
- One towel or cloth handles entry drips without touching sleep insulation.
- Footwear stays sheltered from new rain without entering the clean sleep area.
- Morning clothing is protected from both rain and tent condensation.
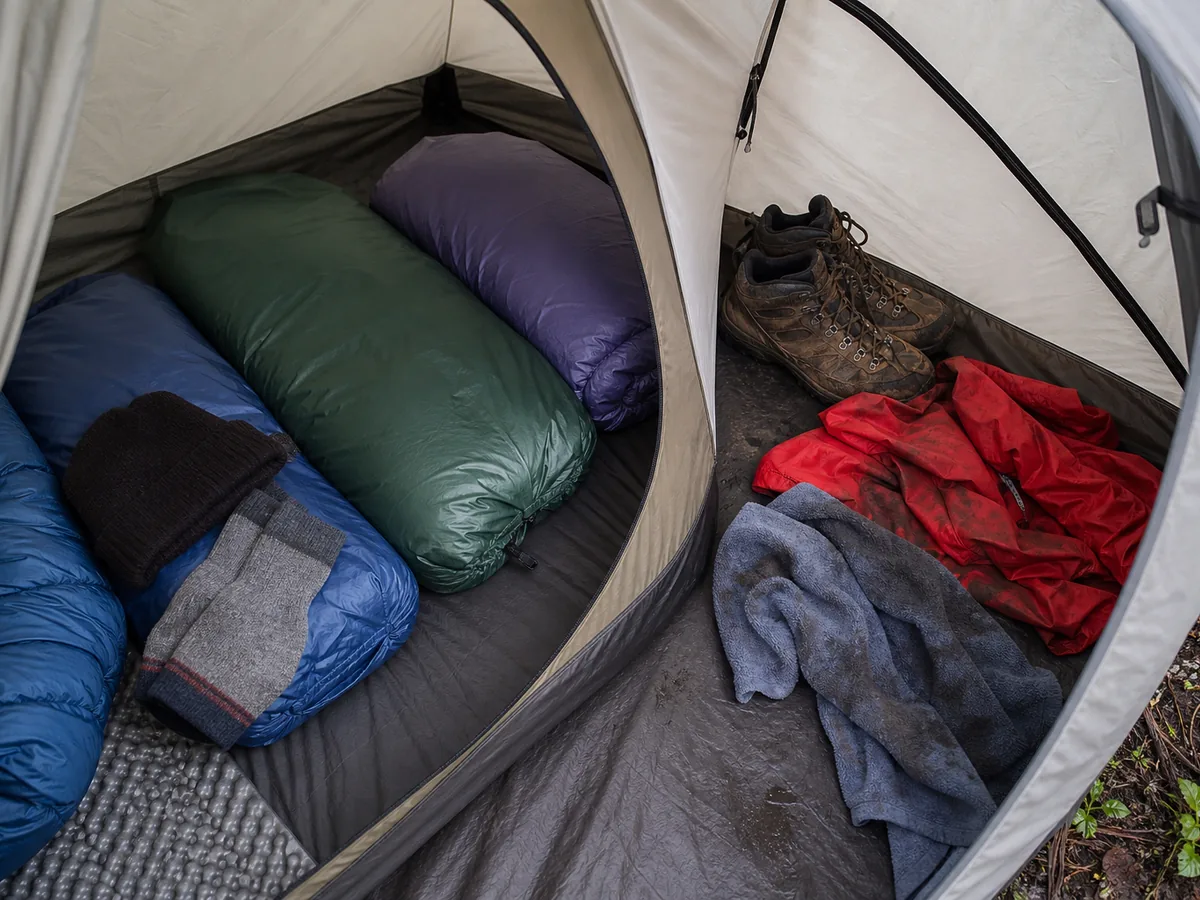
Change before the body cools. A person who waits until shivering has started may need more than a dry shirt, especially when wind and fatigue are present.
Choose the reserve around the likely exit. The solo camping plan makes this especially strict because one person must protect dry socks, a warm layer, usable footwear, and the ability to drive without help.
Store wet daytime gear away from the reserve and sleeping insulation.
A vestibule can manage dripping boots and rainwear only when ventilation, stove separation, and door access remain safe. Do not hang soaked items where they press against the tent wall or drip across the bed.
Dry means reserved. An item is not part of the reserve if normal camp work can soak it.
When should a rainy camp switch to a no-cook meal?
Use a stove only in the legal, stable, ventilated setting allowed by its instructions. Never move fuel-burning equipment into a tent, vehicle sleeping area, or enclosed shelter to escape rain.
Rain makes simple food more valuable. A familiar meal with little cutting, one pot, limited cleanup, and a no-cook fallback reduces the time hands and supplies remain exposed.
A fire is optional. Current restrictions, wind, wet fuel, smoke crossing other sites, and the need for complete extinguishment can all make it a poor plan.
Prepare a no-cook option before departure, not after the stove becomes unusable.
It should require no draining, complicated opening, or long exposure of food in rain. Keep one meal and the necessary utensil together so the kitchen can close quickly.
Rain also changes cleanup. When camping with a dog, bowls, pet food, wet towels, and waste add more scented and damp items that still need legal storage or disposal.
Food can become simpler without weakening shelter, warmth, or sleep.
A few storm signals end the night early
Rain alone does not decide whether to stay. Thunder, lightning, fast runoff, rising water, falling branches, damaging wind, cold behavior, and failing access each change the answer.
If you hear thunder, move to substantial shelter according to local guidance. A tent, picnic shelter, or isolated tree does not provide reliable lightning protection.
Thunder or lightning
Move to substantial shelter and follow official warnings.
Water crossing the site
Leave the flow path before depth or speed increases.
Branches falling or trees moving heavily
Get away from the hazard and use a safer structure or location.
Shelter losing shape
Reduce exposure before poles fabric or anchors fail.
Persistent shivering or confusion
End the activity and get appropriate help.
Road or gate deterioration
Leave while the known route remains usable.
Do not wait for water inside the tent to prove that drainage is failing. Moving early is easier while gear is organized, the vehicle is accessible, and the route is still visible.
Cold rain deserves a lower limit than warm drizzle. Wetness, wind, low activity, hunger, and fatigue can combine before anyone reports feeling severely cold.
Set the departure route before sleep. Families camping with kids should keep keys, light, footwear, rain clothing, medication, and the shortest toilet route ready before everyone settles.
When thunder is present, use the conservative response described in hiking safety tips and follow current official guidance. A tent does not provide the protection of a substantial building or hard-topped vehicle.
Leave on the first clear failure rather than waiting for several systems to fail together.
How do you pack a wet camp without soaking dry gear?
Separate wet shelter parts from dry bedding before anything enters the vehicle. A single wet fly can spread water through a tightly packed bin.
Pack the sleeping system first while it is protected. Take the shelter down in the order its design allows, keeping poles, stakes, and guylines together so no small part disappears into wet ground.
- Seal dry bedding before opening the shelter to rain.
- Bag the wet fly tent body and ground protection separately.
- Count stakes poles guylines and repair parts at the site.
- Keep wet footwear and clothing away from dry vehicle seats and sleep gear.
- Complete an empty-site sweep for trash food and small equipment.
- Open and dry every wet item fully as soon as conditions allow at home.
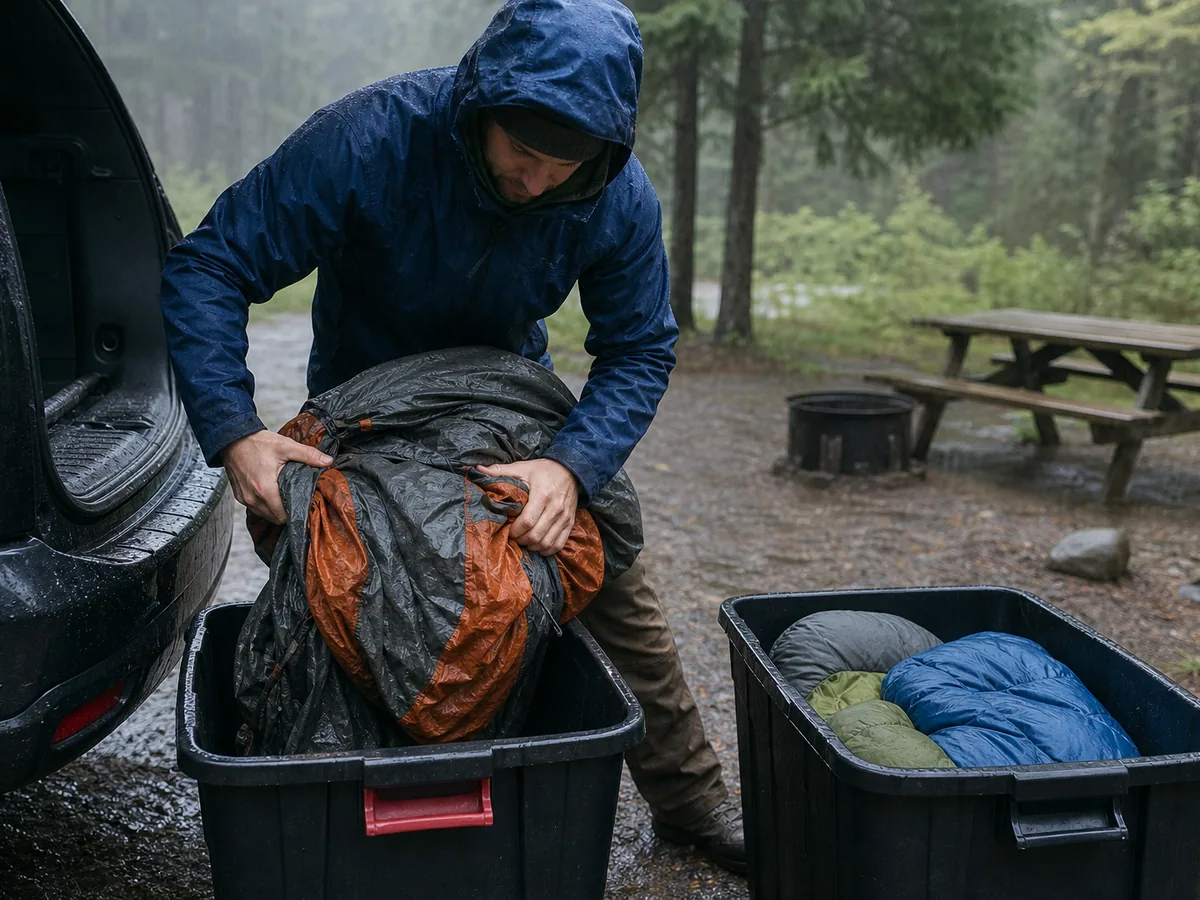
Do not store damp fabric after the trip. Spread it out promptly and inspect the floor, seams, cords, and stakes before repacking.
Separate wet fabric from dry bedding before it enters the vehicle. The separation used for backpacking in rain also protects the car ride and the next night's insulation.
Record what failed while the details are fresh. If cold, fumbling, confusion, or unusual drowsiness appeared, the trip crossed into hypothermia warning signs and needs appropriate help rather than a simple gear note.
The next dry trip starts at home when every wet part is dried and reset.
What should you recheck before sleeping in a rainy camp?
The shelter can stay standing while the camp still loses its ability to recover. Check the dry reserve again before dinner and before sleep, not only after the tent goes up.
Count the dry sleep layers, usable pads, protected bedding, dry socks, working lights, and footwear needed for the exit. A jacket that has become damp during toilet trips no longer belongs in the same category it held at arrival.
Press the sleeping bag or quilt at the foot, hood, and wall-facing side. Small damp patches often appear where insulation touches the tent, where a door drips, or where a wet hand reached inside.
Check the floor beneath the pads. Water collecting at one edge can spread under a sleeper before the top of the pad feels wet.
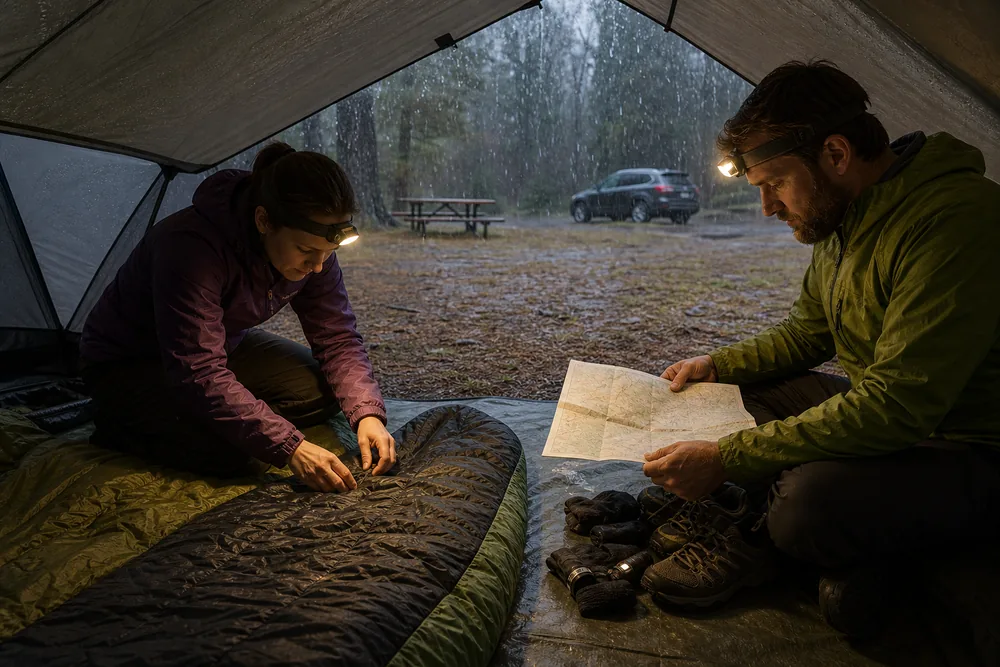
Move the cause before trying to warm the whole space. Restore ventilation, shift bedding away from fabric, redirect a door drip, or leave a pad that is receiving runoff.
The group also needs enough dry hand function for the morning. Protect one pair of socks and the layers needed to pack, drive, or walk out, even when that means wearing a less comfortable damp layer during an evening chore.
Recheck the road, gate, stream, and low ground that form the exit. Several more hours of rain may change the route home even when the campsite itself remains usable.
Set a specific next check after a heavy rain band or a forecast update. Waiting until dawn gives rising water, softened ground, and colder equipment more time to remove choices.
If the dry reserve can no longer support sleep and the exit, close camp while the group still has normal coordination and a clear route. A vehicle nearby is useful only while people can load it safely and the road remains passable.
Recovery has a limit. Leave when the remaining dry equipment cannot support both the night and a controlled exit.
Sources
The National Park Service covers drainage, overhead hazards, tent placement, food separation, and making camp before dark: Finding and Setting Up a Campsite.
The National Weather Service explains lightning risk and why tents and open shelters are not safe lightning locations: Lightning Safety.
The National Park Service also covers weather, food, fire, wildlife, and water decisions during a stay: Camping Safely.
Use current local alerts because rainfall, closures, fire rules, and access can change before arrival.
Step by stepPractical steps
- Read the site for runoff, overhead hazards, and wet foot traffic before unloading.
- Stage and pitch the weather layer before exposing bedding.
- Protect a sealed dry clothing and sleep reserve from all camp chores.
- Simplify cooking and keep fuel-burning equipment in its legal ventilated setting.
- Leave for lightning, rising water, dangerous wind, cold behavior, or failing access.
- Separate wet shelter parts from dry sleep gear and dry everything fully at home.
AnswersQuestions readers ask
Can you camp safely in the rain?
Yes, when the legal site drains safely, the shelter and sleep system are tested, one dry reserve stays protected, and the forecast remains below the group's storm and cold limits. Leave for lightning, moving water, dangerous wind, falling branches, cold behavior, or deteriorating access.
How do you keep a tent dry while setting it up?
Stage every shelter part under cover, prepare the pad before opening the bundle, attach the rainfly as early as the tent design allows, control the entrance, and bring bedding inside only after the roof and floor are protected.
Should you put a tarp under a tent in rain?
Use a correctly sized footprint when the shelter calls for one, but keep every edge beneath the tent floor. Exposed material can collect rain and direct it under the shelter.
Can you cook inside a tent when it rains?
Do not use fuel-burning stoves, grills, or heaters inside a tent, vehicle sleeping area, or enclosed shelter. Cook only in the legal ventilated setting allowed by the equipment instructions, or use the no-cook meal.
What should make you leave a rainy campsite?
Leave for thunder or lightning without substantial shelter, water flowing through the site, falling branches, damaging wind, shelter failure, persistent shivering, confusion, or a road and gate that may become unusable.