
Winter Hiking Gear Checklist for Cold, Snow, and Ice
Choose winter hiking gear from the surface, wind, temperature, daylight, and consequences of an unplanned stop.
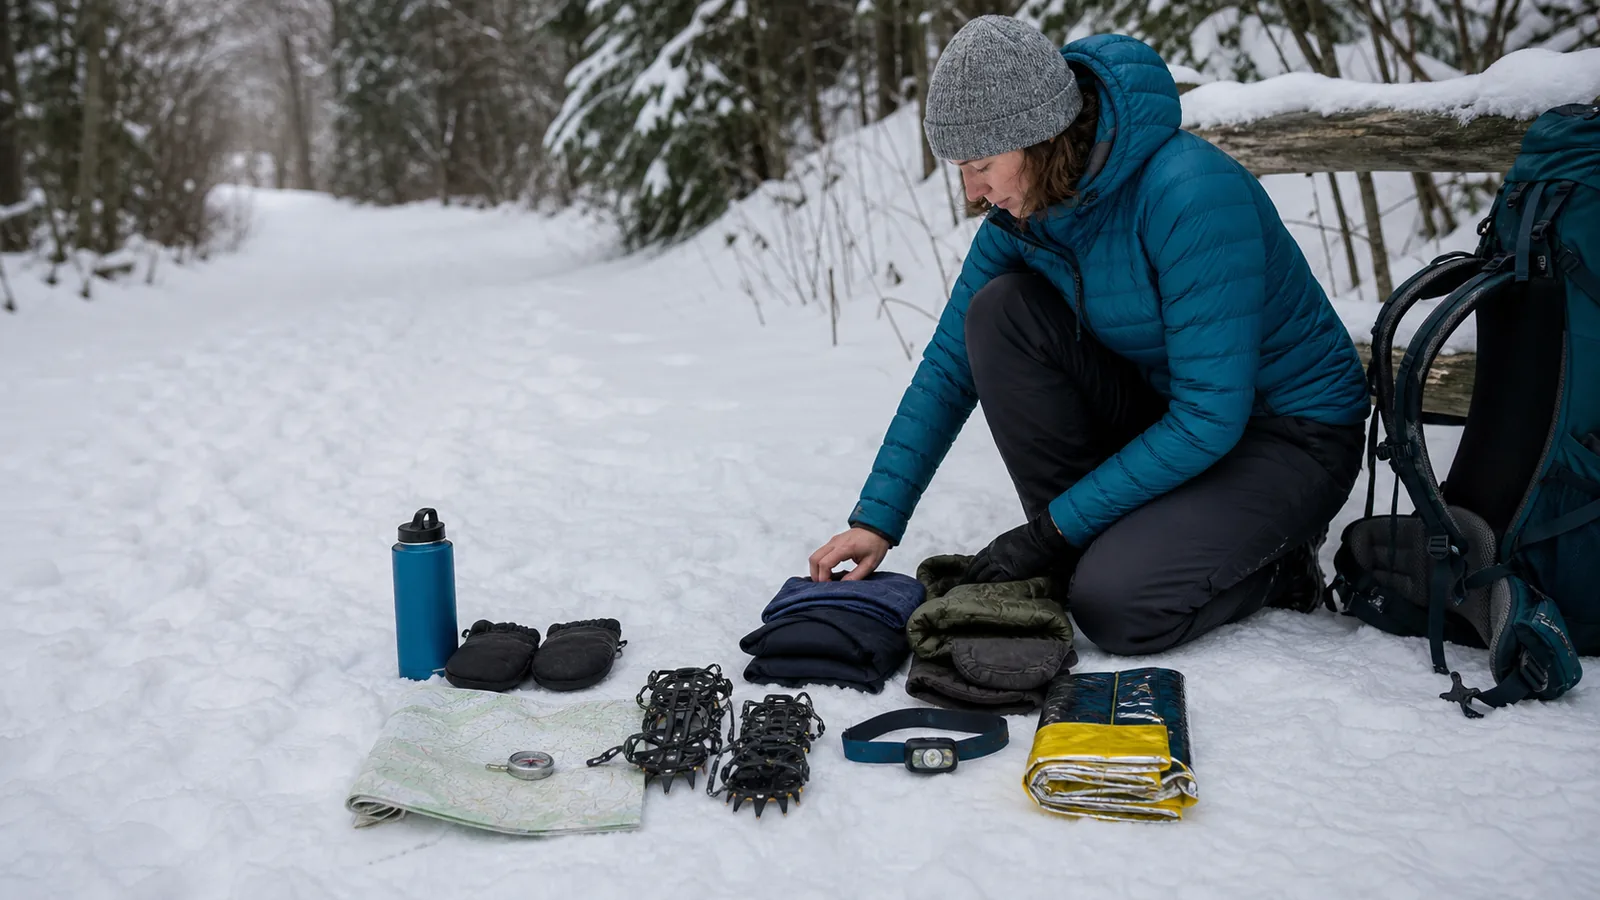
A reliable winter hiking gear checklist starts with the trail surface and the coldest credible return. Pack traction or flotation for the ground, layers that vent while moving, dry insulation for stops, cold-stable water and navigation, and a small delay kit.
Winter hiking gear must do more than keep you comfortable while you walk. It must still protect you when wind rises, daylight runs out, or an injury turns a ten-minute break into an hour.
Start with the coldest credible weather, the actual trail surface, and the slowest credible return. Then choose footwear, layers, water storage, navigation, and emergency insulation for those conditions. The broader winter hiking plan should decide the route and turnaround. This checklist decides what goes in your pack.
- Match traction or flotation to the current surface
- Keep one insulated stop layer dry
- Protect water light and batteries from freezing
- Carry navigation signaling and delay support
Pack for a delay, not only for the expected moving time.
Start with the conditions, not the closet
Check five things before making a packing list. You need the low temperature, wind, precipitation, trail surface, and usable daylight. Remoteness and cell coverage then tell you how much backup the route deserves.
A forecast of 25°F with calm air is not the same problem as 25°F with a 25 mph wind. Falling snow can cover footprints and trail markers. A thaw followed by an overnight freeze can turn a packed path into hard ice.
Read current alerts and recent official trail information. Note whether the route crosses avalanche terrain, exposed ridges, frozen water, or steep ice. Gear does not make those hazards ordinary.
Estimate your slow return, including the possibility of helping another person. The day hiking checklist covers the normal departure checks. Winter adds cold-stable light, dry reserve insulation, surface-specific traction, and protection for water.
| Condition | What changes | Gear decision |
|---|---|---|
| Packed snow | Footing is firm but can be slick | Carry traction sized to the boots |
| Deep soft snow | Each step can sink and waste energy | Use suitable snowshoes |
| Refrozen trail | Hard ice can defeat boot tread | Use appropriate traction or change route |
| Wind and exposed terrain | Heat loss rises during stops | Add wind protection and reserve insulation |
| Snow or fog | Trail and horizon may disappear | Carry map compass and offline navigation |
| Short daylight | A delay can become a dark return | Start with a working headlamp and spare power |
Conditions choose the system. A copied list cannot see the trail in front of you.
Choose traction or flotation for the surface
Boot tread works on bare ground and some shallow snow. It does not reliably grip glare ice, and it does not stop you sinking knee-deep into unconsolidated snow.
Microspikes add traction but almost no flotation. They fit many flexible hiking boots and work best on packed snow and moderate icy trail.
Check the manufacturer fit range, stretch them over the exact boots, and walk before the trip to confirm that the chains sit underfoot.
Snowshoes spread your weight over soft snow. Choose them for the combined weight of you, clothing, pack, food, and water. Shorter models turn more easily in woods. Larger models float better in dry, deep snow but can feel awkward on a narrow trail.
Crampons have rigid points made for harder, steeper snow or ice. They require compatible boots, careful foot placement, and skills that a casual traction checklist cannot provide. If the route description calls for crampons, an ice axe, or self-arrest ability, treat it as a different undertaking.
| Surface | Likely tool | Important limit |
|---|---|---|
| Bare frozen ground | Winter boot | Rubber can still slip on isolated ice |
| Firm packed snow | Microspikes | Not flotation for deep snow |
| Rolling trail with ice patches | Microspikes or route change | Not for every steep icy slope |
| Deep unconsolidated snow | Snowshoes | Size for total carried weight |
| Steep hard snow or ice | Technical equipment and training | Ordinary traction may create false confidence |
Use poles with winter baskets when they help balance, but test each plant before loading it. A pole can punch through a crust or slide on rock. The foot-placement principles for loose trail surfaces still matter because snow often hides uneven ground.
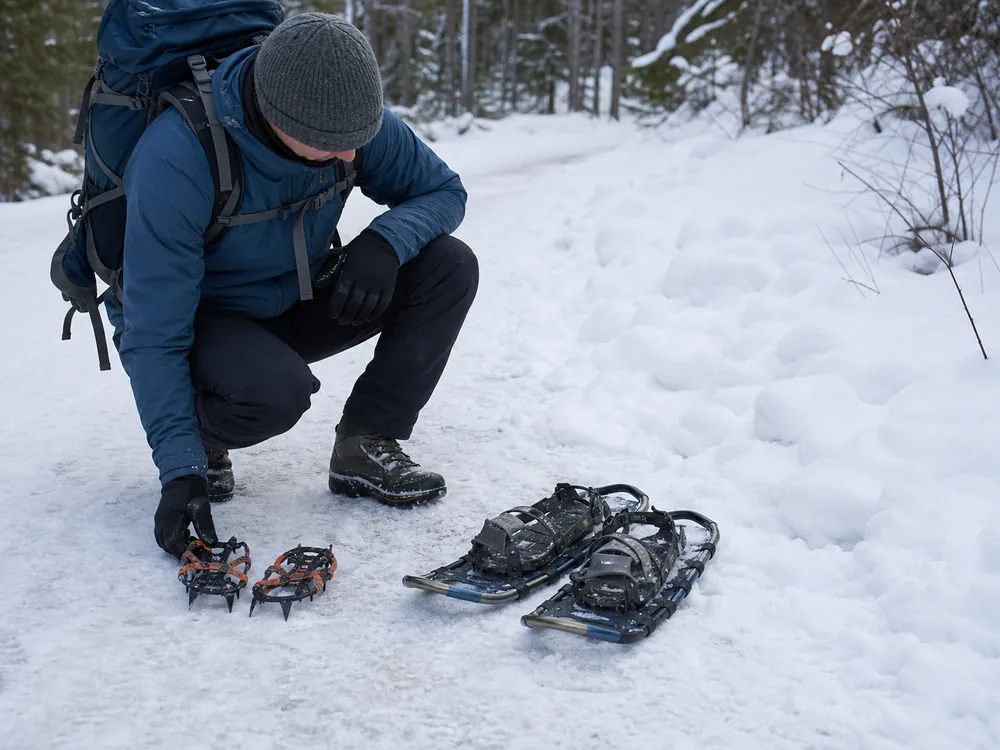
Carry traction where you can reach it without emptying the pack. Put it on before the path becomes a skating rink. Waiting until you are already sliding makes the change harder.
Traction and flotation solve different problems.
Build a layer system that can vent
Use layers with four jobs. A base layer moves moisture from skin. A midlayer holds some warmth while you move. A shell blocks wind and precipitation. A dry stop layer adds insulation when movement ends.
- Base layer
- Wool or synthetic fabric that manages moisture
- Active midlayer
- Adjustable warmth for steady movement
- Shell
- Wind and precipitation barrier with usable vents
- Stop layer
- Dry insulation sized to fit over the moving layers
- Leg system
- Base or soft-shell layer matched to wind snow and exertion
Start slightly cool. Open vents or remove a hat before sweat soaks your clothing. When you climb, heat production can rise quickly even below freezing. Wet insulation loses performance and becomes a problem as soon as the trail levels or the group stops.
The stop layer stays dry inside the pack. It should fit over what you are wearing, so you can put it on immediately during a break. A waterproof pack liner protects it better than a loose pack cover alone because blowing snow can enter around straps and the back panel.
Avoid cotton for cold active layers. It absorbs moisture and dries slowly. The detailed hiking clothing system explains fabric and fit. In winter, the added decision is whether every moving layer can vent and whether one warm layer remains untouched for a delay.
Clothing must not feel tight after all layers are on. Tight socks, boots, gloves, or cuffs can reduce circulation. Test the complete system at home, including reaching pockets and fastening the shell over insulation.
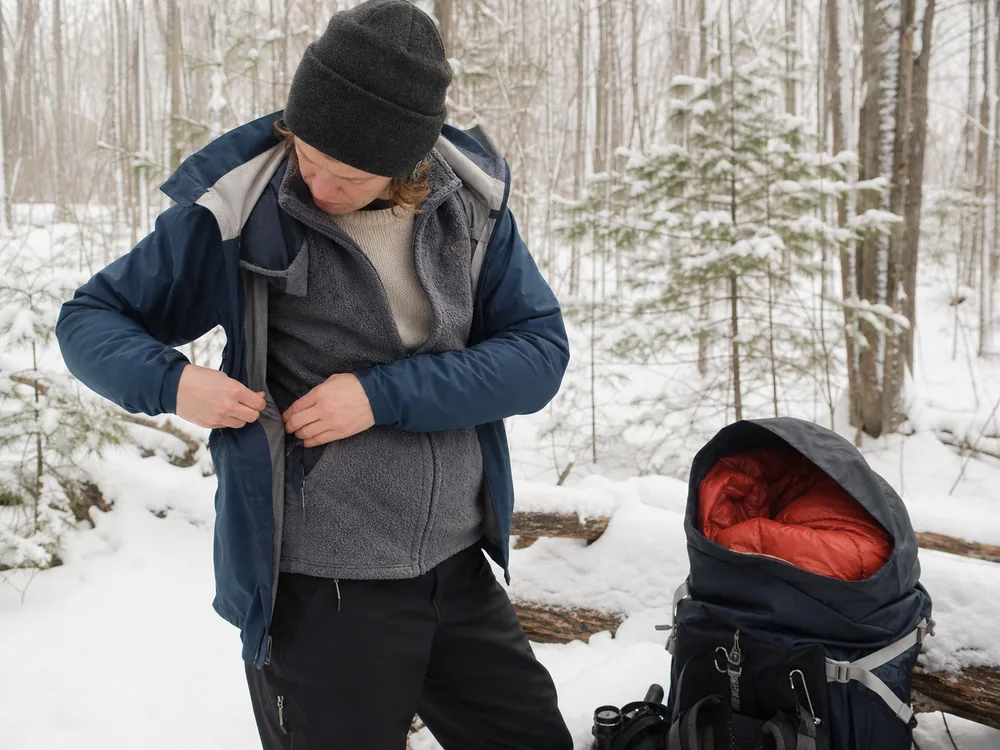
Dry reserve warmth stays reserved until movement stops.
Protect hands, feet, face, and eyes
Use a two-part hand system. Liner gloves preserve basic dexterity for zippers and navigation. Insulated mittens give the fingers more shared warmth than gloves when the temperature drops.
Carry a spare dry pair when wet snow, creek crossings, or heavy sweat are possible. Store the backup inside the pack liner rather than in an exposed pocket.
Wear socks that fit without compressing the toes. Thick socks inside a tight boot can make feet colder by reducing circulation. If you use a warmer sock, test it in the same boot during a cold practice walk.
- Warm hat that covers the ears
- Neck gaiter or face covering that does not block vision
- Liner gloves for dexterity
- Insulated mittens for reserve warmth
- Spare dry gloves or mittens
- Spare dry socks inside the pack liner
- Gaiters when snow can enter the boot cuff
- Sunglasses or goggles for glare and blowing snow
- Broad-spectrum sunscreen for exposed skin
Snow reflects ultraviolet light toward your face and eyes. Sunglasses remain useful on a cold bright day, and goggles can protect vision in blowing snow. Apply sunscreen to exposed skin, including areas under the chin that receive reflected light.
A neck gaiter can cover cheeks and nose, but breath moisture may freeze on fabric. Change its position when visibility or breathing feels restricted.
The early warning signs in the hypothermia response guide matter more than a clothing label. Shivering, poor coordination, confusion, or unusual behavior require action. Add dry insulation, shelter from wind, and leave the exposure.
Warm extremities need room and dry backups.
Keep water and food usable in freezing weather
Cold can freeze a hydration tube before the water inside a bottle becomes solid. Use bottles you can inspect and open. A wide mouth is easier to clear than a narrow valve.
Keep one bottle inside the pack near insulation and another where it remains accessible. Store a bottle upside down only when the cap seals reliably. Ice forms at the top, so the opening may stay clearer.
Insulated sleeves slow freezing. Start with warm water, not boiling water, and confirm that the container is rated for it. Keep the cap threads dry enough to open with gloves.
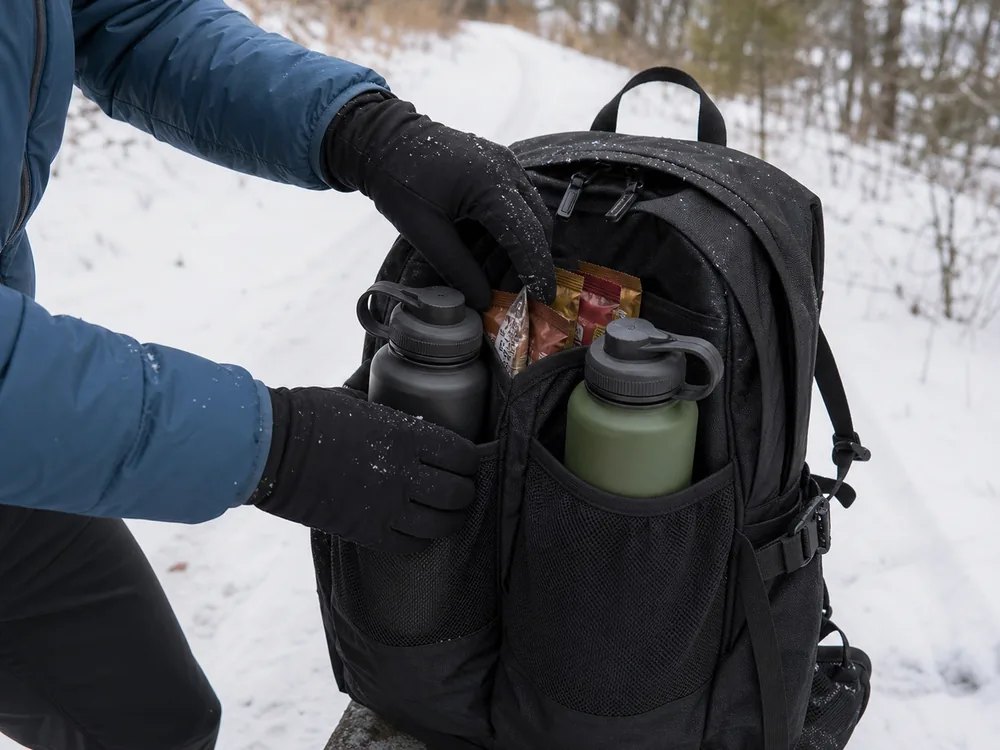
Bring food that remains edible in the expected cold. Some dense bars become hard enough to hurt teeth. Soft sandwiches, nut butter packets, dried fruit, cheese, or other tested foods can be easier to eat while wearing gloves.
Place small portions in reachable pockets. The day-hike fueling plan works better when a winter snack does not require a long stop or a full pack unpack.
Drink regularly, but do not treat water as a cure for cold stress or altitude illness. The water planning method starts with route time and reliable sources. In freezing weather, also account for whether those sources are flowing and whether your filter can freeze.
Usable water matters more than carried water.
Carry navigation and light that survive the cold
A phone can hold maps, weather, and emergency contacts, but cold drains batteries quickly. Keep it in an inside pocket when practical. Use airplane mode when you do not need a signal.
Carry a paper map and compass, and know how to use them. Snow can cover tread, signs, cairns, and familiar junctions. Download the route before leaving service, then mark the trailhead, junctions, turnaround point, and safe exit options.
- Download the mapSave the full route and nearby exits for offline use.
- Set fixed pointsMark the trailhead junctions turnaround and vehicle location.
- Pack analog backupProtect the map and place the compass where it is reachable.
- Warm spare powerKeep a power bank or spare batteries in an inside pocket.
- Test the headlampConfirm the controls work with gloves and fit fresh batteries.
- Share the planGive a contact the route vehicle location and overdue time.
The compass bearing method is useful only if you practice before visibility fails. Do not wait for snowfall to learn which end of the needle points north.
Use lithium batteries when the device manufacturer allows them because they generally handle cold better than alkaline batteries. Carry a headlamp even for a short morning hike. A fall, route error, or slow group can consume the planned daylight.
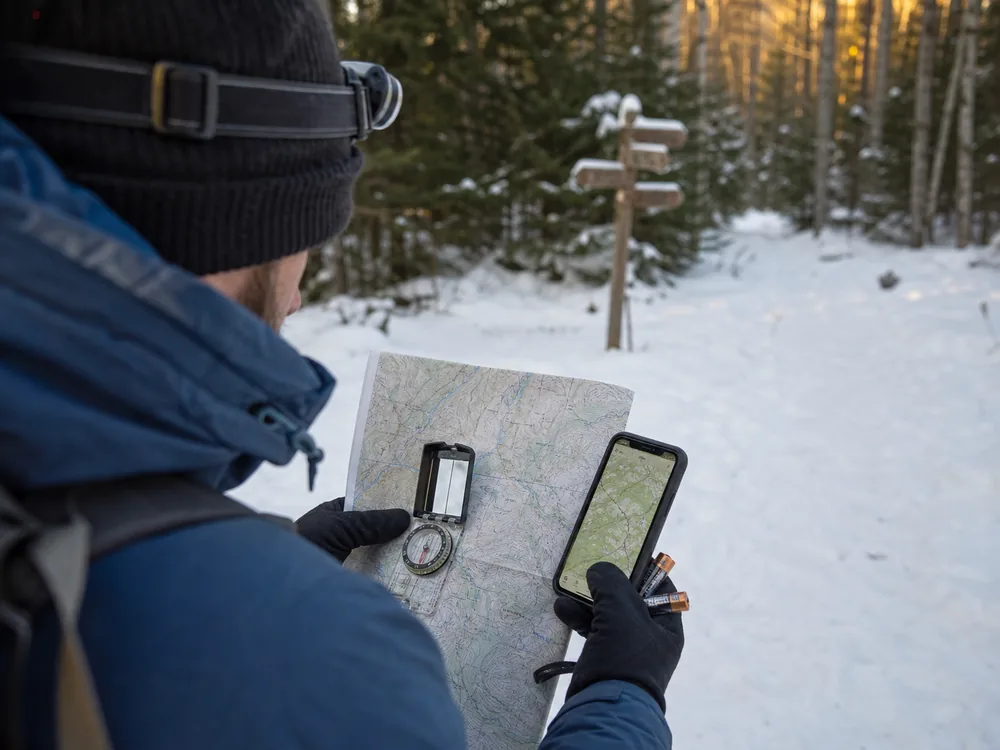
Navigation needs a battery-free layer.
Pack a small delay and repair kit
Build the kit around four functions. You need to retain heat, signal, repair a simple failure, and support an exit.
Insulate
Emergency bivy or blanket plus the dry stop layer reduces heat loss during a delay.
Signal
Whistle mirror and visible light help searchers locate you beyond voice range.
Repair
Tape cord spare buckle and a small multitool can stabilize common gear failures.
Start heat safely
Waterproof ignition helps only where a fire is legal safe and practical.
First aid
Supplies should cover likely cuts blisters and minor injuries while you leave.
An emergency blanket reflects heat but creates none. It works better when paired with clothing, wind protection, ground insulation, and another person's help. Sit on a spare pad or pack rather than directly on snow.
Three whistle blasts are widely recognized as a distress signal. Keep the whistle on your shoulder strap or clothing. A tool buried in the pack may be unreachable after a fall.
Repair tape sticks better when it is warm. Wrap some around a bottle or card, then warm it inside your jacket before applying it. A ski strap can secure a loose snowshoe binding or splint a broken pack attachment.
The common hiking mistakes become more expensive in winter because small delays increase cold exposure. Fix loose straps, dull headlamp batteries, and marginal traction during a practice trip, not at the remote trailhead.
Every emergency item needs a specific job.
Fit the pack around access and balance
Place dense items close to your back. Keep the dry stop layer, shell, mittens, traction, water, headlamp, and navigation accessible. The exact order changes with conditions, but none of those should require spreading the pack across snow.
Secure snowshoes so they cannot swing or catch branches. Tuck loose straps. If the route alternates between snow and bare ground, practice attaching and removing them with gloves.
Use a waterproof liner inside the pack. Separate wet traction and gaiters from dry insulation. A small waterproof bag keeps electronics and spare batteries together.
The heavy daypack technique can reduce balance problems, but winter is not a reason to fill every empty space. Each item should answer a credible condition, delay, or failure.
Accessible gear gets used before the problem grows.
Run the final trailhead check
Use the trailhead as a final decision point. Check the sky, wind, surface, temperature, and group, then compare them with the plan.
- Latest official weather and alerts match the plan
- Traction or flotation matches the current surface
- Every person has a dry reserve layer
- Boots socks and traction fit together
- Water opens and has freeze protection
- Food is edible and reachable in the cold
- Map compass offline route and exit points are ready
- Headlamp and spare power work
- Trip plan and overdue time are with a contact
- Turnaround time leaves daylight and weather margin
Do not put every critical item in one person's pack. A separated group member still needs insulation, light, water, and a way to signal.
Set the turnaround time before departure. The sunrise and sunset hiking plan helps calculate the light margin. Winter twilight, tree cover, snow, and cloud can make usable light fade earlier than a simple sunset time suggests.
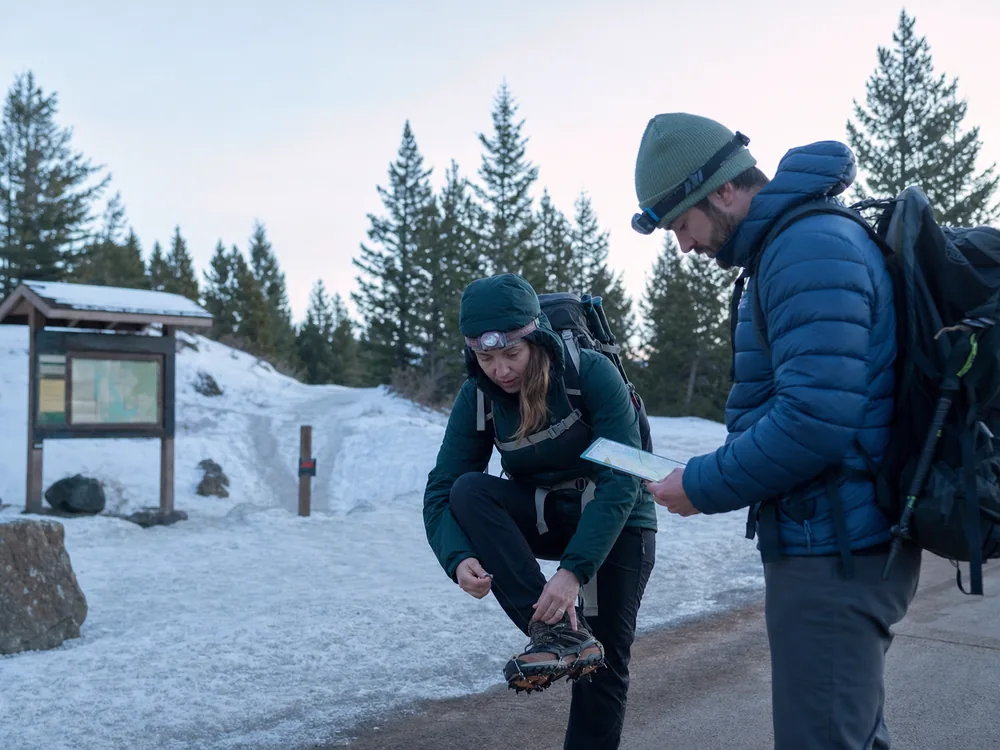
The trailhead can still say no.
Know when the gear is not enough
Turn around when the actual surface exceeds your traction skills, wind removes safe visibility, snowfall hides the route, or the group cannot remain warm during a normal break.
The hiking safety checks should control the decision. A more expensive jacket does not fix a bad route, late start, worsening person, or forecast that has already changed.
If traction balls up, a snowshoe binding repeatedly fails, a boot is wet inside, or a person cannot restore warmth, leave while the return remains manageable.
Good winter gear supports judgment. It never replaces it.
Sources
The National Park Service recommends layers, warm outer clothing, sunscreen, sunglasses, food, water, navigation, traction, current conditions, and a willingness to turn around: Winter Hiking Tips.
REI explains the base, midlayer, and shell system, cold battery care, frozen hydration tubes, and the need to keep food and water accessible: Cold-Weather Hiking.
Rocky Mountain National Park lists winter navigation, snowshoes, microspikes, poles, shovels, moisture protection, and gear for sudden weather or an unplanned night: Winter Backpacking Gear Checklist.
Yosemite National Park lists signaling, waterproof matches, an emergency blanket, a headlamp, spare batteries, extra water, and high-energy food for winter travel: Winter Safety.
The right kit follows the conditions.
Step by stepPractical steps
- Check the low temperature, wind, precipitation, trail surface, and usable daylight.
- Choose boots, microspikes, snowshoes, or technical equipment for the actual surface.
- Build a venting layer system and protect one dry insulated stop layer.
- Keep water, food, navigation, and light usable in freezing conditions.
- Pack compact insulation, signaling, repair, and first-aid support for a delay.
- Run a final trailhead check and turn around when conditions exceed the gear or skills.
AnswersQuestions readers ask
Do I need microspikes for winter hiking?
Carry microspikes when the route may have packed snow or moderate ice and they fit the boots you will wear. They add traction but do not provide flotation in deep snow or make every steep icy slope safe.
Are snowshoes or microspikes better?
They solve different problems. Microspikes grip packed snow and moderate ice. Snowshoes spread your weight over deep soft snow. Current surface conditions should choose the tool.
How many layers should I wear for winter hiking?
Choose layers by function instead of one fixed number. Use a moisture-managing base, adjustable active insulation, a wind or precipitation shell, and a dry insulated layer for stops. Vent before sweat builds.
How do I keep water from freezing while hiking?
Use insulated wide-mouth bottles, keep them near insulation, protect the cap, and store a reliably sealed bottle upside down so forming ice stays away from the opening. Hydration tubes can freeze quickly.
What winter gear should stay easy to reach?
Keep the shell, dry stop layer, mittens, traction, water, food, map, compass, headlamp, and emergency signal accessible without unpacking the whole bag in snow or wind.