
A High-Altitude Layering System That Changes With the Day
Dress for repeated transitions between hard climbing, exposed stops, cold wind, strong sun, and camp.
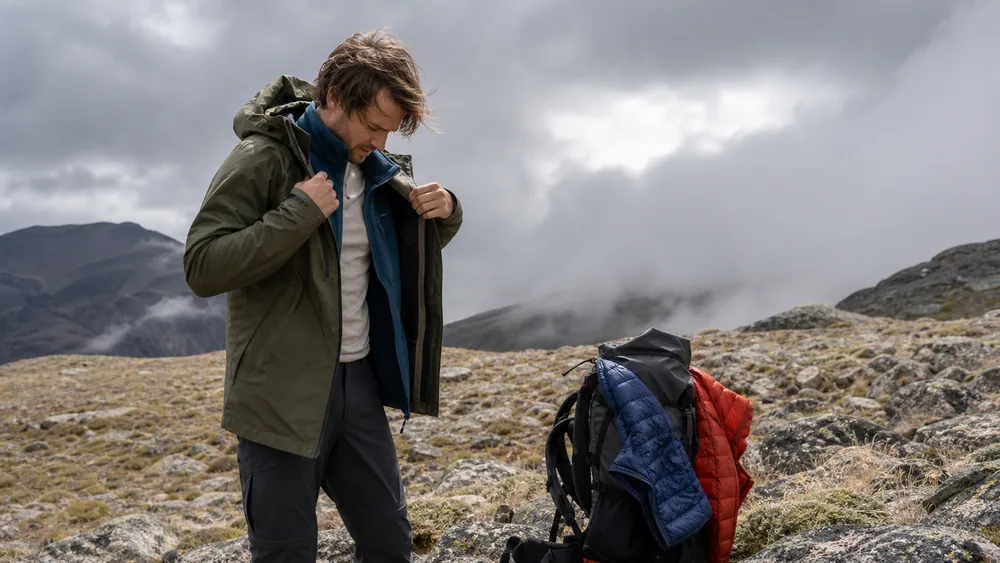
To layer clothing for a high-altitude trek, use a wicking base layer, adjustable midlayers, a wind and rain shell, and a warm stop layer. Start climbs slightly cool, vent before sweat accumulates, and add insulation as soon as movement stops.
An outer wind and rain protection layer that allows some ventilation to prevent overheating.
CDC and NIOSH cold-weather guidance
The ventilation matters because high-altitude trekking repeatedly changes your heat output. A steep climb can make you sweat minutes before a windy stop makes that moisture cold.
Picture the last ten minutes below a pass. You are working hard in shelter, but the ridge above is already moving cloud and cold air across the route. Waiting until the crest to think about clothing turns a simple adjustment into a hurried one with numb fingers.
Manage transitions early. The best layer change happens before you are wet, chilled, or fumbling in strong wind.
Give every layer one clear job
A base layer moves moisture from skin. A light midlayer adds adjustable warmth. A shell limits wind and precipitation. A larger insulated jacket protects you during stops and camp.
| Layer | Main job | Useful adjustment |
|---|---|---|
| Base | Move moisture and reduce skin chill | Change wet pieces when practical |
| Light midlayer | Add breathable warmth | Zip, remove, or add during movement |
| Shell | Block wind and rain or snow | Use hood, vents, cuffs, and front zip |
| Stop insulation | Hold heat during inactivity | Put on immediately at a break |
| Leg system | Balance movement and weather protection | Add long underwear or shell pants as needed |
Loose layers trap air and allow movement. Tight layers can compress insulation, restrict circulation, and leave no room for adjustment.
Choose fabrics and garments you have tested. Use the clothing part of a trekking packing list for the route's lowest temperature, wind, and precipitation rather than the valley forecast.
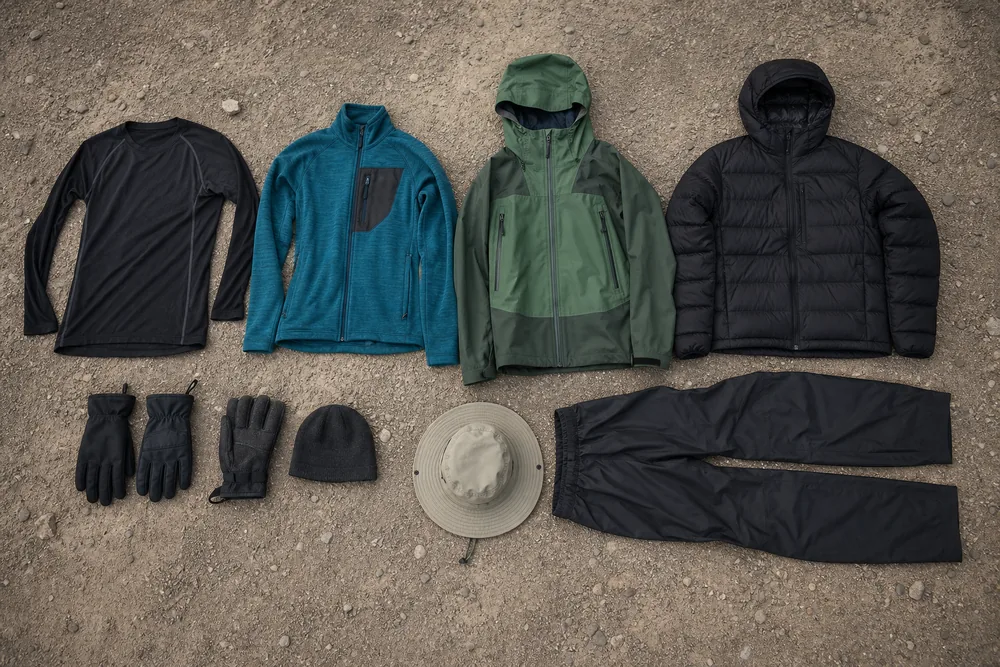
Assign the jobs. Redundant heavy pieces add pack weight while leaving other conditions uncovered.
Start a climb cool and adjust early
Remove the large insulated jacket before sustained uphill movement. Begin slightly cool, then let the climb create heat.
- Check the first slopeIdentify whether the next section is sustained climbing or a short rise.
- Open vents firstUse front zips, pit zips, cuffs, and pockets when their design permits.
- Remove one layerStop before sweat wets the base layer.
- Keep the shell reachableWind and weather can change at the pass.
- Recheck after ten minutesAdjust again when effort or exposure changes.
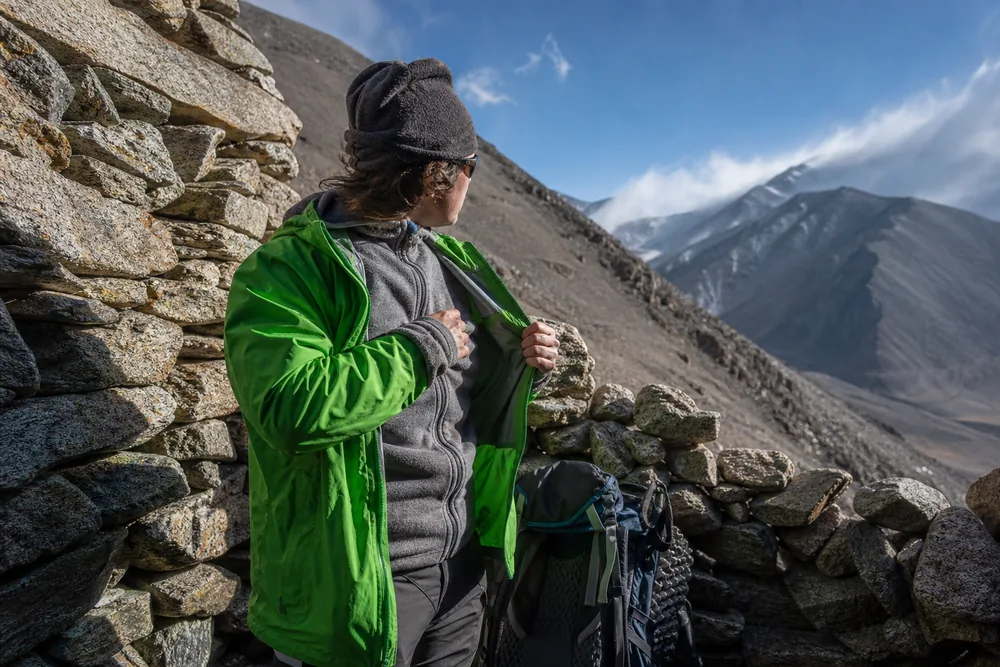
Sweat rate differs between people. The group should allow short clothing stops rather than force everyone into the same layers.
Slow the pace if every vent is open and sweat still pours. A sustainable high-altitude pace is part of moisture control.
Do not remove weather protection on exposed terrain when stopping would be unsafe. Adjust at the last sheltered point before the exposure.
Start cool, not cold. Shivering at departure means you removed too much.
Change layers before a stop
Heat production falls quickly when you stop at a pass, viewpoint, water source, or navigation problem. Put on the warm layer before eating or taking photographs.
Close vents, cover the head, and replace wet gloves when wind increases. Keep the shell outside the insulated layer in rain unless the garment system specifies otherwise.
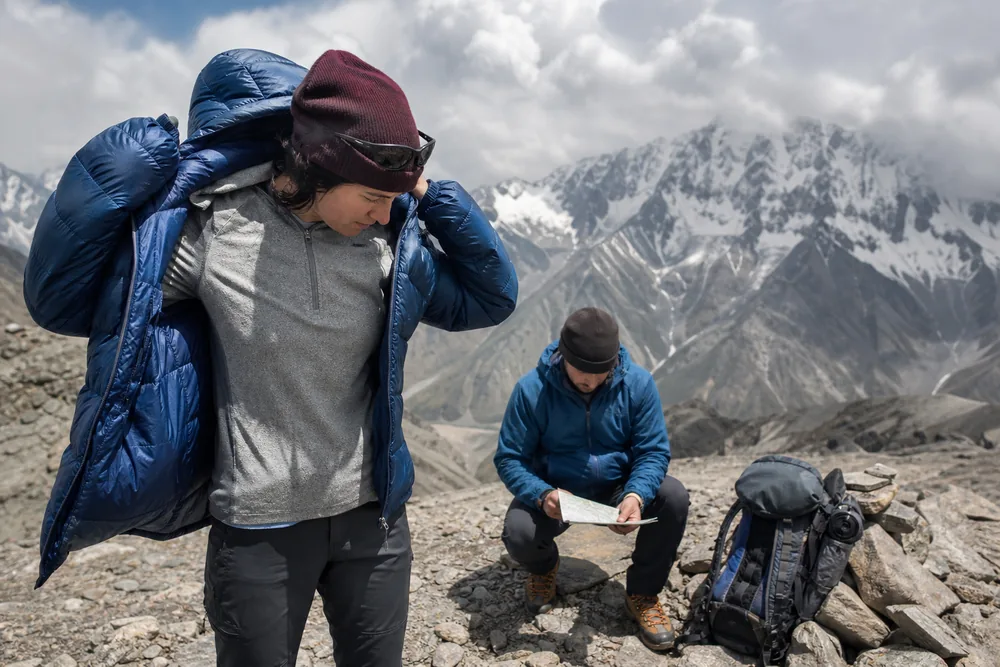
Remove the stop layer again before restarting a hard climb. Do not wait until the inside becomes damp.
Keep one dry base layer reserved for sleep on multi-day routes. Protect it with the dry sleep set routine even if the active set stays damp.
Insulate at once. A scenic stop is still a rapid change from high output to low output.
Match the shell to wind and precipitation
Wind can remove heat through a breathable fleece. Add the shell when exposed ridges, passes, or forecasts make that loss likely.
Dry wind
Use a wind-resistant layer and adjust vents
Cold rain
Wear waterproof protection and keep insulating layers dry
Wet snow
Seal hood, cuffs, and hem while monitoring sweat
Heavy climbing in rain
Slow down, vent safely, and accept some moisture without soaking insulation
Calm sun
Remove unnecessary shell layers and protect skin
A waterproof shell cannot prevent all internal moisture during hard work. Control effort, vent where safe, and change damp base layers at camp.
Inspect hood movement and peripheral vision. A hood that blocks the view can create a navigation or footing hazard.
Check cuffs against gloves and shell pants against boots before the trip. Gaps appear when you reach, bend, or lift a knee.
Use the rain-trekking routine to change before cloud, wind, or precipitation reaches you.
Seal the weather, vent the effort. Both parts are required.
Protect head, hands, face, and eyes
Carry a warm hat, sun hat, neck covering, and at least two glove options when cold and wet conditions are plausible. Gloves need enough dexterity for zips, poles, maps, and shelter tasks.
UV exposure increases with elevation. Wear sunglasses with suitable UV protection, cover skin, and use sunscreen according to its label.
Cold wind can numb cheeks, ears, and fingers before the torso feels severely cold. Ask group members to look for pale, waxy, or unusually firm skin.
Protect the small areas. Cold fingers can prevent you from operating the gear that keeps the whole body safe.
Pack layers in the order you need them
The shell, warm jacket, gloves, and hat belong near the top or in a weather-protected outer pocket. They are ineffective beneath the shelter and food.
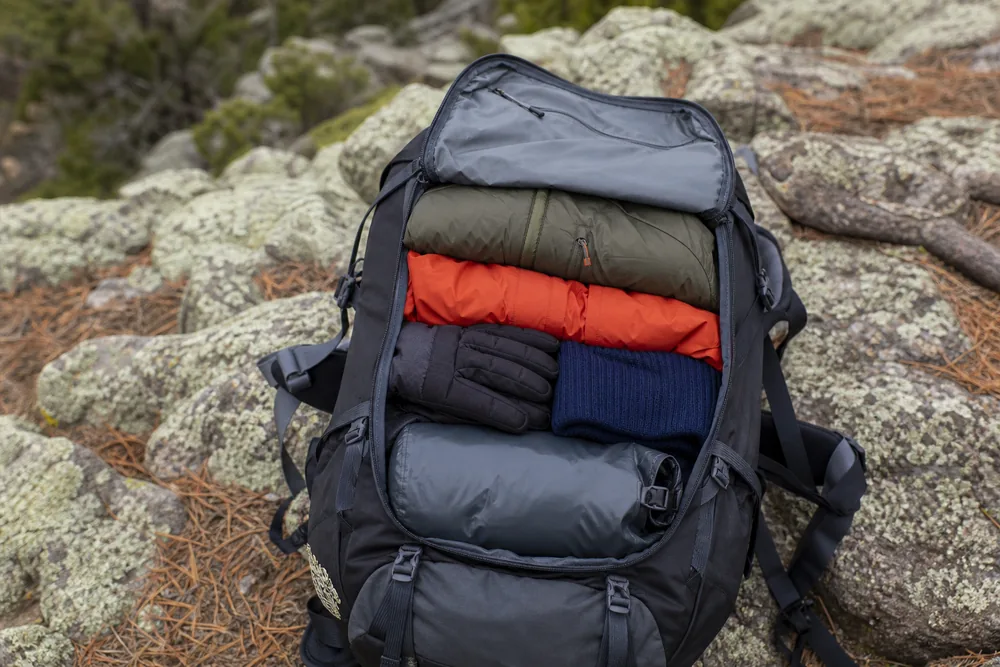
- Shell reachable without opening the dry-bag system
- Warm jacket protected from rain but removable in under a minute
- Gloves and hat accessible with cold hands
- Dry sleep clothing sealed separately
- Wet active layers isolated from dry insulation
- One person can reach emergency layers for an injured partner
Practice a layer change while wearing the loaded pack and gloves. Check whether the pack must come off and whether loose items can blow away.
On technical ground, reach shelter before changing. A fast layer is not worth a fall.
Access is part of warmth. A buried jacket may arrive after the chill has started.
Handle cold starts and camp
Wear enough insulation for breakfast and packing, then remove the large jacket just before moving. Put it inside the pack rather than tying it loosely outside.
At camp, change the damp base layer, add dry insulation, eat, and set shelter before prolonged cooling. Keep tomorrow's active clothing separate from the dry sleep set.
If boots or socks freeze, use the safe method recommended for the equipment. Do not expose synthetic footwear or insulation to open flame.
A planned trek rest day should include drying, skin checks, food, and preparation for the morning temperature.
Keep one set dry. The sleep layer is a recovery and emergency asset.
Test the system through real transitions
Test the layers on a climb, windy stop, rain walk, and cold morning before the trip. Wear the actual pack because straps alter ventilation and compress shoulder insulation.
Pros
- Keep pieces that cover distinct conditions and work together
- Confirm hood, glove, cuff, and hem overlap
- Record which layer works at a known temperature and effort
Cons
- Do not trust a warmth rating without field use
- Do not bring a new shell on the main trek
- Do not assume the warmest combination is best while moving
Replace or repair failing zips, seam tape, wetting fabric, and compressed insulation. Follow the maker's care instructions.
Test the transitions. The system succeeds when you can change state quickly, not when it looks complete on the floor.
Run one test with damp active clothing. Learn whether the midlayer still slides on, whether the shell cuffs close over gloves, and whether the stop jacket fits without removing the shell. Then repeat the change while wearing gloves and standing in wind, because calm hands at home hide the slow parts.
Match the test to the route. Use the winter trekking check when snow, frozen ground, or subfreezing stops are credible. A pass deserves the full mountain-pass sequence because the climb, crest, and descent expose the same clothing to three different heat loads.
Test pack access as part of multi-day preparation. A restrictive backpack fit can trap sweat at the shoulders and block pockets, so correct the fit before blaming every damp patch on the shell.
Know when clothing failure changes the route
Every person needs their own essential warmth. Shared shelter and repair gear can be divided, but one trekker should not carry another person's only shell or insulated jacket. If that pack is lost or separated, both people lose their protection.
Review early hypothermia signs before the route reaches cold exposure. Persistent shivering, loss of hand control, stumbling, confusion, or unusual behavior require shelter, dry insulation, and appropriate emergency action. They are no longer a clothing-comfort problem.
If active clothing becomes soaked and cannot be dried, change the itinerary before the remaining dry system is consumed. A shorter route protects the layers needed during an unplanned stop. The same rule belongs in the trekking safety plan as a clothing-stop and turnaround threshold.
Altitude can make the judgment harder because fatigue and poor coordination have more than one possible cause. Use an acclimatization schedule that does not force hard climbing while the body adjusts, and respond to symptoms rather than guessing which stress created them.
Protect the last dry layer. Once the reserve is wet, the group has lost an important emergency option.
Turn each test into a packing decision
Measure packed volume as well as weight. Large insulation must stay dry and accessible, which may require a different pack position from a dense spare garment. Inspect forecasts across the route's highest and lowest elevations because a valley temperature cannot describe wind, cloud, snow, or overnight cold at the high camp.
Test the system with its sun protection and movement gear. A hat brim may collide with a shell hood, and some sunglasses fog when a face cover directs breath upward. Poles, straps, or a harness may also block pockets, so move snacks, gloves, and the route card to places you can reach without opening the shell.
At a high camp, lay out the morning sequence before sleep. Keep base layer, midlayer, shell, warm jacket, gloves, hat, and headlamp in the order needed.
Bring repair items matched to the garments. A small patch for the shell and insulated jacket, plus a spare zipper pull, can keep a small tear from exposing insulation. Air damp pieces during lunch when conditions allow, but secure them before a gust can take a glove or base layer.
Recheck fit after adding every layer. You must still lift the knees, use poles, turn the head, and operate pack buckles without exposed gaps. Ask a partner to inspect the back of the shell because sweat often collects beneath shoulder straps where you cannot see it.
During the evening review, identify which piece stayed unused and why. Keep it when it covers a credible emergency or forecast condition, but remove true duplication before the next trip. A thermometer can inform that review, but wind, wetness, sun, effort, and personal response determine the useful change on the trail.
Keep the pieces that solve a real condition. Field results decide what stays in the pack.
Down or synthetic insulation for a high-altitude trek?
The insulating layer is the one place where the fill material changes the decision. Down and synthetic both work by trapping warm air, but they fail in different ways, and a multi-day trek at altitude exposes the difference fast.
Choose down for the most warmth at the lowest weight and bulk. A down jacket or sleeping bag packs small and carries light, which matters when you shoulder everything for days on end. Its weakness is water, because wet down clumps and stops insulating, and in cold, humid mountain air it dries slowly, so a soaked down layer can leave you colder than no layer at all.
Choose synthetic when the trek is likely to stay damp. Synthetic fill keeps most of its warmth even when wet and dries far faster, which suits long spells of rain, snow, or heavy condensation where nothing fully dries between camps. The trade is weight and bulk, because it takes more synthetic fill to match the warmth of the same weight of down.
Match the fill to the conditions, not the price tag. Dry cold favors down, and damp cold favors synthetic. On a trek that mixes both, the strongest setup is often a protected down piece kept strictly for a dry camp and sleep, paired with a synthetic layer for active use and wet weather, so each fill does the job it is good at. Keep whichever insulation you carry inside a dry bag during the day, because the layer that keeps you warm at camp is worthless if it arrives wet.
Sources
CDC and NIOSH cold-weather guidance describes loose layers, moisture management, insulation, and ventilated weather protection. The National Park Service Denali equipment guidance emphasizes modular systems and field testing. The CDC Yellow Book sun guidance explains increased ultraviolet exposure with elevation.
AnswersQuestions readers ask
How many layers do you need at high altitude?
Most systems use a base, one or more adjustable midlayers, a weather shell, and a separate warm layer for stops. Conditions determine the exact pieces.
Should you wear a down jacket while climbing?
Usually not during hard movement because sweat can reduce comfort and insulation. Save a large warm layer for stops unless conditions demand it.
Is cotton suitable for a high-altitude trek?
Cotton holds water and dries slowly, so it is a poor main layer in cold conditions.
When should you put on a shell?
Add it before wind or precipitation strips heat, then open vents or adjust layers before sweat builds.
Does altitude increase sun exposure?
Ultraviolet exposure increases with elevation. Cover skin, protect eyes, and use suitable sunscreen.