
How to Cross a Mountain Pass Before the Weather Turns
Treat the pass as a timed crossing with two sides, changing surfaces, and a firm point for turning back.
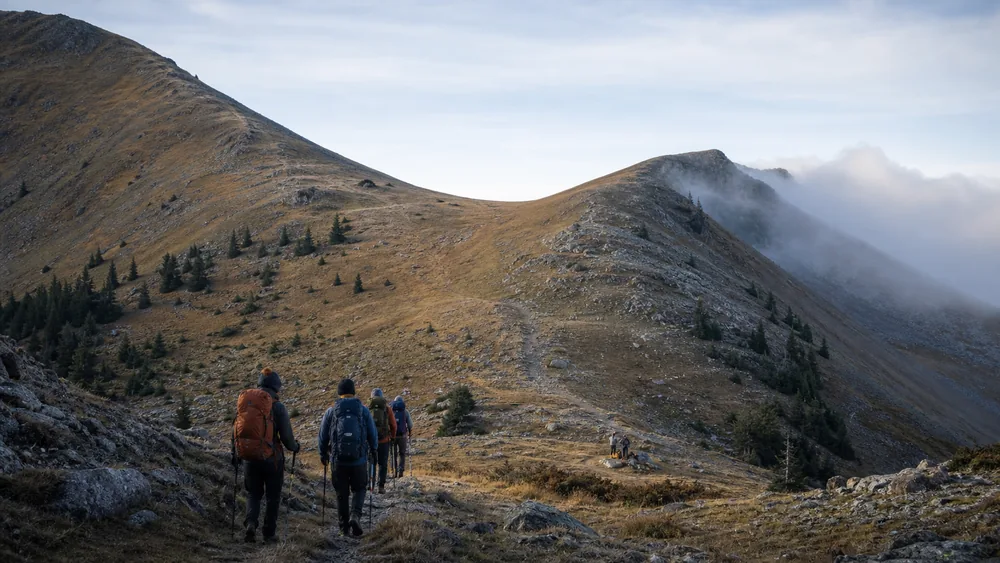
You can cross a mountain pass safely only when the route, weather, surface, daylight, and group pace leave enough time to descend from exposed terrain. Before you start, set a turnaround time because reaching the pass is only the midpoint of the decision.
- Confirm both sidesCheck the ascent, pass, descent, escape routes, and current surface conditions.
- Read the local forecastNote wind, precipitation, temperature, cloud base, lightning timing, and recent snow.
- Calculate the turnaroundAllow the slowest realistic pace plus time for descent and an unexpected delay.
- Check at named pointsCompare actual progress and conditions with the plan before commitment increases.
- Cross without lingeringRegroup in sheltered terrain rather than spending time on the exposed crest.
The sequence matters because a pass can look close while the far side remains hidden. Plan through the descent, then write the turnaround time and conditions down before fatigue and a visible goal begin to change the group's judgment.
A pass has two sides, and only one is visible
A mountain pass is a low point between higher peaks, but it can still be the most exposed point on a route. Wind, cloud, lightning, hard snow, and navigation errors often matter more near the crest.
The far side can differ sharply from the approach. A dry walking trail may lead to shaded snow, loose scree, or a steeper descent that cannot be assessed until late.
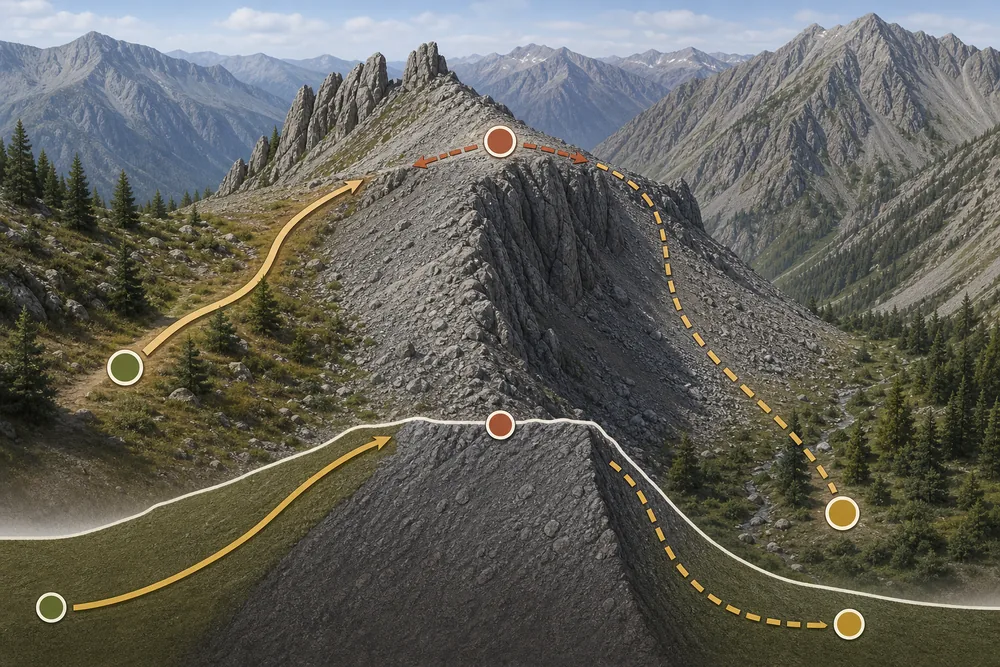
Study contours, route notes, recent reports, and satellite or snow information appropriate to the area. Store an offline map and know how to use the compass navigation method.
The route still needs the communication, equipment, and emergency checks in a trekking safety plan. A pass compresses those decisions into a narrow weather window where retreat may become harder after the crest.
The crest is halfway. You still need enough time, visibility, and control to reach safer terrain.
How do you calculate the start and turnaround times?
Work backward from the time the group must be below exposed terrain. Subtract descent time, crossing time, a delay allowance, and the final ascent time.
- Safe-below time
- Deadline for reaching sheltered, navigable terrain
- Descent time
- Slowest realistic time for the far side in current conditions
- Crossing time
- Time across the crest plus a brief regroup
- Delay allowance
- Navigation checks, clothing changes, minor slips, and fatigue
- Final ascent
- Time from the last decision point to the pass
- Turnaround time
- Latest time to leave that decision point for the pass
Your timing should come from the group's recent pace on similar grade and surface. A guidebook time for a fit author is not evidence that your group can repeat it at altitude.
Calculate ascent and descent separately because a group that climbs at 300 vertical meters per hour on firm trail may descend much more slowly on scree or wet stone. Use the slower observed rate for the matching side.
If the group must be below the exposed descent by noon and that point is two hours beyond the pass, reserve those two hours first. After adding the crest crossing, delay allowance, and final ascent, the remaining clock time becomes the latest departure from the prior checkpoint.
If storms tend to build after midday, schedule the crossing early. The National Weather Service advises morning ascents in mountainous areas where thunderstorms often develop in early afternoon.
Name decision points that appear on the map, such as a junction, lake, shelter, or contour. At each one, compare clock time, weather, visibility, and the slowest person.
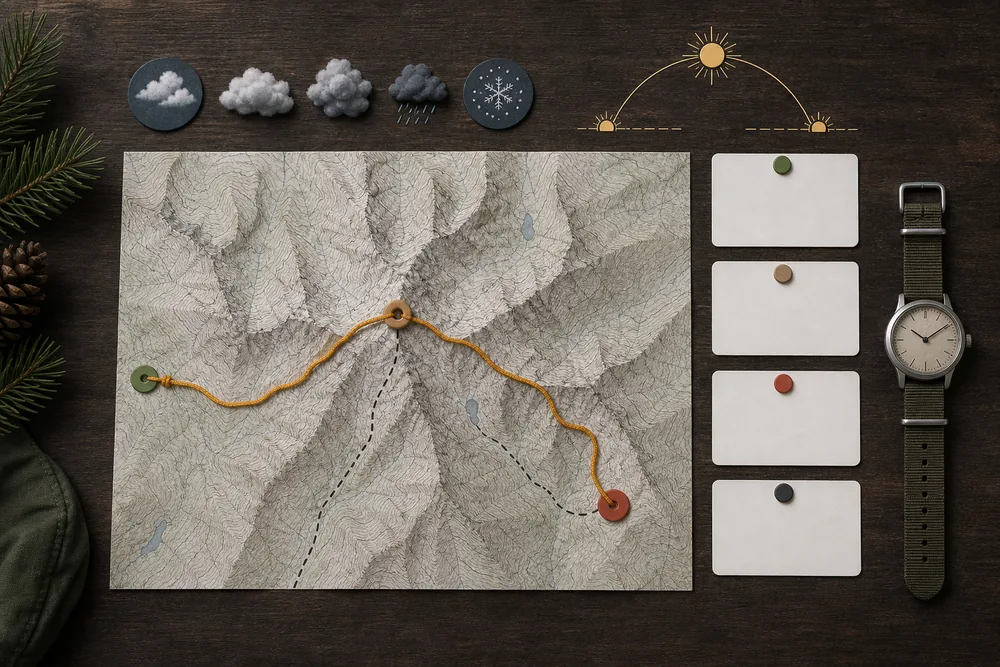
A controlled high-altitude pace should feel sustainable before the final climb. Speeding up to recover a lost hour usually creates more fatigue and less decision capacity.
A deadline needs a location. Turnaround at the named point and time, not after one more bend.
A few weather signs cancel the crossing outright
Cancel or retreat when the forecast, sky, wind, precipitation, or visibility removes the planned margin. A pass is a poor place to wait for a thunderstorm to reveal its direction.
| Sign | Why it matters | Safer response |
|---|---|---|
| Thunder heard | Lightning is close enough to strike | Leave ridges and exposed ground immediately |
| Cloud building rapidly | The forecast window may be closing early | Turn back or descend before visibility fails |
| Wind affecting balance | The crest may be stronger and colder | Retreat to sheltered terrain |
| Rain changing to sleet or snow | Surface and body-cooling risk are increasing | Add layers and use the lower safe option |
| Visibility hiding markers | Navigation and descent errors become likely | Reverse while the known route remains visible |
| Fresh snow loading slopes | Avalanche and route-finding conditions have changed | Avoid the crossing without suitable assessment |
The National Weather Service says no place outside is safe during a thunderstorm. It recommends getting off elevated areas such as hills and ridges and moving toward a substantial building or enclosed vehicle when possible.
Count the seconds between a lightning flash and thunder only as a rough sign that danger is near, not as permission to stay on a ridge when the interval grows. Storm cells can form overhead or send lightning far from the heaviest rain.
You need to watch the group as closely as the sky. A person repeatedly blown sideways, unable to keep gloves dry, or struggling to follow the route has already lost the planned margin even if the forecast threshold has not arrived.
Do not shelter under an isolated tree, shallow overhang, or small cave. Spread group members rather than clustering if caught outside, while continuing toward safer shelter.
You should apply the terrain and clothing controls from trekking in rain before the group becomes wet and cold. If someone cannot stop shivering or becomes confused, follow the site's hypothermia response.
Early retreat preserves choices. Waiting on the crest usually removes them.
How do snow, ice, scree, and loose rock change the plan?
Surface conditions can change a walking pass into a technical objective. Hard snow with a dangerous runout may require an ice axe, crampons, self-arrest competence, and sometimes a rope or qualified guide.
Trekking poles are not a replacement for that equipment. They provide balance but cannot reliably stop an accelerating slide.
Hard snow
A slip may become an uncontrolled slide, so assess angle, runout, and arrest skill.
Cornice
Wind-built snow may extend beyond the solid ridge, so stay well back from an uncertain edge.
Scree
Loose stones roll underfoot and can be kicked onto people below.
Talus
Large blocks can shift, trap a foot, or hide gaps.
Ice
Thin shaded patches can make an otherwise easy trail impossible to reverse safely.
Each person should move alone where loose rock could strike someone below. The group needs enough spacing to keep everyone out of the same fall line.
You should test snow near a safe edge of the route, not above a dangerous runout, while looking for an overnight freeze, softening surface, hidden ice, or footprints that leave the correct line. You need to turn around before entering terrain where a test slip would have serious consequences.
On scree, avoid shortcuts that create new erosion or send stones onto switchbacks. On talus, step on broad stable surfaces, test suspect blocks, and keep hands free enough for balance.
A winter trekking plan must include current avalanche information and the skill to interpret it. If the route needs technical movement or protection that the group lacks, hire a properly qualified guide rather than improvising.
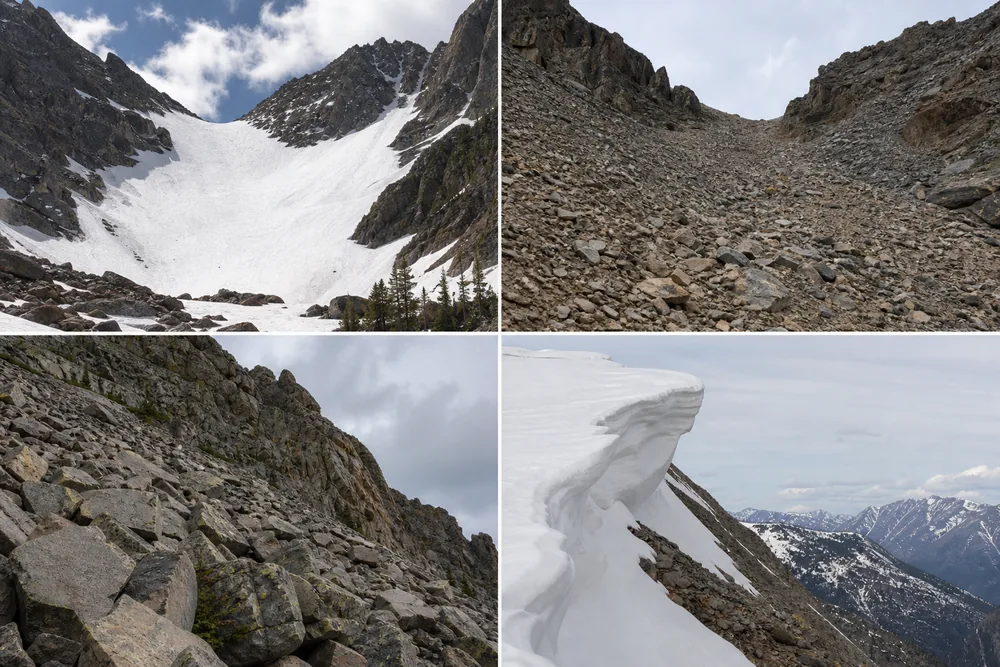
Classify the surface honestly. A route description written for dry summer trail does not cover today's ice or snow.
How should the group move on the final ascent and descent?
The group should stay close enough to communicate but far enough apart that one fall or kicked rock cannot hit everyone. A steady experienced person belongs at the front, with someone reliable at the rear.
You can use short steps and secure foot placement to keep the final climb controlled. The rest-step technique can manage effort on stable steep trail, but active balance takes priority when the surface becomes unstable.
- Every person can name the route and lower regroup point
- Layers are adjusted before the exposed climb
- Food and water are taken before fatigue affects judgment
- The slowest person remains inside the planned time
- Spacing matches rockfall and fall consequences
- Nobody passes beneath another person on loose ground
- The group leaves the crest without a long photo stop
- The leader counts everyone at the first sheltered point
On descent, shorten the stride and keep the center of mass over the feet. Do not run to recover time because loose ground amplifies small errors.
The backpack fit should keep the load close to the body. A loose pack can pull a tired trekker off balance on high steps or scree.
Regroup below the wind. The pass is a transition point, not a rest area.
What if altitude symptoms start near the pass?
You must stop further ascent when someone develops headache with nausea, dizziness, unusual fatigue, or poor appetite after gaining altitude. Those symptoms cannot be dismissed as a lack of fitness.
CDC guidance says never ascend to a higher sleeping altitude with altitude-illness symptoms and to descend when symptoms worsen despite rest at the same elevation.
Your group needs a gradual acclimatization schedule before the pass day. A spare rest day on the trek is useful only if the group is willing to use it.
Confusion, inability to walk a straight line, severe breathlessness at rest, or rapid deterioration requires urgent descent and emergency help.
Symptoms stop ascent. The goal cannot diagnose or treat the person.
When should you turn back even if the pass is close?
You should turn back when any essential condition falls outside the plan. Distance to the crest is only one input, and it may be misleading on steep or hidden terrain.
Pros
- Turn back while the approach route is still visible and familiar.
- Turn back when the slowest person misses the named checkpoint.
- Turn back when wind, cloud, snow, or rain closes the agreed margin.
- Turn back when required equipment or skill is absent.
Cons
- Do not continue because another group did.
- Do not continue because a booking or transport is inconvenient to change.
- Do not split the group to let faster people cross.
Sunk cost makes the final slope dangerous. Hours already spent climbing cannot improve the weather, daylight, surface, or health of the group.
Before departure, you need to set non-negotiable conditions for turning around. Thunder, visibility below the next marker, wind that disrupts balance, a missed checkpoint, new altitude symptoms, or fresh snow on an unassessed slope can each end the attempt.
Also name the person with authority to stop the group. Everyone may report a concern, but one clear decision prevents a tired group from voting its way into worsening terrain.
When you call the turnaround, use clear language such as, “We are turning around now and returning to the last safe stop.” Debate can resume in shelter, but movement should begin before the window closes further.
Treating the itinerary as a promise is one of the common trekking mistakes that becomes costly near a pass. The crossing remains conditional until the group reaches the lower side safely.
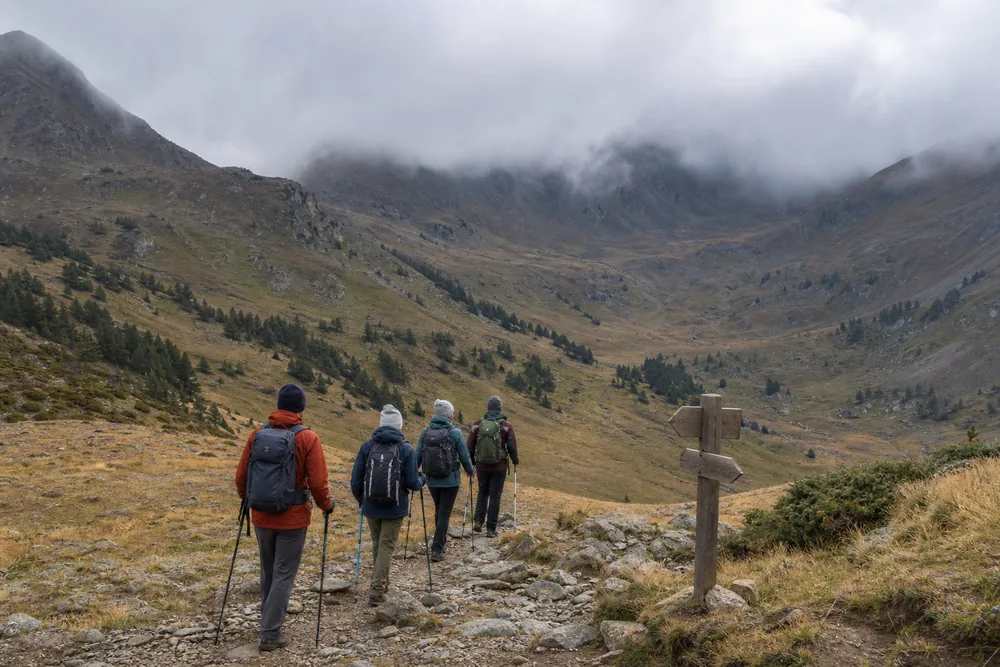
Close is not committed. The safest moment to reverse is often before the hazard becomes obvious.
The fallback plan needs to exist before the crest
Name the last safe shelter on each side, escape routes, communication points, water, and the action if the group becomes overdue. Share the route and return time with a trusted contact.
| Failure | Backup |
|---|---|
| Pass cannot be crossed | Return to the last safe overnight stop |
| Known approach becomes unsafe | Use the prechecked alternate shelter or emergency route |
| Group is separated | Stop at the last agreed point and follow the communication plan |
| Visibility is lost | Halt near a safe feature, navigate deliberately, and avoid cliff or avalanche terrain |
| Injury prevents walking | Protect from cold, give first aid, and contact the appropriate rescue service |
| Phone has no signal | Use offline map, satellite communicator if carried, and the overdue plan |
Your emergency kit should include spare insulation, waterproof protection, headlamp, first aid, food, water, navigation, and communication suited to the remoteness. The trekking packing system keeps these items reachable.
Do not separate an injured or ill person from the group. UIAA mountain guidance recommends that an ill person is not left alone and that the group thinks about descent early.
You should record local rescue numbers and coordinates in the format responders request. A coordinate without the route name, condition of the patient, weather, and group resources is incomplete information.
The fallback must be reachable. A vague plan to find another way is not an emergency option.
Sources
The National Weather Service lightning guidance supports early mountain timing and immediate retreat from elevated terrain when thunder threatens. The UIAA health rules for mountaineers cover forecasts, route registration, emergency equipment, descent from ridges, navigation, and not leaving ill people alone.
The CDC Yellow Book altitude guidance supports the altitude symptom and descent rules.
AnswersQuestions readers ask
What time should you cross a mountain pass?
Start early enough to cross and descend before the local period of greatest weather or heat risk. The exact time comes from the route, forecast, group pace, and turnaround calculation.
Should you wait on a pass for the weather to improve?
Usually no. A pass or ridge is exposed to wind and lightning, so descend toward safer terrain while the route remains visible if conditions deteriorate.
Can trekking poles make a snowy pass safe?
Poles help balance but do not provide the skills or arrest capability required for hard snow, steep runout, cornices, or avalanche terrain.
What if one person develops an altitude headache near the pass?
Stop further ascent. Do not cross merely because the pass is close, and descend if symptoms worsen at the same elevation.
Is turning back safer than descending the unknown side?
Often it is because you know the approach, but not always. Decide from current weather, terrain, daylight, and the safest reachable shelter rather than a fixed rule.