
What to Pack for Trekking Across Repeated Days and Camps
Pack for trekking by planning sleep, weather, food, water treatment, navigation, first aid, repair, and daily access before the bag is closed.
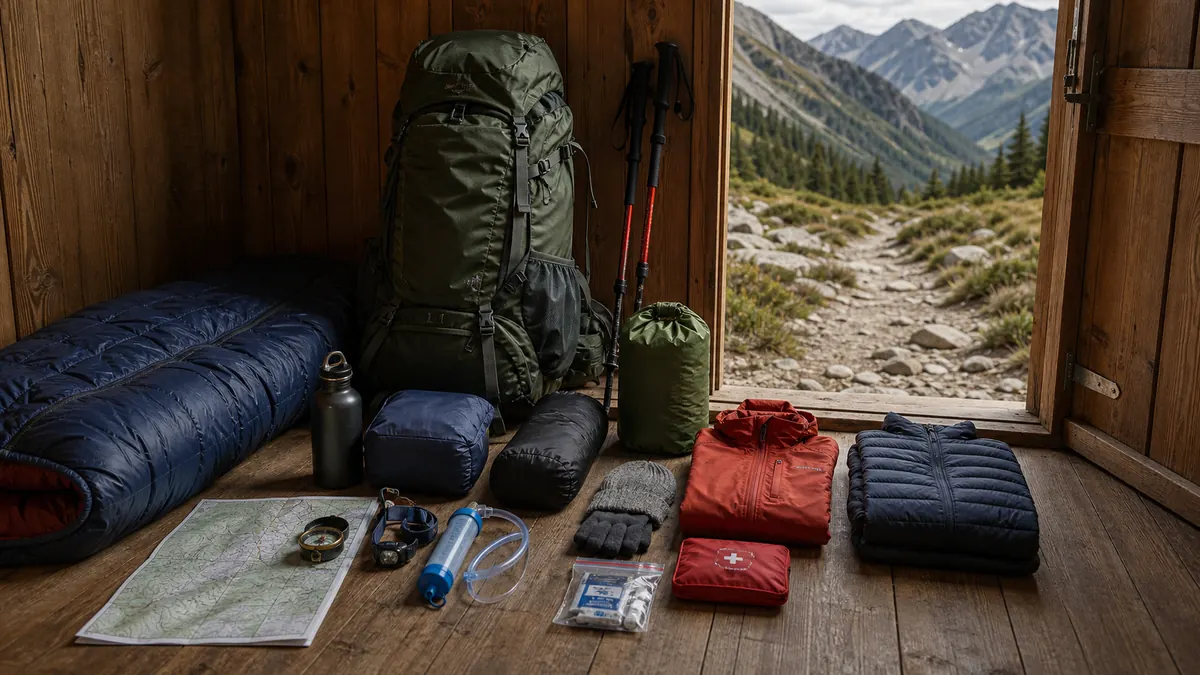
What to pack for trekking depends on how many days you will walk, where you will sleep, how reliable water is, and how much weather margin the route needs.
Which gear belongs in a trekking pack?
A trekking pack is not a trophy case for every outdoor item you own. It is a small system that must keep you moving, warm, fed, hydrated, visible, and able to solve common problems across several days.
Start with the route, nights, weather, water, lodging, and exit options.
Then decide what earns space. The right list for a hut trek differs from a self-supported tent trek.
Both need safety basics, but sleep, cooking, water, and repair needs can change a lot.
Trip shape decides gear before brand or weight.
- Navigation: map or offline map, simple compass.
- Light: headlamp and spare battery or power bank.
- First aid: blister care, bandage, personal medication.
- Repair: tape, cord, patch, small multitool.
- Weather: rain shell and warm insulation layer.
- Sleep: liner or sleep system matched to the overnight style.
- Water: bottles or bladder, filter or treatment tablets.
- Food: familiar meals, trail snacks, no-cook reserve.
- Foot care: tested socks and blister treatment you know.
- Emergency: small shelter layer when the night plan has a gap.
Your first multi-day route needs a pack list built on first-time trekking habits, not on day-hike instinct.
Which sleep system fits your overnight style?
Sleep gear depends on where you will spend the night. A hut, lodge, tent, tarp, or emergency bivy creates different needs for warmth, comfort, cooking, and backup shelter.
Do not copy a camping list blindly if you will sleep indoors. Do not copy a hut list if your route requires real shelter outside.
Poor sleep makes cold mornings, foot care, food choices, and navigation decisions harder the next day.
Protect the next morning with sleep gear that matches the night stop.
Pros
- Hut or lodge: lighter pack, no shelter to pitch, often resupply or warm meals available.
- Tent or tarp: full route freedom, no booking pressure, sleep where the day ends.
- Light insulation in verified mild conditions: reduces pack weight when nights are confirmed warm.
Cons
- Tent trekking in cold or wet season: adds weight and demands a weather-rated setup.
- Hut plan with no backup cover: one closed hut or late arrival leaves no margin for the night.
- Shared dorms without earplugs and a sleep layer: noise and cold air cut sleep quality even with less gear.
If your trek overlaps with camping, sort camp comfort gear from safety gear so the nice-to-have items never crowd out the essentials.
Which safety and navigation items need quick access?
Navigation, light, first aid, repair, insulation, rain protection, and water belong near the top of the list. They matter because a small delay can turn into a cold, dark, or thirsty problem fast.
Carry a map or offline map and know the key direction of travel. A phone is useful, but battery, water, impact, and signal can all fail.
Keep the items you may need fast where you can reach them without opening the main compartment.
Access matters as much as ownership when weather or timing changes.
| Need | Pack item | Best access point |
|---|---|---|
| Navigation | Map, offline map, compass | Hip pocket or top pocket |
| Light | Headlamp and spare power | Top pocket |
| First aid | Blister care, bandage, personal meds | Easy outer pocket |
| Repair | Tape, cord, patch, multitool | Small marked pouch |
| Weather | Rain shell and warm layer | Near top of pack |
| Water | Bottles, bladder, filter or treatment | Reachable while walking |
Basic compass and map work is enough for many marked treks if you practice before leaving. Wider safety basics come from everyday hiking safety checks, adapted to multi-day travel where help sits further away.
How should trekking clothing handle weather and recovery?
Clothing should manage sweat while walking, rain while moving, warmth while stopped, and sleep recovery at night. That usually means layers, not one heavy item.
Pack a rain shell even when the forecast looks friendly if the route is exposed or remote. Wet clothing can turn a mild day into a cold evening.
Dry backup clothing is recovery gear.
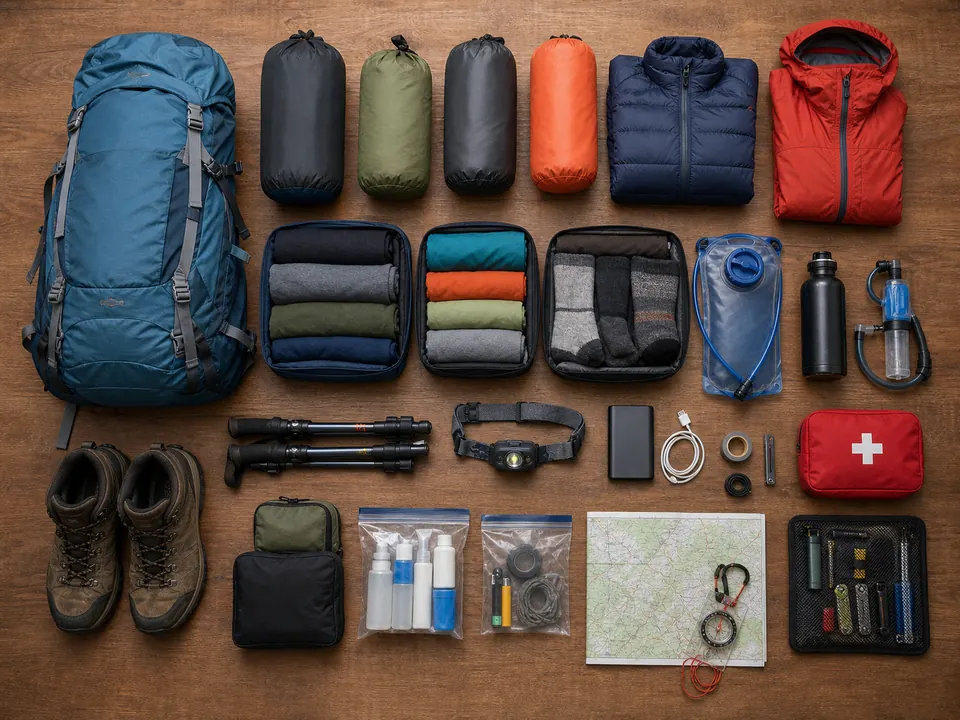
A working clothing kit covers a base layer that dries faster than cotton, a warm layer for stops and evenings, a rain shell sized to move over layers, socks tested on long walks, sun protection for exposed trail, and a dry bag that keeps sleep clothing separate from the day's damp layers. On cold or wet routes, early hypothermia signs matter more than saving a few hundred grams, so keep the spare warm layer.
Warmth is easy to remove from the list and hard to replace on trail.
Build a dry core that survives repeated rain
Your sleep insulation and dry clothing need a waterproof barrier inside the pack. A pack cover sheds much of the rain, but water can still enter around shoulder straps, the back panel, openings, or a wet item pushed under the cover.
Line the main compartment with a durable waterproof liner. Put the sleeping bag or quilt, sleep clothing, and other must-stay-dry insulation inside sealed bags within that liner when the consequence of soaking is high.
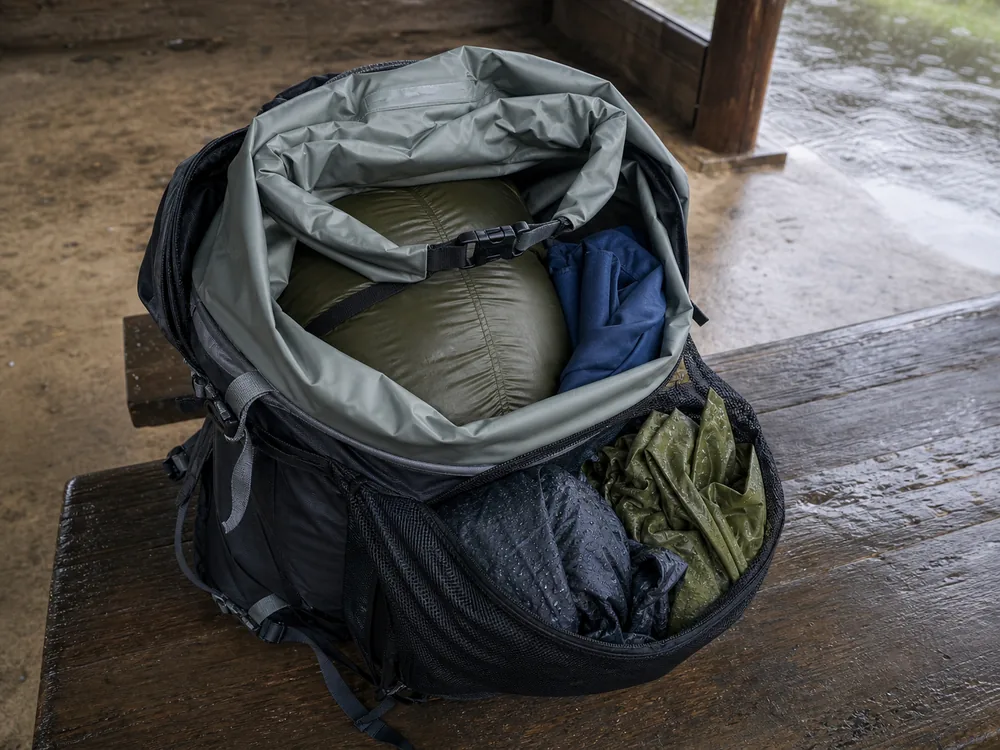
Keep the rain shell, wet shelter, damp socks, and water treatment outside the dry core.
These items need fast access or already carry moisture. Repeated rainy trekking days become harder when one wet afternoon reaches the sleep compartment.
Close the liner before closing the pack. Fold or roll the top so water cannot run straight inside.
At a deep crossing or in prolonged rain, electronics, paper maps, medication, and fire-starting supplies may need their own sealed protection too.
Separate condensation from leaks.
A damp shell stored against a cold bag can create moisture even when rain never entered. Air wet items during a break and at camp whenever conditions allow.
Use the same order every evening. Shelter goes up first, then the dry core opens under cover.
In the morning, seal dry sleep items before packing the wet shelter so the two systems never trade places.
Test the arrangement at home with the actual pack.
Spray the closed pack with water or leave it in steady rain, then check the liner, seams, closures, and every item that must stay dry. Fix the first point of entry instead of assuming the cover failed everywhere.
No single bag is a guarantee. Small holes, poor closures, and sharp cooking gear can defeat a waterproof layer, so inspect the liner before each trip and keep sharp items away from it.
Sleep gear stays in the dry core until shelter protects the place where you unpack it.
How should you plan food, water, and cooking?
Food should be simple, familiar, and easy to eat when tired. The best trekking food is not only high energy.
It is food you will actually eat on a windy break or late evening.
Water planning starts with reliable sources, treatment time, heat, climb, and camp location.
A filter is useful only if you know where water is likely to be on each segment. Cooking gear depends on overnight style: some treks need a stove and fuel, while others need only snacks and a simple backup.
Water choices set pack weight more than most small gear decisions.
| Category | Ask before packing | Practical choice |
|---|---|---|
| Breakfast | Will I cook or move early? | Keep it simple and repeatable |
| Trail snacks | Can I eat this while walking? | Mix sweet, salty, soft, and crunchy |
| Dinner | Will I have time and fuel? | Choose meals that cook reliably |
| Water carry | How far to the next real source? | Size bottles by segment |
| Treatment | Have I practiced this method? | Test it before the trek |
| Reserve | What if a day runs long? | Carry a small no-cook backup |
Water and weather gear earn their place every day on a multi-day route, not just when the sky looks threatening.
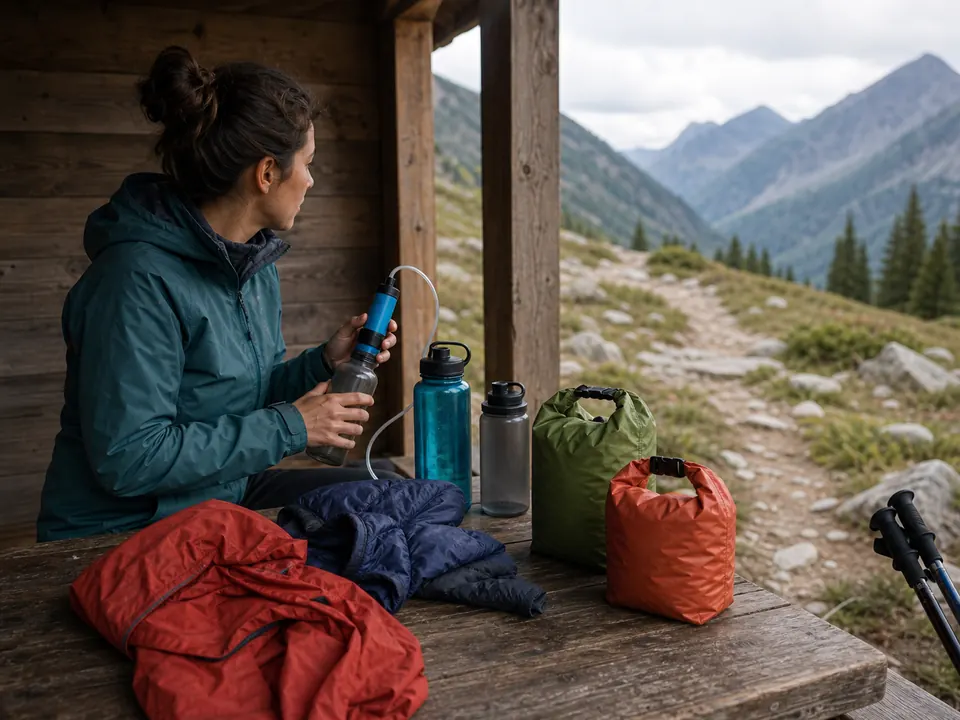
Plan the water carry amount for each day or segment, not for the trip as a whole. Whole-trip totals can hide a long dry afternoon.
Count consumables by day and resupply point
Consumables change weight and capability every day. Count food, stove fuel, medication, battery power, water treatment, and hygiene supplies for each segment between confirmed resupply points.
Start with planned uses. Count meals and snacks, hot-water boils, medication doses, device charges, and liters the treatment method can handle.
A vague extra is hard to check, while one additional dinner or one delay-day dose is measurable.
Keep the delay reserve separate from planned use.
A reserve may cover one missed resupply, a slow exit, or weather that holds the group in place. Choose the amount from the route's longest gap and exit options instead of adding the same arbitrary percentage to every trip.
Treat an unverified shop, hut meal, fuel canister, charging outlet, or water source as unavailable. A first trekking trip plan should confirm opening dates, accepted payment, booking rules, and current service before supplies leave the pack.
Food packaging becomes trash that you still carry.
Repack only when doing so preserves labels, preparation directions, allergy information, and safe storage. A multi-day food rhythm should also leave one known place for wrappers after each stop.
Fuel planning must match the stove, weather, elevation, meal method, and number of people. Test how many normal boils the group gets from its setup.
Do not copy a canister estimate from a different stove or a calm kitchen test.
Spread critical consumables when the group can do so safely.
One person may carry the main fuel, but another can carry the lighter and no-cook reserve. Each person keeps personal medication and the minimum needed if the group separates during an emergency.
Do one final arithmetic check after packing. Add planned uses, reserve uses, and what should remain at the next resupply.
If the count only works when every day goes perfectly, the segment needs more supply or a smaller commitment.
Count uses, not guesses. Consumables earn their weight by covering a named day, task, or delay.
Pack daily-use gear for quick access
Packing is not only about what goes in. It is about what you can reach without dumping everything onto wet ground.
Keep dense items close to your back and centered.
Use dry bags or small pouches by category, but do not create so many bags that finding one item becomes slow. Put rain gear, warm layer, water, snacks, headlamp, map, first aid, and toilet kit where the day can reach them.
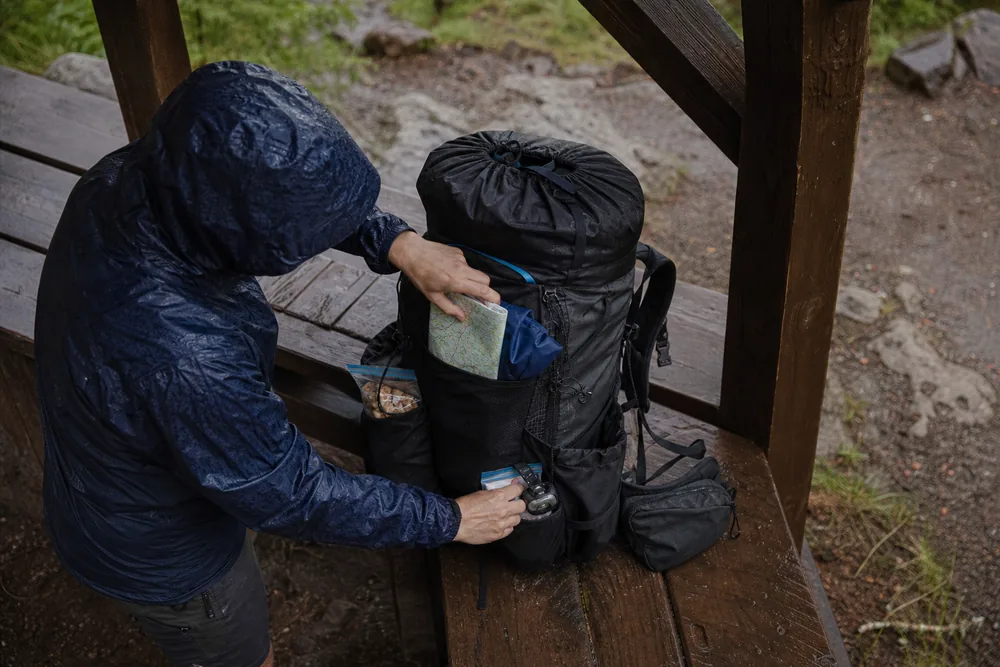
Pack the first day slightly differently from the rest. Keep the first snack, first rain decision, first water treatment, and first blister fix closest to hand so the trip starts with calm routines.
A good pack has a working order.
- Main packing question
- What must work again tomorrow?
- Best pack order
- Safety, sleep, weather, water, food, navigation, repair
- Common beginner mistake
- Packing for comfort but forgetting access and recovery
- Weight rule
- Remove duplication, not safety margin
- Pre-trip test
- Pack it, wear it, walk with it
Do a five-minute unpack test before leaving. Without looking inside every pouch, find rain gear, a warm layer, water treatment, blister care, headlamp, and the day's food.
If that test feels messy at home, it will feel worse in wind, rain, or fading light.
- Lay everything out by use before packing.
- Remove duplicates that do not change safety or comfort.
- Pack dense items close to the back.
- Protect sleep clothing and insulation from water.
- Put daily-use items near the top or outside pockets.
- Wear the loaded pack and walk before the trip.
Good packing supports your trekking fitness plan because the body should practice with the same load it will carry.
How should you test a fully loaded trekking pack?
Test the exact pack you intend to carry, not a lighter training version. Include the first segment's food, the heaviest expected water carry, fuel, shelter, sleep system, and shared gear assigned to you.
Walk long enough for small problems to appear. A short lap around the room will not reveal heel lift, shoulder numbness, hip-belt rubbing, bouncing bottles, or a pack that leans away from the back after an hour.
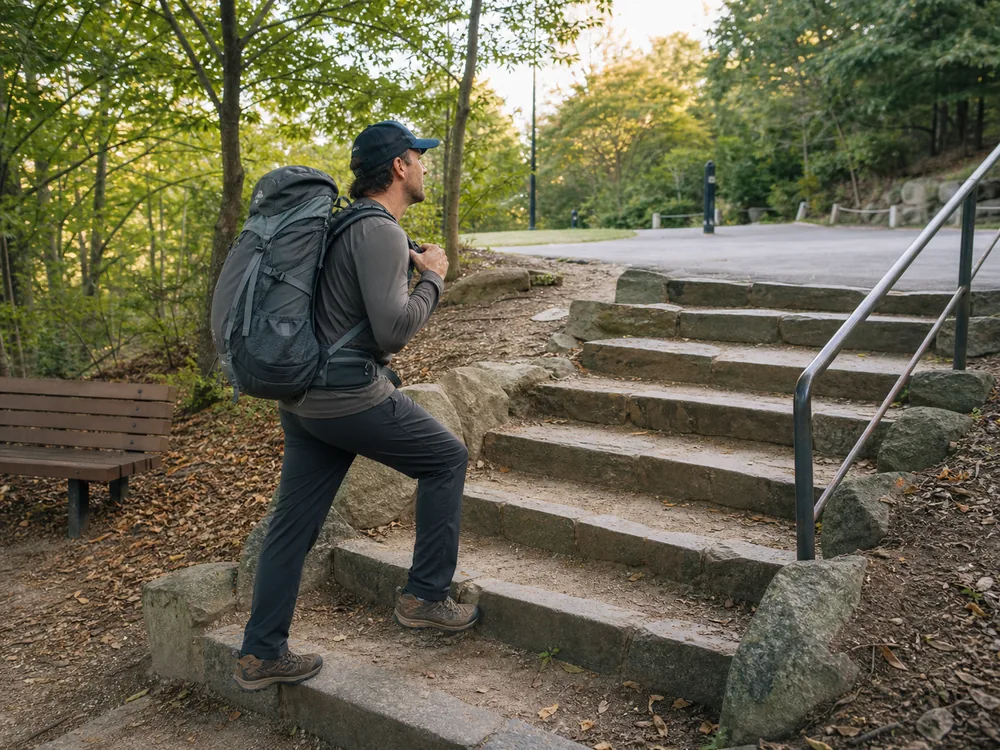
Include hills, stairs, uneven ground, and a controlled descent when those are available safely. Notice whether the load shifts uphill, poles interfere with pockets, or the belt blocks a normal stride.
Stop and run the access drill. Put on rain gear, find a warm layer, treat a blister, filter water, retrieve the map, and reach the first snack without spreading the pack across the ground.
Set up the shelter and sleep system after the walk. Cook or prepare one planned meal, use the water treatment, charge a device from the power plan, and pack everything again.
Camp tasks that feel confusing when rested become harder in cold rain.
Check the body later that day and the next morning.
Tender skin, numbness, bruised hips, unusual knee pain, or a new foot hotspot needs a fit, footwear, load, or route change. Multi-day trekking safety depends on solving that small problem before it repeats across several days.
Make one correction, then repeat enough of the test to prove it worked. Tightening straps in the garage does not prove the pack carries better.
The second loaded walk closes that loop.
Test the real first-day load. A shakedown is useful only when it carries the food, water, and gear that create the problem.
Foot care and repair protect the next day
Foot care is not optional on a trek.
A hotspot on day one can control the rest of the trip if you ignore it. Pack blister tape or treatment you already know how to use.
Add nail clippers, a small amount of lubricant if it works for you, and spare socks that have been tested on long walks.
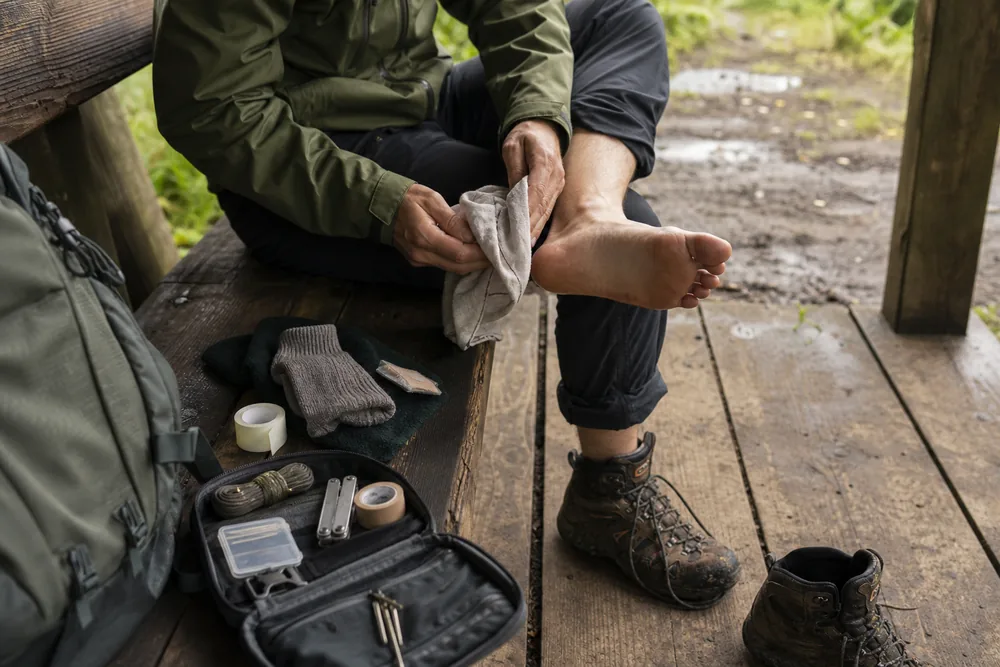
The repair kit should solve common failures, not rebuild the whole pack.
Tape, a needle, thread, cord, a buckle or strap fix, and a small multitool can save a loose sole, torn pocket, or broken strap. Separate first aid from repair so blister care and wound supplies are easy to identify by touch or color, not buried under gear patches.
Small repairs protect big plans.
Fit problems often look like fitness problems. Sore shoulders usually mean poor backpack strap adjustment rather than a back that needs to get stronger.
What can stay home?
Leaving gear behind is safest after you understand what job each item does.
Do not cut something because it looks small, boring, or unlikely to be used. Cut it because another item already solves the same problem or because the trip plan removes that need.
Start with duplication. Two warm layers may be smart in cold rain, but three half-useful layers may weigh more and perform worse than one dry insulation layer and a rain shell.
Two knives rarely beat one small multitool and repair tape.
Cut duplication, not margin.
Pros
- One reliable dry insulation layer: replaces three half-useful outfits and performs better in wet cold.
- Map and offline map together: different failure modes mean real redundancy, not dead weight.
- Tested blister treatment and tape: familiar tools perform better in emergencies than new ones.
- A no-cook food reserve: works when fuel, time, or weather goes wrong.
Cons
- Multiple heavy guidebooks: one good offline map covers the same trail.
- New untested food that needs careful cooking: often goes uneaten on a windy break.
- Large tool kits for rare failures: tape and a small multitool handle most real problems.
- Extra devices with no defined purpose: added weight that slows every morning routine.
| Item type | Usually worth carrying | Usually worth questioning |
|---|---|---|
| Navigation | Map, offline map, simple backup | Multiple heavy guidebooks |
| Warmth | One reliable dry insulation layer | Extra outfits for style |
| Repair | Tape, cord, needle, small tool | Large tool kits for rare failures |
| Food | Familiar meals and snacks | New meals that need perfect cooking |
| Electronics | Phone, power plan, headlamp | Extra devices with unclear purpose |
| Comfort | One item that improves sleep | Bulky camp items used once |
Weigh the pack after cutting, then put the weight back on your shoulders. If removing an item would make bad weather, a late arrival, a minor injury, or a missed water source harder to handle, keep it or change the trip plan so that risk is smaller.
Who carries each shared item?
Group packing can reduce weight, but only if shared items are assigned clearly. A stove, shelter, first-aid kit, repair kit, water treatment method, or battery plan should never live in the imaginary middle of the group.
Write down who carries each shared item and what backup exists if that person turns around. The plan matters most on point-to-point treks, exposed routes, and any trip where the group may separate briefly.
Keep critical items from being too centralized: one person can carry the main shelter, but another person may need emergency cover.
Shared gear needs named responsibility.
| Shared item | Main question | Safer habit |
|---|---|---|
| Shelter | Who has it if weather changes? | Keep group together or carry backup cover |
| Stove and fuel | Who can cook if someone exits? | Assign fuel and lighter clearly |
| Water treatment | What if the filter fails? | Carry tablets or another simple backup |
| First aid | Who can reach it fast? | Put it in a known pocket |
| Power | Whose phone holds maps? | Spread maps and power across the group |
| Repair kit | Who can fix shelter, stove, or pack failures? | Keep shared repair parts in a named pocket |
| Food storage | Who carries the required container or hanging system? | Confirm every scented item fits before departure |
A solo trek changes this completely. If you carry everything yourself, cut comfort first and keep core safety items, because there is no partner's pack to borrow from.
For pairs, avoid splitting a single life-support system into pieces that only work together. If one person carries the stove and the other carries all fuel, a simple separation can stop dinner or hot drinks.
Pair shared systems with a clear rule to stay together.
Sources
The National Park Service ten essentials article covers navigation, sun protection, clothing, light, first aid, fire, repair, food, hydration, and emergency shelter: NPS Ten Essentials. NPS Hike Smart explains limits, planning, weather, communication, and emergency plans: NPS Hike Smart.
Step by stepPractical steps
- Start with route length, nights, weather, water, and sleep style.
- Pack safety, navigation, water, first aid, repair, light, and weather layers first.
- Choose sleep and clothing systems that protect the next morning.
- Plan food and water by day or segment, not only by total trip length.
- Pack by access, then walk with the loaded pack before leaving.
AnswersQuestions readers ask
What should I pack for a first trek?
Pack navigation, light, first aid, repair, water treatment, food, weather layers, sleep gear for the overnight style, foot care, and a small emergency margin.
How heavy should a trekking pack be?
There is no single correct number. Keep the load light enough to walk safely for several days, but do not remove weather, water, navigation, first aid, or sleep protection to chase a number.
Do I need a stove for trekking?
Only if your food plan or overnight style requires it. Hut or lodge treks may not need full cooking gear, while self-supported tent treks often do.
Should I pack extra clothes for trekking?
Pack layers that solve sweat, rain, cold stops, and sleep recovery. Extra dry socks and a protected dry layer often matter more than many spare outfits.
What packing mistake causes the most trouble?
Packing items without testing access, fit, and weight. A useful item still causes problems if you cannot reach it or if the pack hurts after a few hours.