
Can Trekking With a Dog Still Work on Day Two?
Prove repeated-day readiness, protect human load reserve, and plan every camp and exit around the dog.
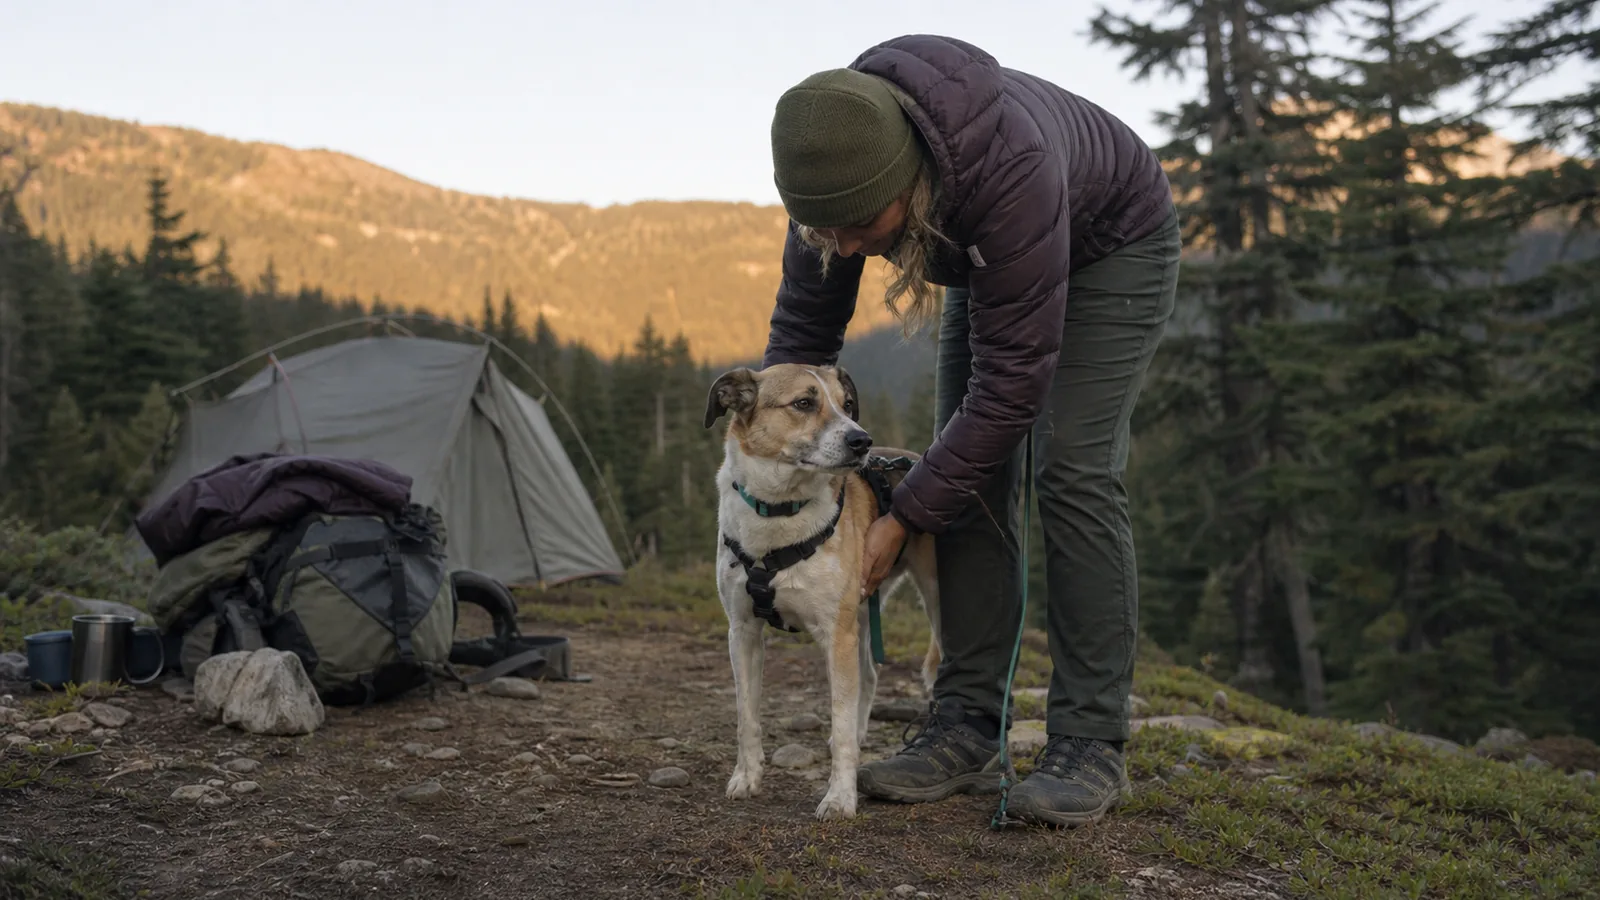
Trekking with a dog works when the pair can repeat the effort after a night out. Prove the dog's recovery before the trip, choose dog-permitted camps and usable exits, keep enough human reserve to take every dog-carried item, and practice how the dog leaves if it cannot walk.
How do you know a dog is ready for a multi-day trek?
A dog is ready for a trek when it can repeat the work after eating, sleeping, and waking in an unfamiliar place. Finishing one long, exciting hike proves less than moving normally on the second morning.
- Veterinary check
- Ask whether age, joints, breathing, heart health, and current medicines change the plan
- Walking proof
- Complete two suitable walking days in a row without limping, pad damage, or unusual fatigue
- Camp proof
- Spend a practice night close to the car with the real sleep, food, leash, and water setup
- Morning proof
- Look for normal appetite, drinking, gait, paws, and willingness to move
- Handler proof
- Carry the full human load with spare capacity for the dog's food, pack, or body
A veterinary check comes first if the dog is new to loaded exercise, has a health condition, is still growing, or has not worked on rough ground recently. The veterinarian can assess the individual dog and advise on conditioning, parasite prevention, vaccination, and a first-aid plan.
Readiness needs proof in stages.
Your first proof is an easy route on two consecutive days with the harness and any dog pack planned for the trek. The distance and surface should stay familiar enough that the test measures recovery, not novelty.
The dog should eat, drink, settle, and move normally after the first day. Check again before the second walk and after it.
Sore pads, stiffness, reluctance to rise, a changed gait, vomiting, diarrhea, or unusual quietness means the test has found a limit.
Next, run a practice night at a legal campground or another controlled place near an exit.
The overnight test should use the same bed, food container, bowl, restraint, rain protection, and morning routine planned for the trek. A dog that patrols all night, refuses food, shivers in its sleep space, or cannot settle beside shelter needs another practice or a different setup.
The second morning is the test. Excitement can carry a dog through day one, while paws, joints, digestion, and sleep show the real cost later.
This is the main difference between dog hiking basics and a trek. Day-hike access, leash control, heat, paws, wildlife, and passing still apply, but trekking adds a night and asks both of you to work again.
The trekking trip structure adds repeated walking, camp work, and a restart, so it exposes problems that a single outing can hide.
The trekking foundation treats food, water, sleep, pace, and foot care as systems that must survive several days. Your dog becomes part of every one of those systems.
Route, camp, and exit rules all have to fit the dog
The entire route chain needs checking, not only the first trailhead. A dog may be allowed on one path but excluded from a shuttle, hut, bridge, protected zone, campground, or later section.
Open the current land-manager pages for every segment and sleep stop.
You need to confirm leash rules, dog access, camping restrictions, waste instructions, seasonal wildlife closures, and transport limits. Save the relevant pages offline when service may disappear.
| Route feature | What to verify | Why it changes the trek |
|---|---|---|
| Every walking segment | Dogs allowed under current rules | One closed section can break the whole itinerary |
| Each sleep stop | Pets allowed and restraint rules | A legal trail does not guarantee a legal camp or hut |
| Surface and shade | Paw abrasion, heat exposure, snow, or sharp rock | The dog meets the ground on every step |
| Water plan | Reliable source information and clean backup water | A mapped source may be dry or unsafe for a dog |
| Exit after each night | Distance, terrain, road access, and pickup | A tired dog may not complete the planned direction |
| Nearest veterinary care | Location, hours, and travel time | Remote first aid cannot replace veterinary treatment |
Reject the route when one essential row cannot be confirmed. A missing camp rule or vague exit can turn a legal first day into a blocked second day.
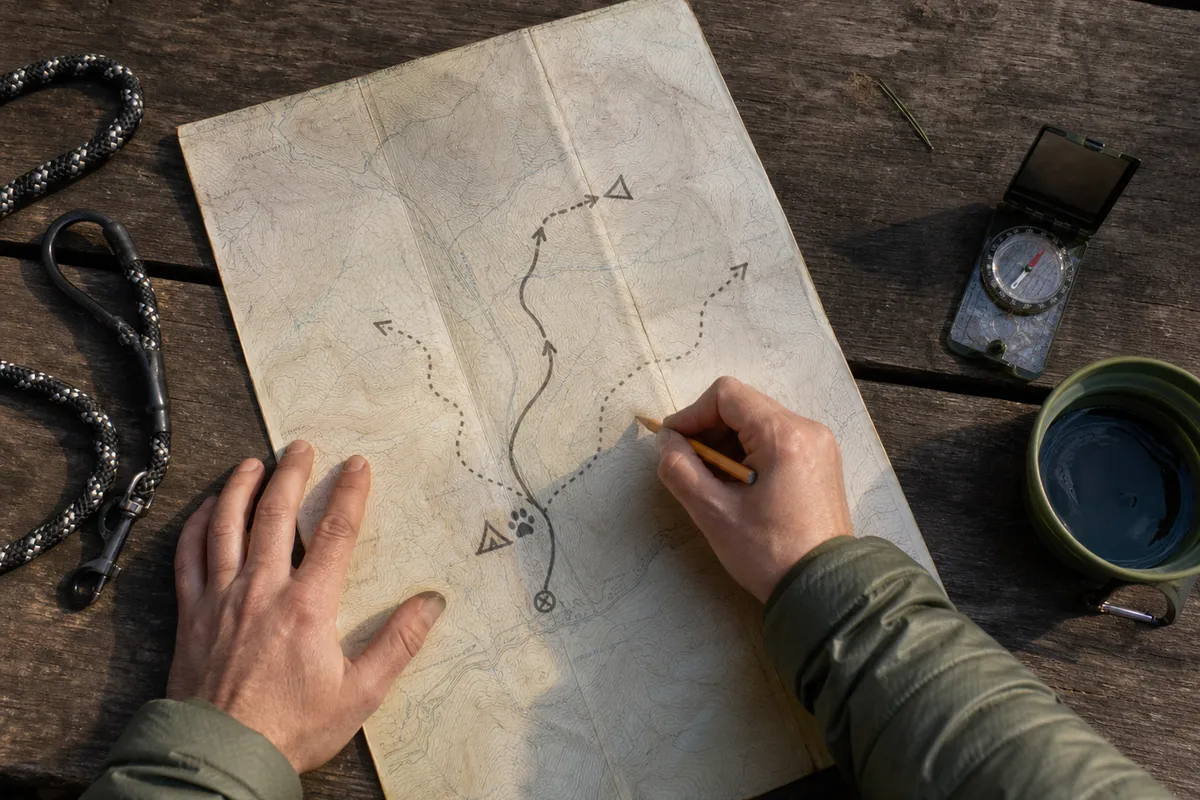
Your daily plan should stay below the mileage both of you have proved at home. Pack weight, repeated climbing, hot ground, wet fur, camp work, and poor sleep all take capacity away from the next day.
Clear paths, modest daily segments, and exits before the hardest ground make a better first route. A trek that forces the group over a high pass to reach the first road is a poor first dog trip, even when the total mileage looks manageable.
The first trekking route plan helps place water, camps, daily effort, and decision points. Add dog access and dog evacuation to that map before accepting the itinerary.
Weather should shrink the route early. A cold wet night can leave a dog with damp fur and poor sleep, while heat can make a mild climb unsafe before the person feels overworked.
The rainy trekking system protects dry sleep gear, and winter trekking limits cover cold starts and frozen water.
The farthest exit anchors the plan. If you cannot describe how a tired or injured dog reaches that exit, choose a shorter route with more road access.
The handler ends up carrying most of the dog's load
Your load plan must assume that the dog may stop carrying its share. The human load reserve needs enough volume and weight capacity to absorb the dog pack without leaving food, water, shelter, or safety gear behind.
The veterinarian should decide whether loaded walking is suitable for the individual dog.
No universal body-weight percentage fits every dog. Age, size, build, health, pack fit, terrain, temperature, conditioning, and trip length can change the safe answer.
Introduce the dog pack empty on ordinary walks. Add light, even contents only after the dog moves normally, ignores the pack, and shows no rubbing.
A loaded pack should not bounce, twist, block the shoulders, press the spine, or change the dog's gait.
- Fit the harness or pack before adding weight.
- Balance the two sides and secure every hard edge.
- Watch the first ten minutes for shortened steps or twisting.
- Recheck under the chest, behind the elbows, and along the straps at each break.
- Keep dog water and first-aid items in the human pack where they remain reachable.
- Leave space for every item the dog carries.
Complete these checks with the real trip load. An empty-looking pack can fit differently once both panniers hold food and water.
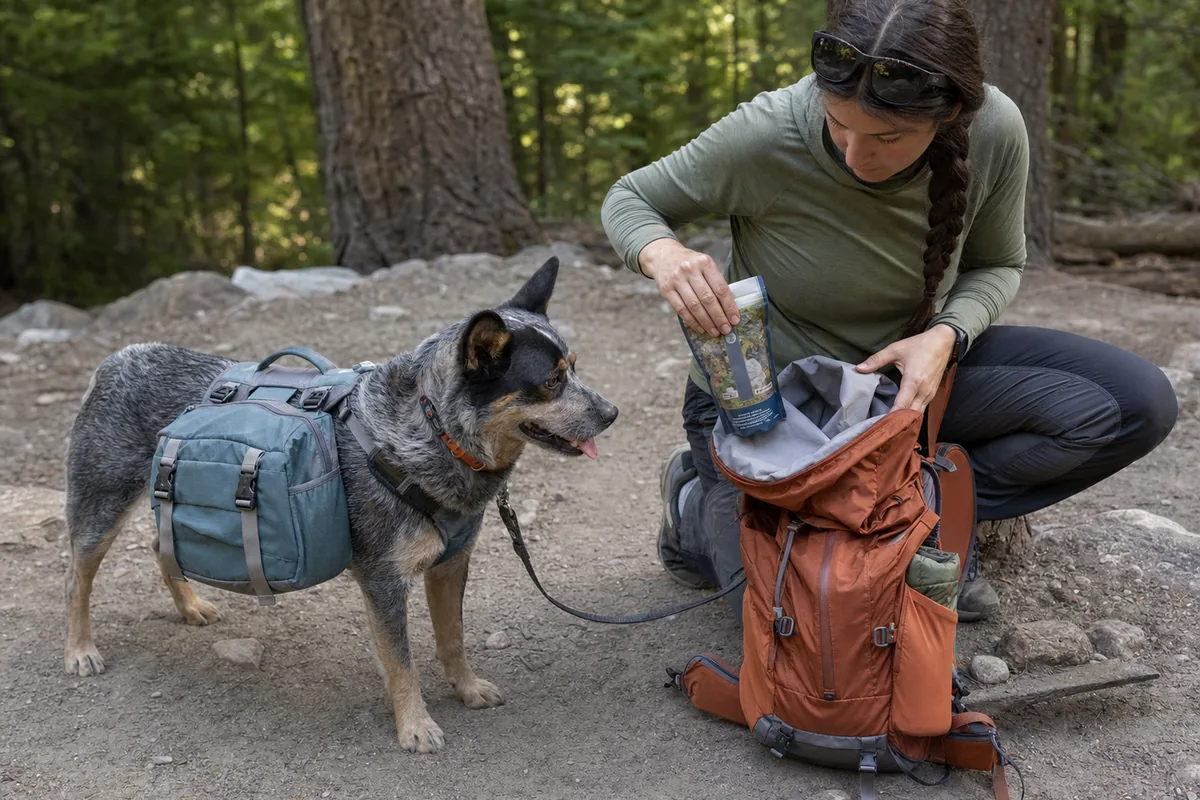
A training walk should test the transfer. Put every dog-carried item into the human pack, remove the dog pack, and walk the steepest type of ground planned for the trek.
If balance, pace, or access to water falls apart, the original load plan has no reserve.
A stable backpack fit matters more after the transfer because loose weight can pull the handler backward or side to side. The trekking pack system should also keep human shelter, warmth, navigation, and first aid intact.
Train the handler for the contingency, not only the normal load. The trekking training plan should include walking with the full transfer weight before the trip.
Human reserve carries the plan. The dog's pack can save space on an easy day, but it must never become essential to reaching camp or an exit.
How much dog food, water, and waste capacity does each day need?
One meal, one bowl fill, and one waste bag look small at home. Across several days, those items become a meaningful part of the shared load and camp routine.
The dog's normal, tested food belongs in measured daily portions, with a modest contingency for delay. A remote trip is a poor place to change food or introduce rich trail snacks because stomach trouble can remove both energy and water.
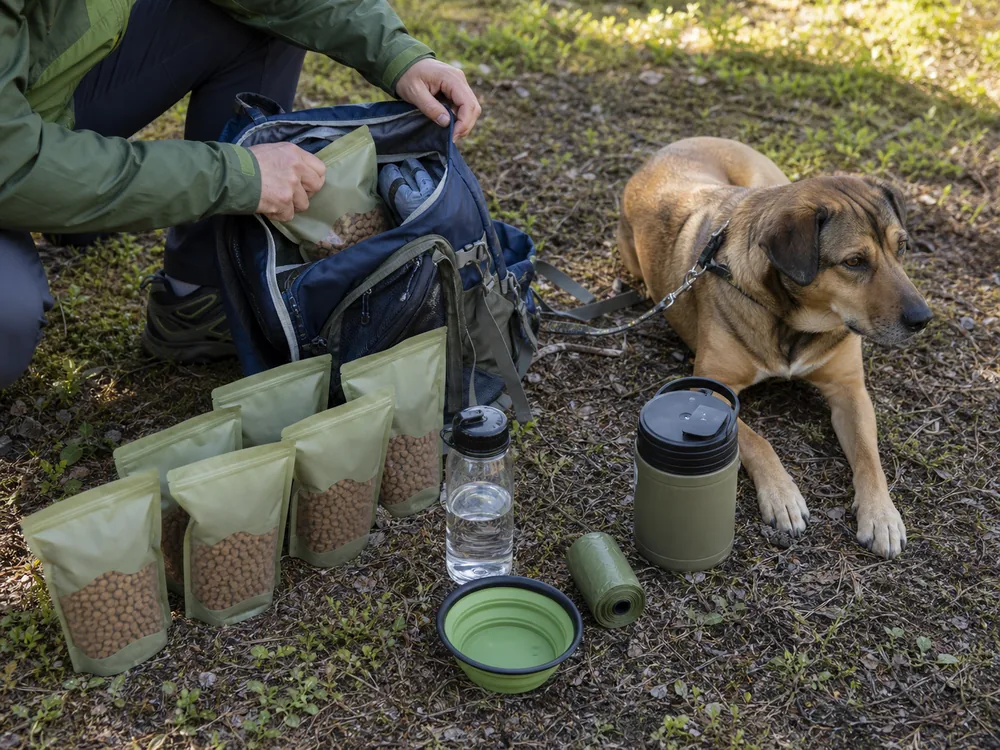
Dog food, chews, used bowls, and scented waste count as attractants where wildlife rules require protected storage. They belong with human food and trash in the approved container or hang system.
Never keep dog food loose beside the dog's bed.
Food
The normal ration stays protected from moisture, and the handler notes how much the dog actually eats.
Water
Clean or suitably treated water should be offered before heavy panting.
Waste
The exact local rule decides whether a sealed pack-out method is required.
Wildlife
Secure dog food, bowls, treats, and trash with the rest of the group's attractants.
Daily reset
Refill the reachable portion, inspect the bowl, count remaining meals, and check waste-bag capacity each morning.
Do not assume every stream or lake is suitable drinking water.
A source can be dry, hard to reach, contaminated, or covered by a harmful algal bloom. The CDC advises keeping pets away from stagnant, discolored, foamy, scummy, paint-like, or bad-smelling water.
The group's water carry calculation must include the dog and a dry-source margin. Offer smaller drinks during breaks rather than waiting until the dog is panting hard, seeking shade, or refusing to move.
Waste handling depends on local rules, but leaving a filled bag beside a remote trail is never a plan.
Your waste kit needs enough bags and a durable outer container that prevents punctures and separates waste from food. If the required pack-out volume feels unmanageable, shorten the trip.
- Measure every meal before leaving home.
- Carry one complete day where a route delay could require it.
- Store pet food with other wildlife attractants.
- Keep a clean bowl and reachable water in the human pack.
- Check official waste instructions for the exact area.
- Carry full bags to the approved disposal point.
Count supplies by dog-days. The first day's small items still have to work after rain, a dry water source, an extra night, or a dog that can no longer carry anything.
Settling a dog at camp takes a routine
Reach camp with time for the dog to drink, cool or warm, eat, and settle while the handler still has enough daylight and patience to set shelter. A late arrival forces dog care and camp work into the same tired minutes.
The dog should stay leashed or restrained as local rules require. Camp is full of food smells, wildlife movement, unfamiliar people, and darkness.
Reliable behavior at home does not remove the need for physical control where rules or risk demand it.
- Choose the sleep spotUse a legal durable site away from hazards, traffic, and fragile vegetation.
- Secure the dogSet the leash or approved restraint before opening food or shelter bags.
- Offer water and check the bodyLook at paws, gait, coat, breathing, and strap areas while the dog is still standing.
- Build weather protectionKeep the dog's bed and insulation dry while shelter goes up.
- Feed and secure attractantsUse the familiar ration, clean the bowl, and store all scented items correctly.
- Check for ticks and debrisInspect between toes, under straps, around ears, and through the coat.
- Prepare morning itemsPlace the leash, bowl, food, paw care, and human layers where the restart stays controlled.
This order keeps the dog controlled while water, warmth, shelter, food, and body checks happen without competing for the same moment.
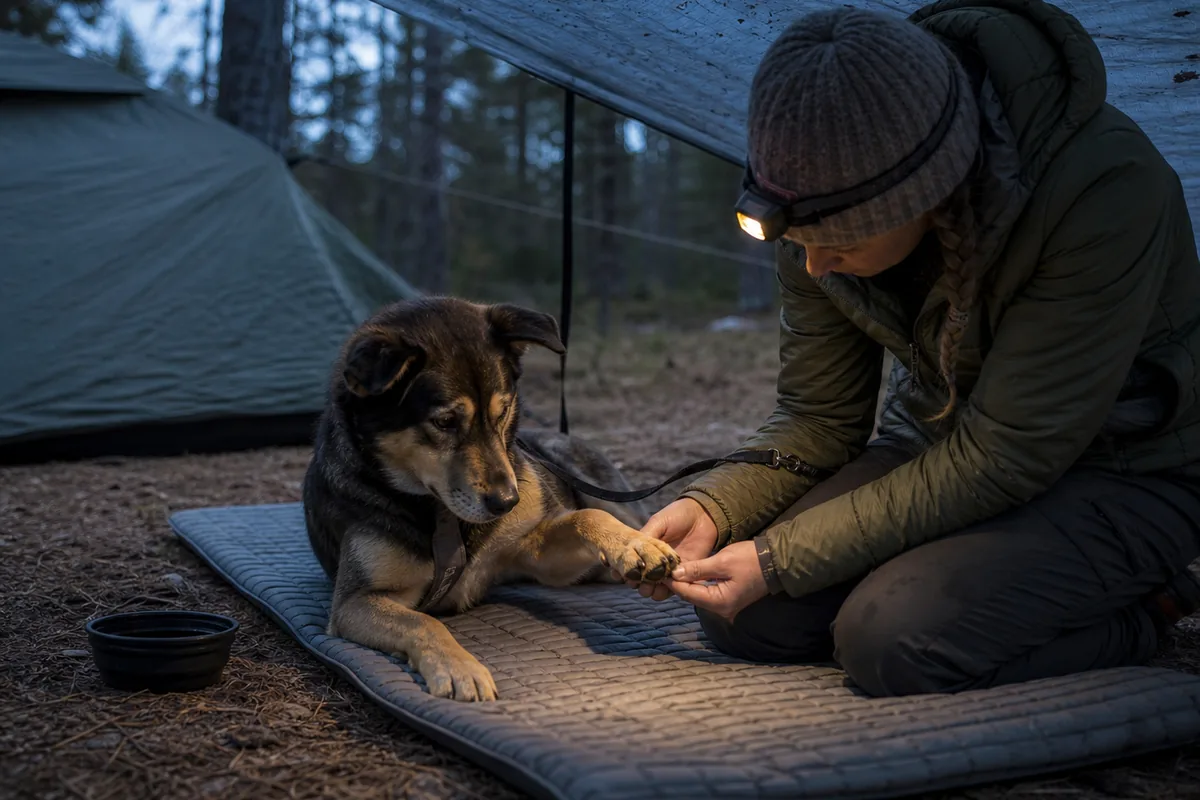
Give the dog a dry insulating layer between its body and cold ground. Wet fur, wind, and inactivity can change comfort quickly after walking stops.
The sleeping arrangement should keep the dog close enough for the handler to notice shivering, repeated standing, panting, vomiting, or attempts to escape.
Clean and dry paws before the dog settles.
A paw check should cover grit, burrs, ice, cuts, and pad wear between the toes. The chest and elbow areas also need inspection where a harness or pack may have rubbed through the day.
The human sleep system also needs protection. A restless dog that crowds, claws, wets, or damages shelter can leave the handler unable to recover.
Practice the exact sleeping position before the trek so both bodies fit without blocking an exit or crushing insulation.
Camp must restore both of you.
The adult reserve used for family trekking contingencies follows the same practical rule here. One member's needs cannot consume all the group's sleep, pack space, and next-day capacity.
What should you check before the dog starts day two?
The dog's stance and first ten steps matter more than a wagging tail when judging readiness. Excitement can appear beside stiff joints, sore pads, poor appetite, or a changed gait.
Every paw needs a check in full light.
You should look for worn pads, cracks, swelling, tenderness, debris between the toes, and repeated licking. Run your hands along the pack and harness contact areas before fastening anything again.
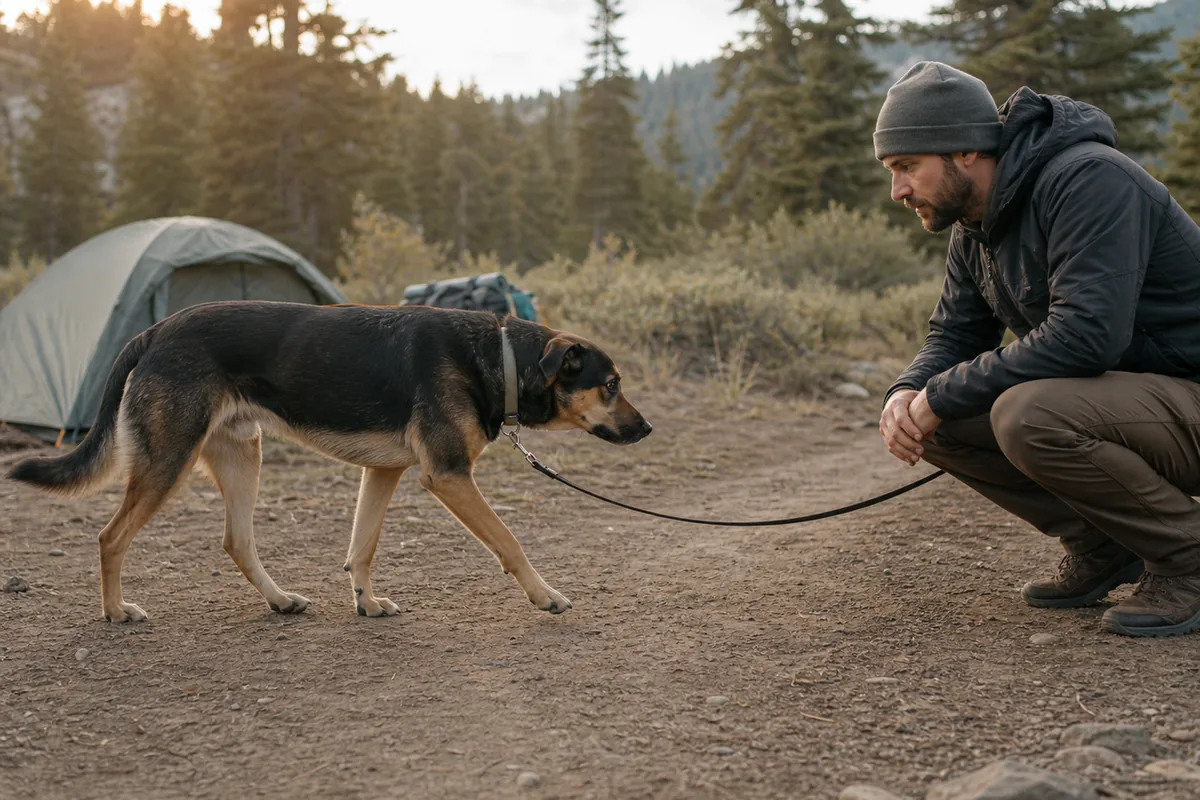
Offer water and the normal meal. A dog that refuses both, vomits, has diarrhea, seems unusually quiet, or cannot settle should not begin a remote full segment while the cause is unknown.
Start as planned
Normal gait, comfortable paws, normal appetite, normal drinking, and usual behavior.
Shorten now
Mild stiffness, slow eating, a rubbed spot, poor sleep, or a weather change that reduces recovery.
Rest and reassess
The dog is reluctant to rise, repeatedly licks a paw, will not eat, or moves abnormally.
Use the exit
Limping, collapse, confusion, repeated vomiting or diarrhea, breathing distress, or worsening condition.
Do not wait for several warning signs to stack. The common trekking failure chain often begins when a group sees one small problem and keeps the original distance until it becomes harder to solve.
If the dog is safe to move but not ready for the planned day, take the closest suitable exit or stay only when the site is legal, supplies are adequate, weather is stable, and veterinary advice supports waiting. Remote rest is not useful when the dog is getting worse.
The itinerary never overrules the dog. Morning appetite, gait, paws, breathing, and behavior decide the day before mileage does.
How will you evacuate a dog that cannot walk?
A tested carry method must come before a remote route. A first-aid kit can cover or stabilize some injuries, but it cannot move a dog that cannot bear weight.
Match the plan to the dog's size and the handler's real strength.
A small dog may fit a purpose-built carrier, while a large dog can require two people, a tested sling, and a much shorter distance to a road. Practice with the dog calm and uninjured near home.
The practice should include lifting, securing, walking a short distance, and putting the dog down without a fall. Stop if the method compresses the chest, worsens breathing, forces a painful position, or makes the handler unstable.
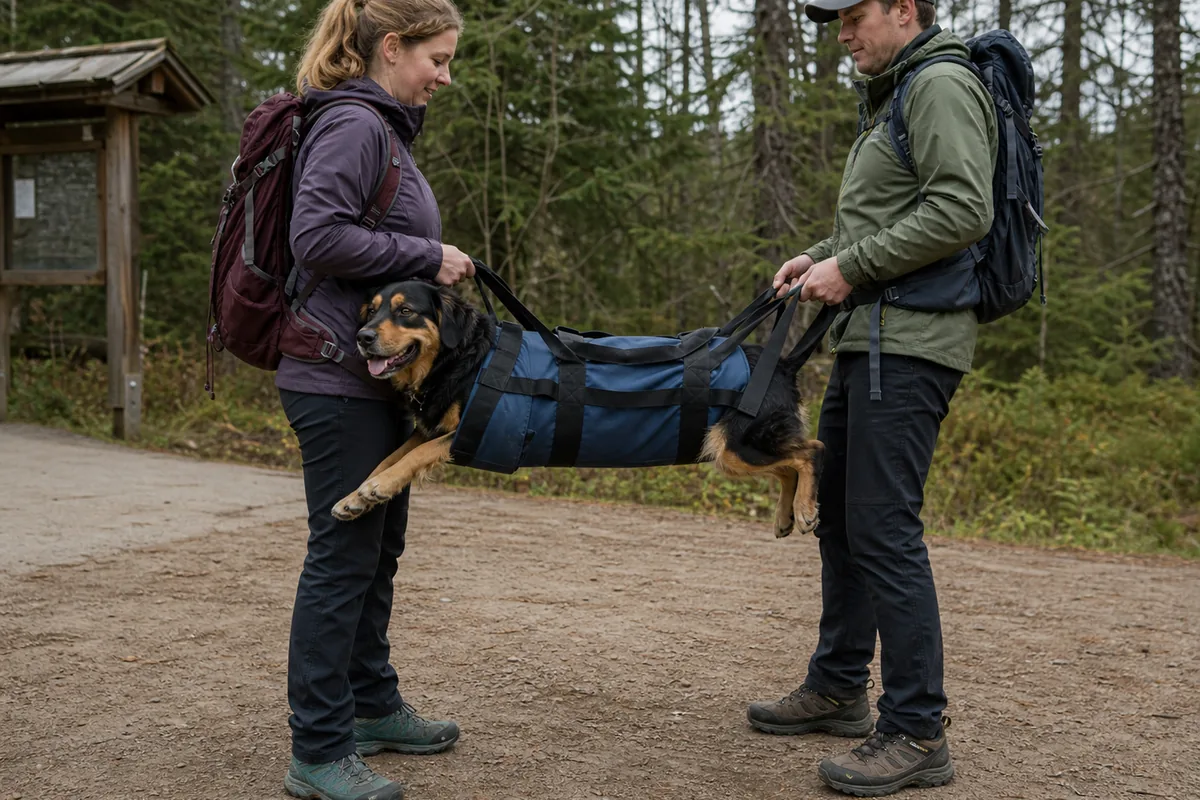
Mark road crossings, staffed sites, phone coverage, emergency contacts, and the nearest open veterinary clinic on the trip notes. Share the itinerary with a trusted person who knows the dog is coming and when to raise concern.
Your dog first-aid kit should follow veterinary advice, and you need to know its limits. Control serious bleeding with direct pressure, protect yourself from a frightened bite, and seek veterinary help for major wounds, breathing trouble, collapse, severe pain, poisoning, or a dog that cannot walk normally.
Cold and wet conditions can also remove the dog's ability to continue. Dry the dog, add insulation, protect it from wind and wet ground, then use the planned exit if shivering, weakness, poor coordination, or altered behavior continues.
- Carry a tested sling or carrier that fits the dog.
- Know which person can lift and which person manages the route and communication.
- Mark the closest exit from each camp and major junction.
- Store veterinarian and emergency numbers offline.
- Carry the dog's medical and medication details.
- Leave before the handler becomes too tired to carry safely.
A usable exit is equipment. It has a location, a carry method, enough people, and a decision point early enough to work.
When is a dog ready for a harder trek?
The dog needs another check after the drive home and the next morning. Delayed stiffness, pad licking, loss of appetite, unusual sleep, diarrhea, or reluctance on stairs can show that the trip took more than the dog displayed on the route.
Three observations are worth recording while they are clear:
- When the dog's pace or behavior first changed.
- Which surface, weather, camp task, or pack contact caused trouble.
- How long normal gait, appetite, and energy took to return.
Change one demand next time. Add a little distance, one more night, a modest climb, or a slightly fuller dog pack only after the previous setup produced normal recovery.
Keeping the same route while changing one factor makes the result easier to read.
Recovery earns progression. A successful first trek is one both of you can repeat, not one the dog barely finishes.
Sources
The National Park Service explains its B.A.R.K. principles and the need to check where pets may go: Visit Parks With Your Pet.
The CDC recommends leash control, tick checks, parasite prevention, and avoiding stagnant or discolored water while traveling with pets: Pet Travel Safety.
Cornell University College of Veterinary Medicine covers heat risk, warning signs, and prevention for dogs: Summer Heat Safety Tips for Dogs. The American Veterinary Medical Association provides first-aid guidance for bleeding, heatstroke, and transport to veterinary care: Pet First Aid.
The Leave No Trace guidance explains why dog waste should be picked up and carried to proper disposal: Pack Out Dog Waste. The U.S.
Forest Service advises checking local pet restrictions and physically restraining dogs around wildlife and horses: Backpacking on National Forests.
Step by stepPractical steps
- Confirm veterinary fitness and current access rules for every segment and sleep stop.
- Prove the dog can handle consecutive walking days and a controlled practice night.
- Choose short daily segments with a legal camp and usable dog evacuation route after each night.
- Carry dog food, clean water, waste capacity, first aid, and enough human reserve to absorb the dog pack.
- Use camp and morning checks to shorten or end the trek before the dog's condition worsens.
AnswersQuestions readers ask
How do I know if my dog is ready for a multi-day trek?
Ask your veterinarian about the individual dog, then complete two suitable walking days in a row and a practice night close to an exit. Normal appetite, drinking, gait, paws, sleep, and morning behavior matter more than excitement on day one.
Should my dog carry a backpack while trekking?
A dog pack is optional. Introduce it empty, add only a veterinarian-approved load, stop for rubbing or a changed gait, and keep enough space in the human pack to take every item the dog carries.
How much food and water should I carry for my dog?
The amount depends on the dog, weather, work, food, and route, so avoid a universal formula. Carry measured portions of the normal food, a delay margin, clean water or a suitable treatment plan, and advice from your veterinarian for the individual dog.
Can my dog sleep in the tent on a trek?
That depends on shelter space, dog behavior, weather, and local rules. Practice the exact arrangement first, give the dog a dry insulated place, and make sure neither the dog nor handler loses the sleep needed for the next day.
What should I do if my dog cannot walk out?
Use the tested carrier or sling and the nearest planned exit, contact a veterinarian or emergency service, and leave before the handler becomes too tired to carry safely. Do not depend on an improvised method first tried during the emergency.