
Car Camping Checklist for Loading the Car in Campsite Order
Pack car camping gear by campsite task, vehicle access, cooler control, weather reach, and the morning reset.
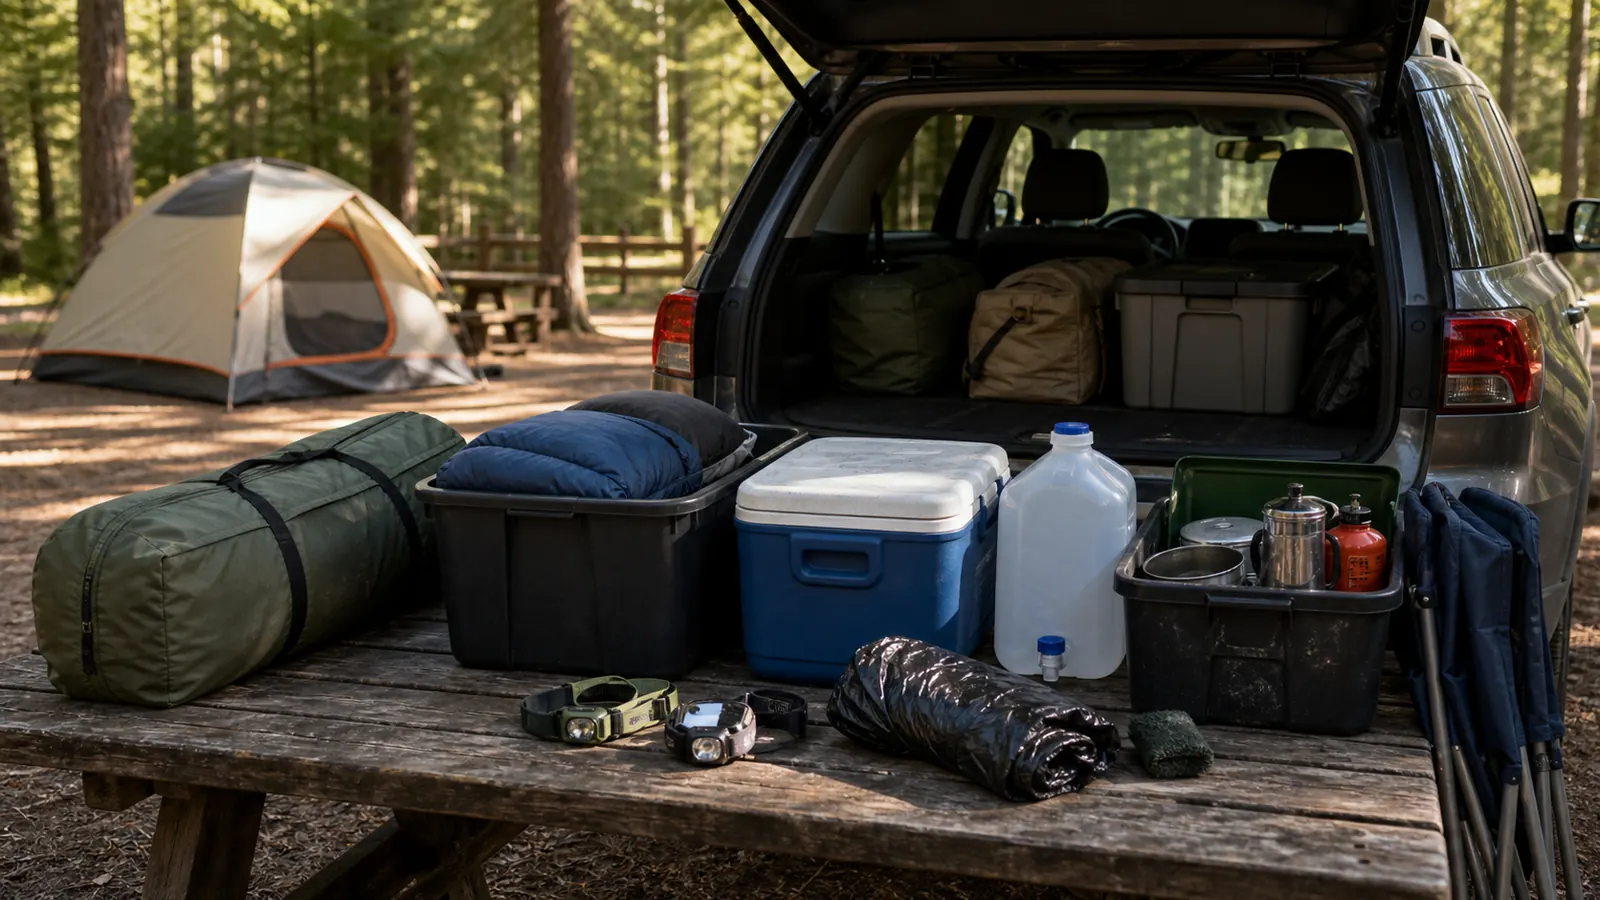
A car camping checklist should start with the campsite, not the storage shelf. Stage bins for shelter, sleep, kitchen, cooler, water, weather, health, cleanup, and drive-home reset before the vehicle is packed.
Car camping gives you more room, but the checklist still has to prove the campsite will work. Pack by site task first: sleep, kitchen, water, light, weather, health, cleanup, and the drive home.
A useful car camping checklist is different from a broad camping packing list because the vehicle changes volume, storage, cooler use, camp furniture, and departure cleanup.
It does not remove the need to test shelter, sleep warmth, food safety, water, light, medication, and a clean exit. If the site is not drive-up and the load has to move by pack, carried-load packing rules replace car-camp bins on that route.
Pack by campsite task. If an item does not support a specific job at the site, in the vehicle, or on the drive home, it should not enter the load by habit.
What changes when the vehicle carries the camping load?
A closet or garage shelf sorts gear by where it lives at home.
A campsite sorts gear by when you need it. That difference matters because car camping often includes bulky bins, a cooler, chairs, a larger tent, extra water, and comfort items that can bury small critical parts.
Start with the version of camping you booked.
A developed campground with a picnic table, potable water, and a vehicle beside the site needs a different load than a walk-in site or a first night that depends on a long arrival drive. The first camping plan should already name the people, nights, site type, weather, water, food rules, and checkout time.
A solo trip needs the same list with fewer hands, so the solo camping setup should keep the first shelter, light, and food-storage tasks manageable for one person.
- Vehicle access: parking location, site limit, road condition, and whether the car stays beside camp.
- Shelter: tent, poles, rainfly, stakes, guylines, ground protection, mallet, and small repair.
- Sleep: pads, bags or quilts, dry sleep clothes, pillow, and night light.
- Kitchen: cooler, dry food, stove, fuel, ignition, cookware, utensils, water, wash kit, and trash plan.
- Comfort: chairs, table cover, shade, rug, games, book, and extra layers only after core tasks are covered.
- Reachable bin: rain gear, headlamps, first aid, medication, power, towels, and repair items.
- Closeout: trash bags, dish cleanup, site sweep, wet-gear separation, and home drying space.
The vehicle also creates a loading order.
Put the items you need first at the top or near the hatch: rain gear, headlamps, shelter, site confirmation, and the bin that starts camp. Do not bury them under chairs and spare blankets.
For a first easy night, the beginner camping setup should stay simple enough that a missing item is annoying, not trip-ending. Car camping helps because you can bring backups, but those backups only help if you can find them before dark.
Kids or a dog change the load before comfort items do.
Add child sleep routines, supervision handoffs, bedding, and spare clothing before chairs or games fill the remaining space. A kids camp routine needs named adult responsibilities as well as extra gear.
For a dog, reserve space for restraint, bedding, food storage, cleanup bags, paw care, and water. A complete dog camp kit should be reachable before the animal leaves the vehicle.
How do you keep passengers and cargo safe?
Camping volume can hide a vehicle problem. A trunk that closes is not proof that the load stays within the vehicle's passenger and cargo limits or remains controlled during hard braking.
Check the owner manual and the vehicle label for the exact model. Count people, water, cooler contents, roof cargo, hitch equipment, and every bin because all of that mass travels with the vehicle.
Do not use a universal camping payload number. Vehicle limits differ, and accessories or a trailer can change which rating controls the trip.
Every person needs a designated seating position and working restraint. Do not trade a seatbelt position for a cooler, folded seat, pet crate, or sleeping platform while the vehicle is moving.
Secure hard or heavy items so they cannot slide forward, tip, leak, or leave the vehicle. Water jugs, stoves, fuel, toolboxes, cast-iron cookware, and full coolers deserve more control than soft bedding.
Keep the driver's view, mirrors, pedals, and normal controls clear. A last-minute bag placed behind the seat can still affect driving if it blocks sight or shifts into the footwell.
Roof and exterior loads need the rack, attachment method, and limits specified for the vehicle and equipment. Stop after the first few miles to inspect straps and covers because vibration and wind can reveal movement that was not obvious in the driveway.
Think through one hard stop before departure. If a bin could strike a person, release fuel, spill cooler water, or break a window, change its position or restraint.
Closed is not secured. The load must remain controlled when the road is rough or the driver brakes suddenly.
Check the list by camp task and by person
A task-based checklist catches complete systems, but it can miss one person's glasses, medicine, sleep layer, food restriction, or mobility need. Run a second pass with each camper's name after the shared bins are complete.
Ask each adult to confirm their own medication, identification, weather layers, sleep items, footwear, water bottle, light, and hygiene supplies. One person should verify items for each child or dependent adult.
Keep daily medication in the temperature and storage conditions specified for that product. Do not bury it in a hot vehicle, loose cooler water, or a bin that cannot be reached until camp is built.
Food planning also needs a named pass. Mark allergies, dietary limits, meal portions, no-cook backup, and the utensil or equipment each meal requires.
Sleep proof should happen by person because pad size, bag fit, warmth, and night access differ. A spare blanket does not solve a pad that is too short or a bag that compresses around one camper.
Give each person one headlamp or reliable light and show where it will stay after dark. Shared lanterns can light the table, but they do not free both hands for a bathroom walk or tent problem.
Review the return drive too. The driver needs enough rest, clear access to keys and documents, and a plan for wet gear that does not fog windows or soak passenger belongings.
Finish with an out-loud roll call before the hatch closes. Each person confirms their critical items, then the group confirms shelter, water, food storage, stove and fuel, first aid, repair, light, and the site information.
Two passes catch different failures. Task order builds a working campsite, while the named-person pass protects individual needs.
Why should you stage every bin before loading?
Open every bin before loading. This is the moment to find the missing tent pole, dead lantern battery, wrong stove fuel, cracked water jug, or empty first-aid pouch.
Once the car is packed tightly, small mistakes become harder to see.
- Shelter bin
- Tent body, poles, rainfly, stakes, guylines, footprint, mallet, and repair tape
- Sleep bin
- Pads, bags or quilts, dry sleep clothes, pillow, earplugs, and sleep socks
- Kitchen bin
- Stove, compatible fuel, ignition, cookware, utensils, wash kit, towel, trash bags, and food-storage supplies
- Reachable bin
- Headlamps, rain layers, medication, first aid, power, towels, and small repair
- Cooler zone
- Ice, sealed cold food, thermometer if used, drinks if separate, and shade plan
Assign each shared item to one person.
Shared gear fails when everyone assumes someone else packed it. One person should own the shelter bag, stove, fuel, water container, first-aid kit, repair pouch, cooler, and trash supplies until each item is physically in the vehicle.
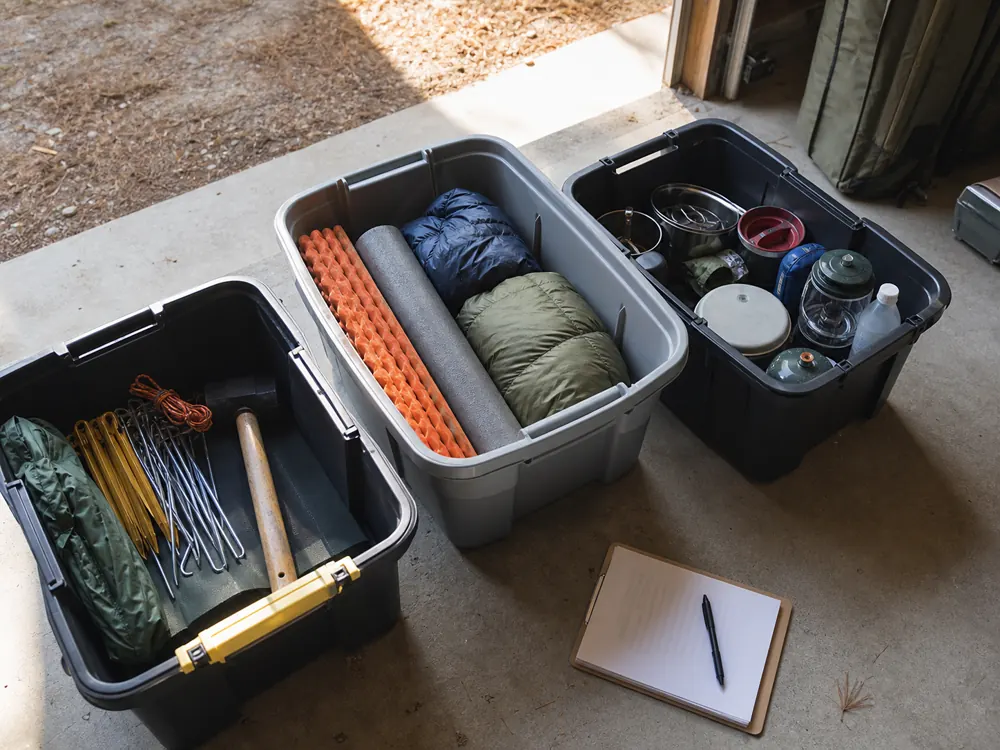
Load heavy durable bins low and stable. Keep soft sleep gear dry and away from sharp stove parts, stakes, or greasy kitchen tools.
If a bin must ride outside the passenger area, protect it from rain and road dust.
Last into the vehicle should be first out at camp.
Shelter and rain gear often beat chairs and games because a dry sleeping space matters before comfort. A wet forecast makes the rain camping setup decide which shelter and dry-zone items stay closest to the hatch.
Stage before loading because a visible floor check catches what a packed trunk hides.
How do you test the shelter and sleep setup?
Car camping lets you bring a larger tent, thicker pads, extra blankets, and a roomier pillow.
Those items still need proof. A big tent that does not fit the pad, a pad that leaks, or a missing rainfly can ruin the night even when the vehicle is ten feet away.
Pitch the tent at home or in a low-pressure place before the trip. Count the poles, stakes, guylines, and rainfly while taking it down.
Put the mallet, stake puller if used, and small shelter repair items in the same bin.
| Sleep job | What to pack | What to prove |
|---|---|---|
| Flat insulated base | Pad, cot, or mattress | Fits the tent and holds air through a test rest |
| Warmth | Sleeping bag, quilt, blanket, or liner | Matches the expected overnight low with dry sleep clothes |
| Dry reserve | Base layer, socks, hat, and backup layer | Stays sealed away from wet setup clothing |
| Night access | Headlamp, shoes, glasses, medication, and door mat | Can be reached without unpacking the tent |
| Ventilation | Rainfly vents and door position | Reduces condensation without exposing bedding to rain |
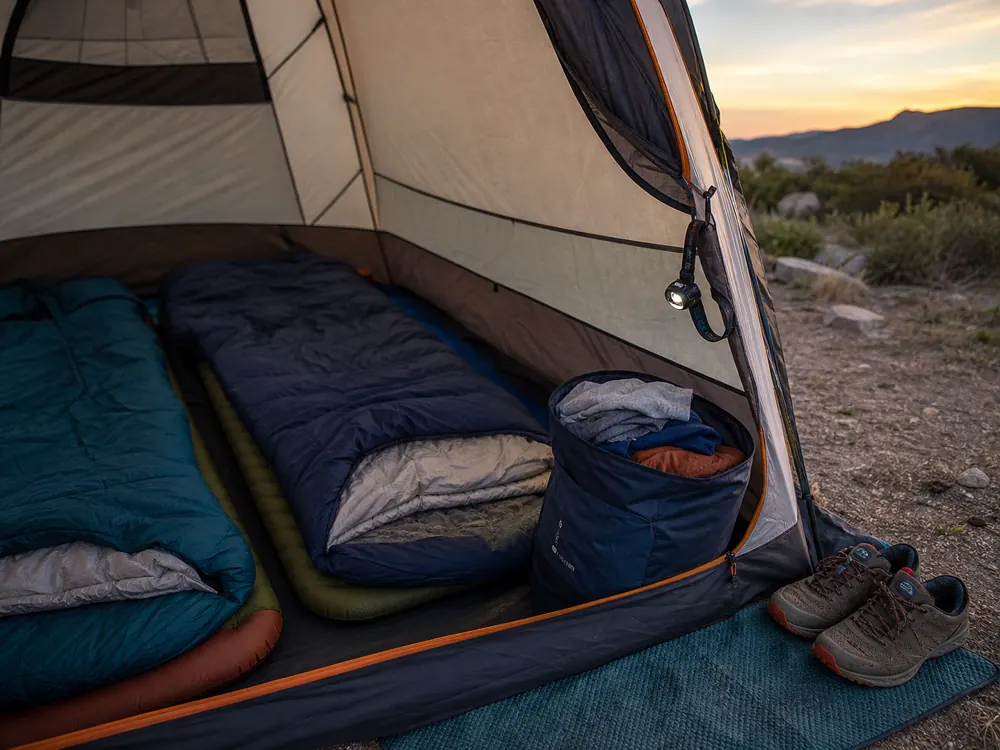
Chairs, rugs, lantern strings, and extra pillows are comfort items.
Pack them after the shelter and sleep system are complete. If space gets tight, protect warmth, dryness, and night access before adding furniture.
Cold or windy conditions raise the proof standard. The stay warm camping plan should decide pad insulation, dry layers, and bedtime food before the car is packed.
Real winter conditions need a cold-weather camp kit instead of a stretched mild-weather car-camp load.
Prove the night before you add comfort gear.
Pack the cooler from the finished menu
The cooler is not just extra storage. It is the part of the checklist that controls cold food, ice, meal order, and how often the lid opens.
Pack it after the menu is final, not as a loose box for anything that fits.
Keep raw meat, poultry, and seafood sealed and low or in a separate cooler.
Keep ready-to-eat food and produce protected from meltwater. If the group opens drinks often, use a separate drink cooler when practical so the food cooler stays closed longer.
- Cold food: sealed containers, ice or frozen packs, meal order, and a shade plan.
- Dry food: rigid tote, snacks, coffee or tea, seasonings, and wildlife-safe storage method.
- Water: drinking volume, cooking volume, dishwashing volume, and backup if the campground source is unavailable.
- Cooking: stove, compatible fuel, ignition, stable cookware, utensils, heat-safe tool, and no-cook fallback.
- Cleanup: basin, scraper, towel, minimal soap where allowed, trash bags, and wastewater plan.
- Storage: provided locker, hard-sided vehicle, or required wildlife-resistant container based on current site rules.
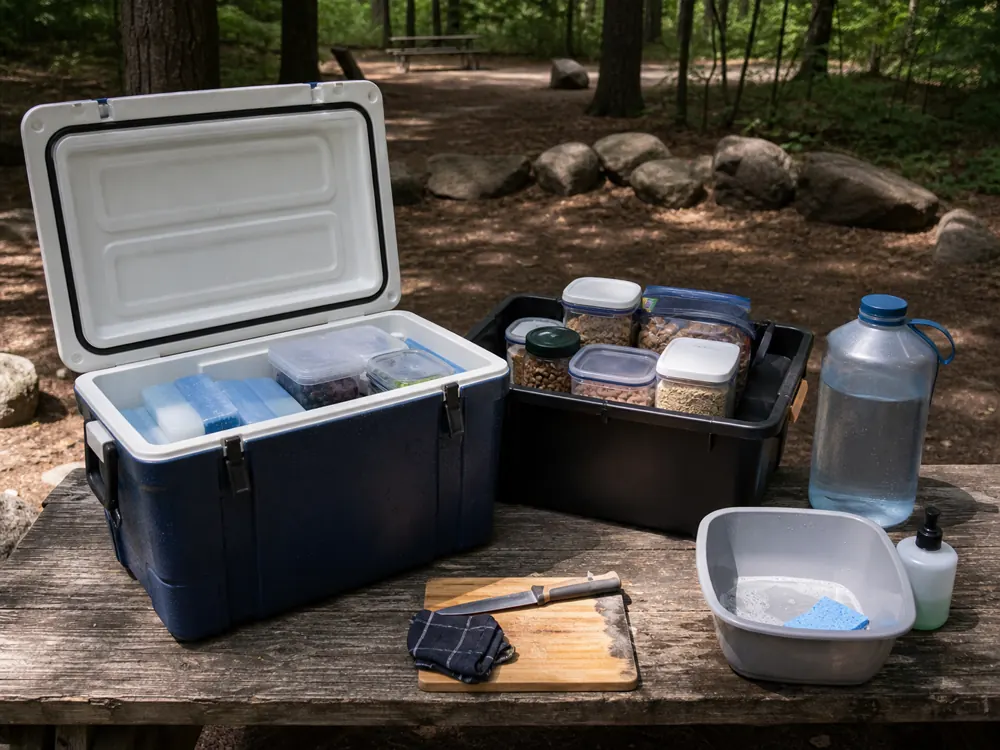
Pack water even when the campground usually has a tap unless a current source confirms it is operating. Drinking water is only one part of the need.
Cooking, hand cleaning, dish cleanup, pets, and a hot arrival can use more than the amount people expect, so run a water carry calculation before choosing jug size.
Food storage rules are local.
Some sites allow locked hard-sided vehicles, some require provided lockers, and some require specific wildlife-resistant containers. The campground choice should include those rules before the menu is built.
Do not depend on a campfire for cooking or warmth. Fire rules, weather, smoke, wood supply, and local restrictions can change the plan.
The stove, food, clothing, and sleep system should work without flame.
Cooler control comes first because food safety and storage rules shape the rest of the kitchen.
Which gear must stay reachable in the car?
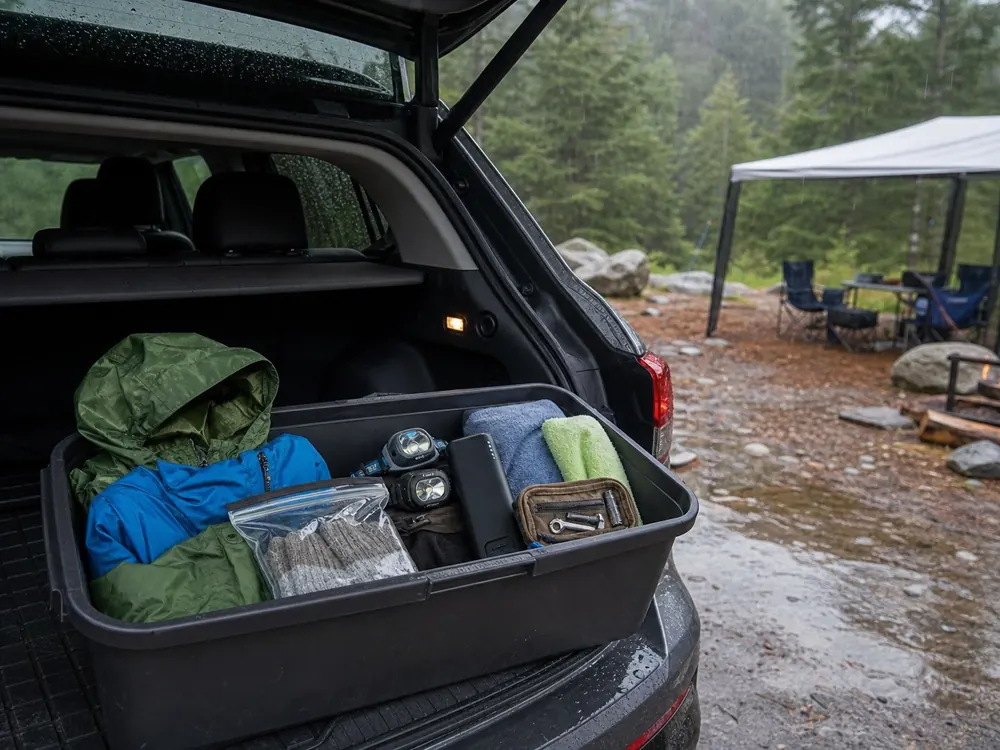
Some gear is needed before camp is organized. Rain can start while you unload, a headlamp may be needed before the tent is ready, and medication or first aid should not be buried under sleep bins.
Treat this reachable bin as part of your camping safety plan, not as a miscellaneous box.
Wet-weather access
Rain jackets, pack towels, dry socks, and a small tarp or mat belong near the hatch when clouds are possible.
Light and power
Every person needs a headlamp or reliable light, plus spare power protected from rain and cold.
Health and medication
First aid, prescriptions, allergy medication, sunscreen, insect protection, and hygiene supplies should be known to the adults.
Small repair
Tape, cord, multitool, pad patch, pole sleeve, spare batteries, and zip ties should match the gear actually packed.
Camp documents
Reservation, directions, gate code, offline map, and emergency contact belong somewhere reachable without cell service.
A phone light is not a camp lighting plan.
Phones lose charge, get wet, and often need to stay available for navigation or contact. A headlamp leaves both hands free for stakes, dishes, bathroom walks, and a late-night problem.
Match the repair kit to the gear. A pad patch helps only if the pad is patchable and the adhesive is still usable.
Extra cord helps only if someone knows how it will replace a broken guyline or tie down a loose load.
When cool rain or wind is possible, keep hypothermia warning signs in mind. Car access makes leaving easier, so use that advantage early if someone cannot get warm, dry, or functional.
Reach beats ownership. The right item is not useful when it is locked under the whole camp load.
What order should you use to set up camp?
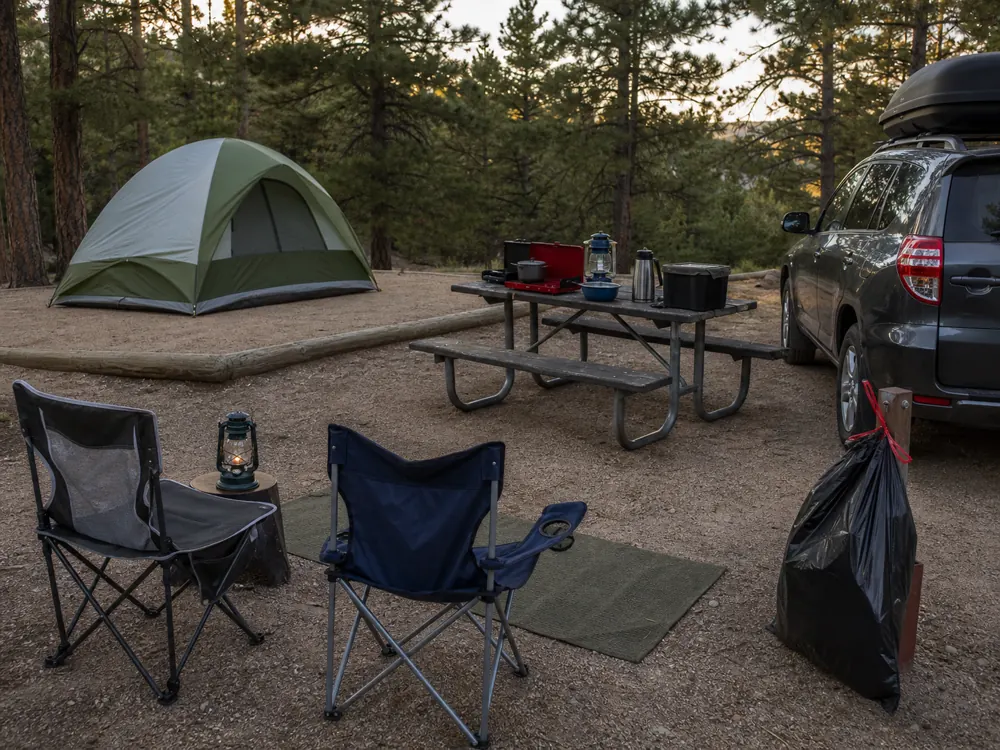
Arrival order controls the first hour. If everyone unloads chairs, snacks, games, and bedding at once, the campsite becomes cluttered before the shelter, food storage, and lighting are stable.
- Park and pauseConfirm the vehicle is inside the allowed spot and not blocking the road, neighbor site, or tent pad.
- Inspect the groundCheck drainage, overhead hazards, slope, sharp debris, and the path between car, tent, table, and toilet.
- Set shelter firstPitch the tent, add rainfly or vents for the forecast, and place sleep gear before full dark.
- Build the kitchen zoneKeep stove, cooler, dry food, wash kit, and trash away from the tent and inside the local storage rule.
- Set light and night accessPut headlamps, shoes, water, medication, and bathroom route items where people can find them.
- Add comfort lastChairs, rugs, games, and extra decor come after the site can handle weather, food, sleep, and cleanup.
Keep food and scented items out of the tent. That includes trash, toiletries, pet food, cookware with residue, and snack wrappers.
The tent is for sleep and dry personal gear, not kitchen overflow.
Respect site boundaries while you set up.
Do not spread bins into neighboring space, block campground roads, or create new paths around vegetation. Good camping etiquette starts with a site that stays predictable for the people around you.
For wind, set the shelter before the loose comfort items. The tent wind setup explains why staged parts, stake order, and guylines matter when the site is exposed.
Shelter, kitchen, light, then comfort keeps the site usable before it becomes cozy.
How do you close camp before driving home?
The checklist should not end when breakfast is done. Morning closeout decides whether you leave trash, lose stakes, pack wet gear into storage, or discover the missing pot lid on the next trip.
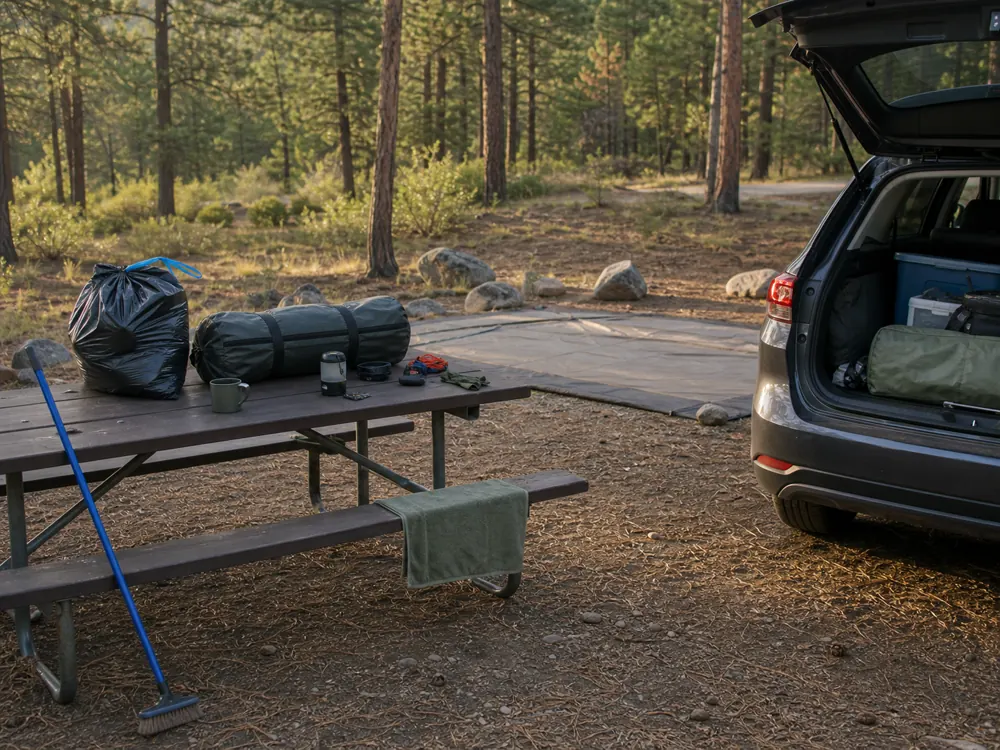
- Walk the tent pad, picnic table, fire ring area if present, parking spot, and path to the bathroom.
- Pick up food scraps, twist ties, bottle caps, stakes, cord, wrappers, and dropped small tools.
- Pack all trash, leftover food, and scented items under the required storage or disposal rule.
- Separate wet shelter, towels, and clothing from dry sleep gear for the ride home.
- Count shared items before leaving: stove, fuel, pot, knife, first aid, repair kit, headlamps, and water containers.
- Record broken gear, low fuel, used first-aid supplies, missing stakes, and food that should not be packed again.
Dry gear at home before long storage.
Mildew, rust, dull blades, dead batteries, and old food residue usually start after the trip, not during it. Put the next trip's repair list where you will see it before the next departure.
The common camping mistakes are often small chains: a rushed closeout, wet tent storage, missing fuel, or a dirty cooler that turns into a bigger problem later. A five-minute reset breaks those chains.
If the trip included kids or a dog, give the closeout one named adult owner while another person handles people or pets. Do not let a child or leash problem interrupt the site sweep, the cooler close, or the final trash check.
Leave the next trip ready by closing the site and the gear at the same time.
Sources
The National Park Service Leave No Trace principles support the campsite cleanup and pack-out guidance. The NHTSA secure-load guidance supports tying down cargo, avoiding excessive loads, and checking whether anything can shift or leave the vehicle.
The USDA cooler packing guidance supports separating raw foods, watertight containers, and reduced cooler openings. The FDA outdoor food handling guidance supports organizing cooler contents and keeping coolers closed.
Step by stepPractical steps
- Confirm vehicle access, campsite rules, water, food storage, weather, and checkout before packing.
- Open shelter, sleep, kitchen, cooler, reachable, comfort, and closeout bins before loading the car.
- Assign one person to every shared item and prove the dependent parts are present.
- Load first-needed gear near the hatch: rain layers, headlamps, shelter, site details, and the starter bin.
- Set camp in order: park, inspect ground, pitch shelter, build kitchen, place lights, then add comfort.
- Sweep the site, separate wet gear, record repairs, and restock supplies after the drive home.
AnswersQuestions readers ask
What should be on a car camping checklist?
Include shelter, sleep gear, cooler, dry food, water, stove and fuel, cookware, light, power, first aid, medication, weather layers, repair items, chairs, trash bags, cleanup supplies, site documents, and a drive-home reset list.
How is a car camping checklist different from a regular camping list?
A car camping checklist can include rigid bins, a cooler, chairs, larger shelter, extra water, and comfort gear, but it also needs a loading order so rain gear, shelter, light, first aid, and site documents stay reachable.
What should I pack first for car camping?
Stage everything before loading, then put heavy durable bins low and stable. Keep first-needed items near the hatch, including rain layers, headlamps, shelter, reservation details, and the bin that starts camp setup.
Do I need a cooler for car camping?
Use a cooler when the menu includes perishable food. Keep raw items sealed and low, protect ready-to-eat food from meltwater, keep the cooler shaded, and limit lid openings.
A separate drink cooler helps on group trips.
What should stay reachable in the car at camp?
Keep rain layers, headlamps, first aid, medication, spare power, towels, repair items, reservation details, and emergency contact information where you can reach them without unloading the whole vehicle.